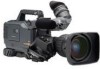
Panasonic AJ-HDX900 Dvcpro Hd Camera - Page 50
Viewfinder screen status, displays
 |
UPC - 791871302781
View all Panasonic AJ-HDX900 manuals
Add to My Manuals
Save this manual to your list of manuals |
Page 50 highlights
Chapter 4 Adjustments and settings for recording (continued) 4-7 Viewfinder screen status displays Not only the images but the lamps and characters indicating the unit's settings and operation statuses as well as the messages, center and safety zone markers, camera ID and other information are displayed inside the viewfinder. 4-7-1 Viewfinder lamp displays 1 TALLY / REC BATT SAVE Viewfinder pictured here is the AJHVF21G. (For details concerning viewfinder, 2 3 4 refer to the operating instructions of each viewfinder.) 1 TALLY/REC (recording) lamp This lights up (red) during recording. It flashes when a problem has occurred. For details, refer to the appropriate section in "6-3 Warning system." 2 (abnormal operating status warning) lamp This lights when the unit is set to an abnormal operating status for any of the items set to "ON" on the "!LED" screen of the setting menu. For details on selecting the items which are to be indicated with the lamp, refer to the screen items in "Chapter 7 Menu description tables." 3 BATT (battery) lamp This starts flashing when the battery voltage has dropped to the level where the battery will no longer be usable in several minutes' time, and it lights when the battery is no longer usable. To prevent operation from being interrupted, replace the battery before it has discharged completely. For details, refer to the appropriate section in "6-3 Warning system." 4 SAVE (VTR power-saving) lamp This lights when the VTR SAVE/STBY switch is set to SAVE. It goes off during recording. In the rec-pause mode, the SAVE mode is established automatically, and the lamp lights after the time set for the pause timer (temporary stop time) has elapsed. After two minutes in the play-pause mode, the SAVE mode is established automatically, and the lamp lights. 4-7-2 Viewfinder screen status display configuration All the items that can be displayed are laid out inside the viewfinder as shown in the figure below. L3 45 6 2 24PA 31/249.8 ∑10min REC14.6V 8 1 1080 DRS /34min DIONIC90 7 -- GAIN -- -- USER SW GAIN -- LOW : 0 S.GAIN:30/36 9 MID :12 HIGH:18 DS.GAIN: 6:/10:/12: /15 :/20: : ; UM:S.GAIN 30dB U1:AUDIO CH1 U2:DS.GAIN 12: C REC WARNING COMP M < EX D TCG 00:00:00:00 iREC K = 3.2K 12:M F:1 BS 23h59m > 1A A 18dB F:2 F5.6 Z99 J ?@ B A E FHG I For details, refer to the following pages. 4-7-3 Selecting the viewfinder screen display items To select which items are to be displayed on the viewfinder screen, perform menu operations to open the screen or screen from the VF page, and select ON or OFF for the display or select the type desired for each item concerned. For details on operation, refer to "4-6-2 Basic menu operations." #< VF INDICATOR1 > EXTENDER :ON SHUTTER :ON FILTER :ON WHITE :ON GAIN :ON IRIS :S+IRIS CAMERA ID :BAR ID POSITION :UPPER L DATE/TIME :OFF ZOOM LVL :ON COLOR TEMP :ON SYSTEM MODE :ON CAMERA MODE :ON #< VF INDICATOR2 > TAPE :ON BATTERY :ON AUDIO LVL :ON TC :OFF VTR WARNING :NORMAL SAVE LED :SAVE 50
-
 1
1 -
2
-
3
-
4
-
5
-
6
-
7
-
8
-
9
-
10
-
11
-
12
-
13
-
14
-
15
-
16
-
17
-
18
-
19
-
20
-
21
-
22
-
23
-
24
-
25
-
26
-
27
-
28
-
29
-
30
-
31
-
32
-
33
-
34
-
35
-
36
-
37
-
38
-
39
-
40
-
41
-
42
-
43
-
44
-
 45
45 -
 46
46 -
 47
47 -
 48
48 -
 49
49 -
 50
50 -
 51
51 -
 52
52 -
 53
53 -
 54
54 -
 55
55 -
56
-
57
-
58
-
59
-
60
-
61
-
62
-
63
-
64
-
65
-
66
-
67
-
68
-
69
-
70
-
71
-
72
-
73
-
74
-
75
-
76
-
77
-
78
-
79
-
80
-
81
-
82
-
83
-
84
-
85
-
86
-
87
-
88
-
89
-
90
-
91
-
92
-
93
-
94
-
95
-
96
-
97
-
98
-
99
-
100
-
101
-
102
-
103
-
104
-
105
-
106
-
107
-
108
-
109
-
110
-
111
-
112
-
113
-
114
-
115
-
116
-
117
-
118
-
119
-
120
-
121
-
122
-
123
-
124
-
125
-
126
-
127
-
128
-
129
-
130
-
131
-
132
-
133
-
134
 |
 |
