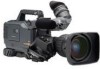
Panasonic AJ-HDX900 Dvcpro Hd Camera - Page 87
Mounting the unit on a tripod
 |
UPC - 791871302781
View all Panasonic AJ-HDX900 manuals
Add to My Manuals
Save this manual to your list of manuals |
Page 87 highlights
Chapter 5 Preparation (continued) 5-4-3 When using an audio component 5-5 Mounting the unit on a tripod 1 Connect the AUDIO IN connectors on the camera with the audio component using the XLR cable. 2 Set the AUDIO IN switch or switches for the channel or channels to which the audio component has been connected to "REAR." Use the tripod adapter (SHAN-TM700) to mount the unit on a tripod. 1 Mount the tripod adapter on the tripod. Tripod adapter 3 Set the LINE/MIC/+48V selector switch on the rear panel to "LINE." Tripod head 5 AUDIO IN switches LINE/MIC/+48V selector switch Take account of the center of gravity of the unit and that of the tripod adapter when selecting the adapter hole. Check that the diameter of the hole selected matches the diameter of the tripod head screw. 2 Mount the unit on the tripod adapter. AUDIO IN connectors Slide the unit along the groove toward the front until it clicks into place. Detaching the unit from the tripod adapter Tripod adapter Red lever Black lever While pushing down the red lever, move the black lever in the direction of the arrow and slide the unit toward the back to remove it. If the pin of the tripod adapter fails to return to its original position after the unit has been detached, again move the black lever in the direction of the arrow while pushing down the red lever, and return the pin to its original position. Bear in mind that the unit cannot be attached if the pin remains in the center. 87
-
 1
1 -
2
-
3
-
4
-
5
-
6
-
7
-
8
-
9
-
10
-
11
-
12
-
13
-
14
-
15
-
16
-
17
-
18
-
19
-
20
-
21
-
22
-
23
-
24
-
25
-
26
-
27
-
28
-
29
-
30
-
31
-
32
-
33
-
34
-
35
-
36
-
37
-
38
-
39
-
40
-
41
-
42
-
43
-
44
-
45
-
46
-
47
-
48
-
49
-
50
-
51
-
52
-
53
-
54
-
55
-
56
-
57
-
58
-
59
-
60
-
61
-
62
-
63
-
64
-
65
-
66
-
67
-
68
-
69
-
70
-
71
-
72
-
73
-
74
-
75
-
76
-
77
-
78
-
79
-
80
-
81
-
 82
82 -
 83
83 -
 84
84 -
 85
85 -
 86
86 -
 87
87 -
 88
88 -
 89
89 -
 90
90 -
 91
91 -
 92
92 -
93
-
94
-
95
-
96
-
97
-
98
-
99
-
100
-
101
-
102
-
103
-
104
-
105
-
106
-
107
-
108
-
109
-
110
-
111
-
112
-
113
-
114
-
115
-
116
-
117
-
118
-
119
-
120
-
121
-
122
-
123
-
124
-
125
-
126
-
127
-
128
-
129
-
130
-
131
-
132
-
133
-
134
 |
 |
