Panasonic WVCW974 WVCW974 User Guide - Page 36
Configuring AUTO PAN Detailed, Settings, PAN LIMIT, Notes, AUTO PAN Key Setting AUTO PAN KEY
 |
UPC - 791871505373
View all Panasonic WVCW974 manuals
Add to My Manuals
Save this manual to your list of manuals |
Page 36 highlights
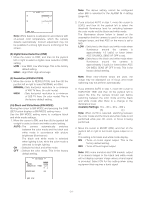
● Configuring AUTO PAN Detailed Settings 1. Perform the following steps to set the PAN start point and end point. (1) Move the cursor to POSITION, press the CAM (SET) button, and then move the cursor to START. (2) Use the joystick to move the camera to the desired PAN start point, and then press the CAM (SET) button. This defines the start point and moves the cursor to END. (3) Use the joystick to move the camera to the desired PAN end point, and then press the CAM (SET) button. This defines the start point and moves the cursor to POSITION. **AUTO PAN** POSITION SPEED ENDLESS DWELL TIME PAN LIMIT START END •••I•••127 L H OFF 1S OFF RET TOP 2. Move the cursor to SPEED and then tilt the joystick left or right to select a panning speed setting. Shifting the setting towards the "H" (right) side increases the speed, while shifting towards the "L" (left) side decreases it. 3. Move the cursor to ENDLESS, and then tilt the joystick left or right to turn endless panning on or off. ON : Pans from the start point to the end point, and then continues to pan in the same direction from the end point to the start point. Select OFF for the PAN LIMIT setting (step 5) when using this setting. Panning will be repeated endlessly. OFF : Pans from the start point to the end point, and then reverses direction to pan from the end point to the start point. Panning is repeated endlessly. 4. Move the cursor to DWELL TIME, and then tilt the joystick left or right to select the start point and end point dwell time setting. Tilting the joystick cycles through the stop time display in the sequence shown below. (unit: sec) 0S ↔ 1S ↔ 2S ↔ 3S ↔ 5S ↔ 10S ↔ 20S ↔ 30S 5. Move the cursor to PAN LIMIT, and then tilt the joystick left or right to toggle it on and off. ON : Limits manual panning to the zone between the start point and the end point. The TILT range is from horizontal to straight down. Select OFF for the ENDLESS setting (step 3) when using this setting. OFF : Allows manual panning outside the zone between the start point and the end point. PAN LIMIT PAN LIMIT allows panning in the area from the start point to the end point specified in step 1, but not in the area from the end point to the start point. End point Camera AUTO PAN zone PAN LIMIT zone Start point Notes: • When the panning, tilting, zooming or focusing in the SEQ, SORT or PATROL mode is controlled manually, the auto mode function should be cancelled. To activate the auto mode, select the desired auto mode again or set a time for SELF RETURN in the SET UP menu. • When 0S is selected, the camera stops without dwelling and starts. • Auto refreshing may be activated during the patrol play or the auto mode to calibrate the lens position. (6) AUTO PAN Key Setting (AUTO PAN KEY) Set the operations of the camera when AUTO PAN is executed from the system controller (page 35). 1. Move the cursor to AUTO PAN KEY, and then tilt the joystick left or right to select a camera movement mode setting. Tilting the joystick cycles through settings in the sequence shown below. AUTO PAN ↔ SEQ ↔ SORT ↔ PATROL1 ↔ PATROL2 AUTO TRACK ↔ PATROL4 ↔ PATROL3 Notes: • Auto Mode can be started, but not stopped, with the AUTO PAN key. • PATROL1-4 displays only the set number of patrol routines (page 37). -36-
-
 1
1 -
2
-
3
-
4
-
5
-
6
-
7
-
8
-
9
-
10
-
11
-
12
-
13
-
14
-
15
-
16
-
17
-
18
-
19
-
20
-
21
-
22
-
23
-
24
-
25
-
26
-
27
-
28
-
29
-
30
-
 31
31 -
 32
32 -
 33
33 -
 34
34 -
 35
35 -
 36
36 -
 37
37 -
 38
38 -
 39
39 -
 40
40 -
 41
41 -
42
-
43
-
44
-
45
-
46
-
47
-
48
-
49
-
50
-
51
-
52
-
53
-
54
-
55
-
56
-
57
-
58
-
59
-
60
-
61
-
62
-
63
-
64
-
65
-
66
-
67
-
68
-
69
-
70
-
71
-
72
-
73
-
74
-
75
-
76
-
77
-
78
-
79
-
80
-
81
-
82
-
83
-
84
-
85
-
86
-
87
-
88
-
89
-
90
-
91
-
92
-
93
-
94
-
95
-
96
-
97
-
98
-
99
-
100
-
101
-
102
-
103
-
104
-
105
-
106
-
107
-
108
-
109
-
110
-
111
-
112
-
113
-
114
-
115
-
116
-
117
-
118
-
119
-
120
-
121
-
122
 |
 |
