Philips DVDR77 User manual - Page 26
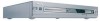
Antenna In, S-video, Audio L/r Out, S-video Out
 |
View all Philips DVDR77 manuals
Add to My Manuals
Save this manual to your list of manuals |
Page 26 highlights
Connecting with a S Video (Y/C) cable This connecting cable, also known as the SVHS cable, is used to transmit the brightness signal (Y signal) and color signal (C signal) separately. This mini DIN jack/plug is also called a Hosiden jack/plug. Have the following cables ready: an antenna cable (1, supplied), a power cable (2, supplied), a S-video (SVHS) cable (3), an audio cable (4, with red/white ends). 1 Remove the antenna cable plug from your TV. Insert it into the ANTENNA IN jack at the back of the DVD recorder. 2 Insert one end of the supplied antenna cable into the TV OUT jack at the back of the DVD Recorder and the other end into the antenna input jack at the back of the TV. 3 Use a S-Video (SVHS) cable and plug one end into the S-VIDEO OUT jack at the back of the DVD Recorder and the other end into the S-Video (SVHS) In jack of the TV (usually called S-Video in or SVHS in. See your TV's instruction manual). 4 5 Use an audio (cinch) cable and plug one end into the red/white cinch jack AUDIO L/R OUT at the back of the DVD Recorder (next to S-VIDEO OUT ) and the other into the corresponding red/white audio input jack of the TV (usually called Audio in', 'AV in'. See your TV's instruction manual). Switch on the TV. Then switch the set to the SVHS input jack or select the corresponding channel number. For the channel number, please see your TV's instruction manual. 14 Connecting the DVD Recorder
-
 1
1 -
2
-
3
-
4
-
5
-
6
-
7
-
8
-
9
-
10
-
11
-
12
-
13
-
14
-
15
-
16
-
17
-
18
-
19
-
20
-
 21
21 -
 22
22 -
 23
23 -
 24
24 -
 25
25 -
 26
26 -
 27
27 -
 28
28 -
 29
29 -
 30
30 -
 31
31 -
32
-
33
-
34
-
35
-
36
-
37
-
38
-
39
-
40
-
41
-
42
-
43
-
44
-
45
-
46
-
47
-
48
-
49
-
50
-
51
-
52
-
53
-
54
-
55
-
56
-
57
-
58
-
59
-
60
-
61
-
62
-
63
-
64
-
65
-
66
-
67
-
68
-
69
-
70
-
71
-
72
-
73
-
74
-
75
-
76
-
77
-
78
-
79
-
80
-
81
-
82
-
83
-
84
-
85
-
86
-
87
-
88
-
89
-
90
-
91
-
92
-
93
-
94
-
95
-
96
-
97
-
98
-
99
-
100
-
101
-
102
-
103
-
104
-
105
-
106
-
107
-
108
-
109
-
110
-
111
-
112
-
113
-
114
-
115
-
116
-
117
-
118
-
119
-
120
-
121
-
122
 |
 |
