Philips TSU7500 User manual - Page 17
Changing the Date
 |
UPC - 037849966563
View all Philips TSU7500 manuals
Add to My Manuals
Save this manual to your list of manuals |
Page 17 highlights
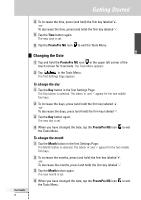
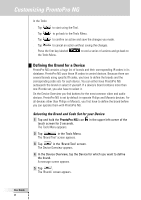
Getting Started EN User Guide 15 4 To increase the time, press (and hold) the firm key labeled '+'. -orTo decrease the time, press (and hold) the firm key labeled '-'. 5 Tap the Time button again. The new time is set. 6 Tap the ProntoPro NG icon to exit the Tools Menu. Changing the Date 1 Tap and hold the ProntoPro NG icon in the upper left corner of the touch screen for 3 seconds. The Tools Menu appears. 2 Tap in the Tools Menu. The first Settings Page appears. To change the day 1 Tap the Day button in the first Settings Page. The Day button is selected. The labels '+' and '-' appear for the two middle firm keys. 2 To increase the days, press (and hold) the firm key labeled '+'. -orTo decrease the days, press (and hold) the firm key labeled '-'. 3 Tap the Day button again. The new day is set. 4 When you have changed the date, tap the ProntoPro NG icon to exit the Tools Menu. To change the month 1 Tap the Month button in the first Settings Page. The Month button is selected. The labels '+' and '-' appear for the two middle firm keys. 2 To increase the months, press (and hold) the firm key labeled '+'. -orTo decrease the months, press (and hold) the firm key labeled '-'. 3 Tap the Month button again. The new month is set. 4 When you have changed the date, tap the ProntoPro NG icon to exit the Tools Menu.
-
 1
1 -
2
-
3
-
4
-
5
-
6
-
7
-
8
-
9
-
10
-
11
-
 12
12 -
 13
13 -
 14
14 -
 15
15 -
 16
16 -
 17
17 -
 18
18 -
 19
19 -
 20
20 -
 21
21 -
 22
22 -
23
-
24
-
25
-
26
-
27
-
28
-
29
-
30
-
31
-
32
-
33
-
34
-
35
-
36
-
37
-
38
-
39
-
40
-
41
-
42
-
43
-
44
-
45
-
46
-
47
-
48
-
49
-
50
-
51
-
52
-
53
-
54
-
55
-
56
-
57
-
58
-
59
-
60
-
61
-
62
-
63
-
64
-
65
-
66
-
67
-
68
-
69
-
70
-
71
-
72
 |
 |
