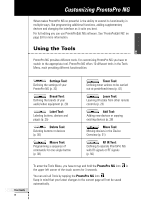
Philips TSU7500 User manual - Page 23
Selecting the brand, Selecting the code set, Installing the brand
 |
UPC - 037849966563
View all Philips TSU7500 manuals
Add to My Manuals
Save this manual to your list of manuals |
Page 23 highlights
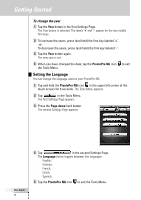
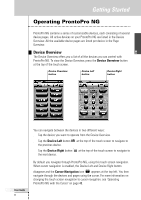
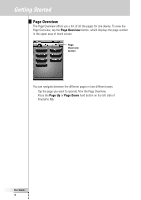
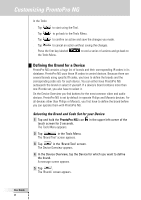
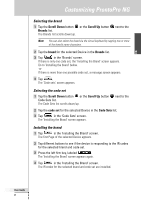
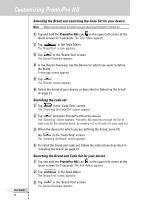
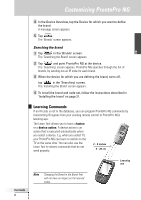
EN Customizing ProntoPro NG Selecting the brand 1 Tap the Scroll Down button Brands list. The Brands list scrolls down/up. or the Scroll Up button next to the Note You can also select the brand via the virtual keyboard by tapping one or more of the brand's name characters. 2 Tap the brand for the selected Device in the Brands list. 3 Tap in the 'Brands' screen. If there is only one code set, the 'Installing the Brand' screen appears. Go to 'Installing the brand' below. -or- If there is more than one possible code set, a message screen appears. 4 Tap . The 'Code sets' screen appears. Selecting the code set 1 Tap the Scroll Down button or the Scroll Up button Code Sets list. The Code Sets list scrolls down/up. next to the 2 Tap the code set for the selected Device in the Code Sets list. 3 Tap in the 'Code Sets' screen. The 'Installing the Brand' screen appears. Installing the brand 1 Tap in the 'Installing the Brand' screen. The first Page of the selected Device appears. 2 Tap different buttons to see if the device is responding to the IR codes for the selected brand and code set. 3 Press the left firm key, labeled . The 'Installing the Brand' screen appears again. 4 Tap in the 'Installing the Brand' screen. The IR codes for the selected brand and code set are installed. User Guide 21
-
 1
1 -
2
-
3
-
4
-
5
-
6
-
7
-
8
-
9
-
10
-
11
-
12
-
13
-
14
-
15
-
16
-
17
-
 18
18 -
 19
19 -
 20
20 -
 21
21 -
 22
22 -
 23
23 -
 24
24 -
 25
25 -
 26
26 -
 27
27 -
 28
28 -
29
-
30
-
31
-
32
-
33
-
34
-
35
-
36
-
37
-
38
-
39
-
40
-
41
-
42
-
43
-
44
-
45
-
46
-
47
-
48
-
49
-
50
-
51
-
52
-
53
-
54
-
55
-
56
-
57
-
58
-
59
-
60
-
61
-
62
-
63
-
64
-
65
-
66
-
67
-
68
-
69
-
70
-
71
-
72
 |
 |
