Pioneer AVIC-X9115BT Operation Manual - Page 157
Setting the rear view camera
 |
View all Pioneer AVIC-X9115BT manuals
Add to My Manuals
Save this manual to your list of manuals |
Page 157 highlights
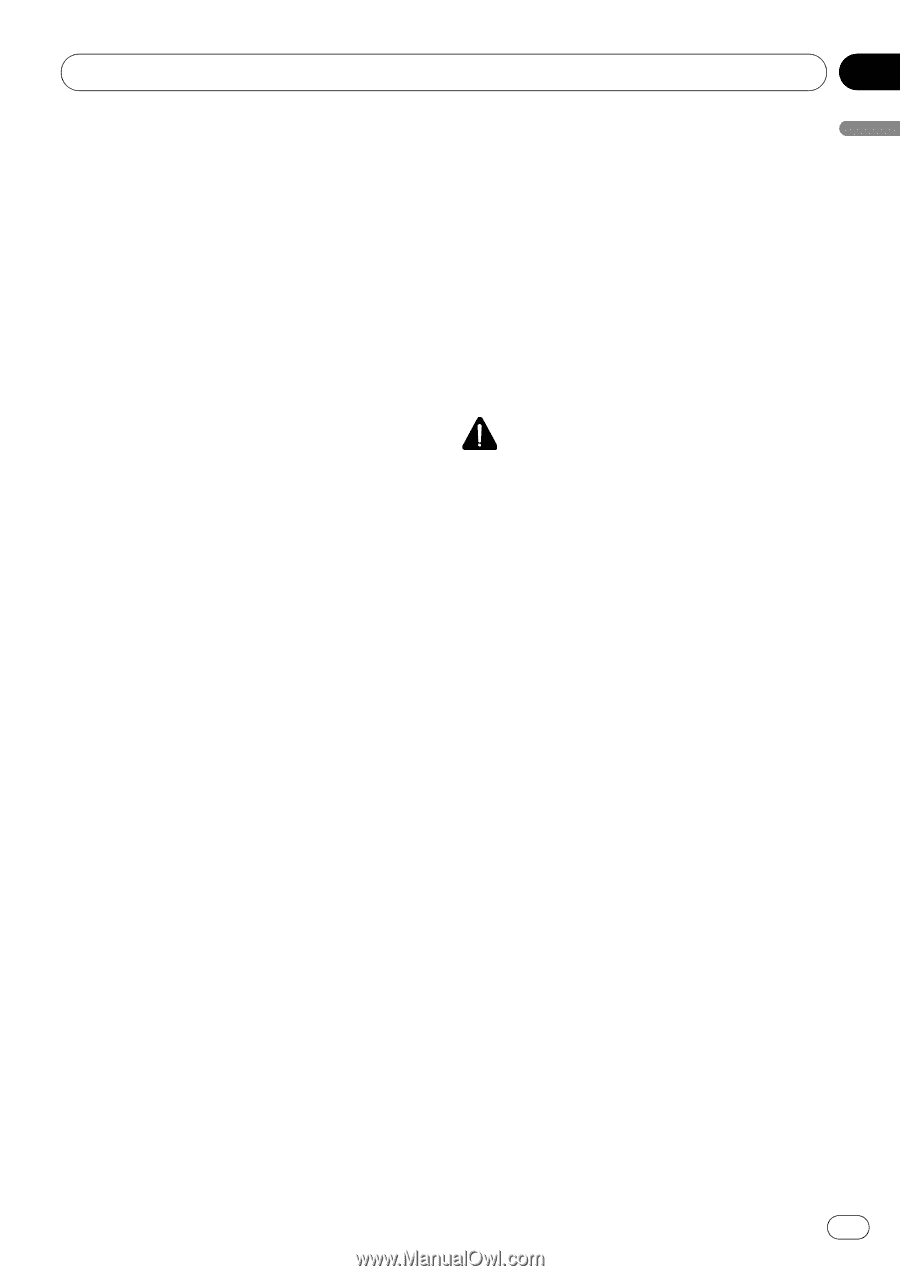
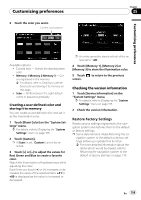
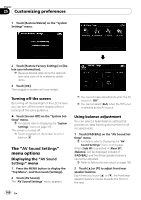
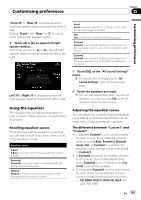
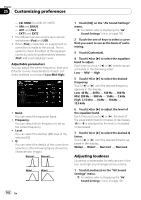
Customizing preferences Chapter 25 Customizing preferences p Imported original images will be stored in the built-in memory, but the ability to save these images cannot be guaranteed completely. If your original image data is deleted, insert the external storage device (USB, SD) again and re-import the original image. 1 Create a folder named "Pictures" on the top-most directory of the external storage device (USB, SD) and store the picture files in this folder. 2 Insert the SD memory card into the SD card slot or plug the USB storage device into the USB connector. 3 Touch [Splash Screen] on the "System Settings" menu. = For details, refer to Displaying the "System Settings" menu on page 155. The navigation system checks the external storage device (USB, SD). If an appropriate file is found, the file list will be displayed. p If there is no "Pictures" folder or loadable file, a message appears. p You can switch the list by touching [Import from SD] and [Import from USB]. 4 Touch the image to use as the splash screen from the list. The image is displayed on the screen. 5 Touch [OK]. The image is set as the splash screen, and the system returns to the "System Settings" menu. Setting the rear view camera The following two functions are available. The rear view camera feature requires a separately sold rear view camera (e.g. ND-BC2). (For details, consult your dealer.) Rear view camera The navigation system features a function that automatically switches to the full-screen rear view camera image installed on your vehicle. When the shift lever is in the REVERSE (R) position, the screen automatically switches to full-screen rear view camera. Camera for "RearView" [RearView] can display the full-screen rear view camera image any time without relation to the shift lever position after touching [RearView] on the "AV Source" menu. [RearView] is useful if you want to monitor an attached trailer, etc. CAUTION Pioneer recommends the use of a camera which outputs mirror reversed images, otherwise the screen image may appear reversed. p Immediately verify whether the display changes to a rear view camera image when the shift lever is moved to REVERSE (R) from another position. p When the whole screen changes to a rear view camera image during normal driving, switch to another setting. p Initially, this function is set to "On". 1 Touch [Back Camera] on the "System Settings" menu. = For details, refer to Displaying the "System Settings" menu on page 155. The "Camera Input" screen appears. 2 Touch [On] next to "Camera" to activate the camera setting. p You can only switch to "RearView" if this setting is [On]. 3 Touch [Battery] or [GND] next to "Polarity" to select the appropriate polarity setting. ! Battery - When the polarity of the connected lead is positive while the shift lever is in the REVERSE (R) position ! GND - When the polarity of the connected lead is negative while the shift lever is in the REVERSE (R) position En 157
-
 1
1 -
2
-
3
-
4
-
5
-
6
-
7
-
8
-
9
-
10
-
11
-
12
-
13
-
14
-
15
-
16
-
17
-
18
-
19
-
20
-
21
-
22
-
23
-
24
-
25
-
26
-
27
-
28
-
29
-
30
-
31
-
32
-
33
-
34
-
35
-
36
-
37
-
38
-
39
-
40
-
41
-
42
-
43
-
44
-
45
-
46
-
47
-
48
-
49
-
50
-
51
-
52
-
53
-
54
-
55
-
56
-
57
-
58
-
59
-
60
-
61
-
62
-
63
-
64
-
65
-
66
-
67
-
68
-
69
-
70
-
71
-
72
-
73
-
74
-
75
-
76
-
77
-
78
-
79
-
80
-
81
-
82
-
83
-
84
-
85
-
86
-
87
-
88
-
89
-
90
-
91
-
92
-
93
-
94
-
95
-
96
-
97
-
98
-
99
-
100
-
101
-
102
-
103
-
104
-
105
-
106
-
107
-
108
-
109
-
110
-
111
-
112
-
113
-
114
-
115
-
116
-
117
-
118
-
119
-
120
-
121
-
122
-
123
-
124
-
125
-
126
-
127
-
128
-
129
-
130
-
131
-
132
-
133
-
134
-
135
-
136
-
137
-
138
-
139
-
140
-
141
-
142
-
143
-
144
-
145
-
146
-
147
-
148
-
149
-
150
-
151
-
 152
152 -
 153
153 -
 154
154 -
 155
155 -
 156
156 -
 157
157 -
 158
158 -
 159
159 -
 160
160 -
 161
161 -
 162
162 -
163
-
164
-
165
-
166
-
167
-
168
-
169
-
170
-
171
-
172
-
173
-
174
-
175
-
176
-
177
-
178
-
179
-
180
-
181
-
182
-
183
-
184
-
185
-
186
-
187
-
188
-
189
-
190
-
191
-
192
-
193
-
194
-
195
-
196
-
197
-
198
-
199
-
200
-
201
-
202
-
203
-
204
-
205
-
206
-
207
-
208
-
209
-
210
-
211
-
212
-
213
-
214
-
215
 |
 |