Ricoh Aficio MP C2050 User Manual - Page 15
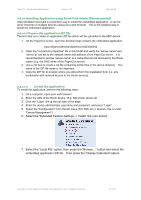
Select the PaperCut Client application. - install
 |
View all Ricoh Aficio MP C2050 manuals
Add to My Manuals
Save this manual to your list of manuals |
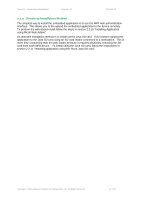
Page 15 highlights
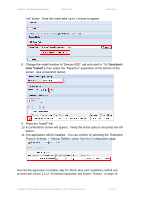
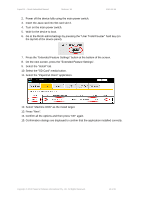
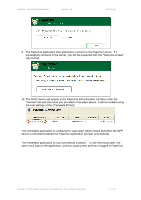
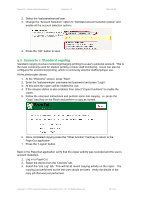
PaperCut - Ricoh Embedded Manual Revision: 19 2012-10-26 2. Power off the device fully using the main power switch. 3. Insert the Java card into SD card slot 3. 4. Turn on the main power switch. 5. Wait for the device to boot. 6. Go to the Ricoh admin/settings by pressing the "User Tools/Counter" hard key (on the top left of the device panel). 7. Press the "Extended Feature Settings" button at the bottom of the screen. 8. On the next screen, press the "Extended Feature Settings". 9. Select the "Install" tab. 10. Select the "SD Card" media button. 11. Select the "PaperCut Client" application. 12. Select "Machine HDD" as the install target. 13. Press "Next". 14. Confirm all the options and then press "OK" again. 15. Confirmation dialogs are displayed to confirm that the application installed correctly. Copyright © 2012 PaperCut Software International Pty. Ltd., All Rights Reserved. 15 of 41
-
 1
1 -
2
-
3
-
4
-
5
-
6
-
7
-
8
-
9
-
 10
10 -
 11
11 -
 12
12 -
 13
13 -
 14
14 -
 15
15 -
 16
16 -
 17
17 -
 18
18 -
 19
19 -
 20
20 -
21
-
22
-
23
-
24
-
25
-
26
-
27
-
28
-
29
-
30
-
31
-
32
-
33
-
34
-
35
-
36
-
37
-
38
-
39
-
40
-
41
 |
 |
