Ricoh Aficio MP C2050 User Manual - Page 4
Requirements - scanner
 |
View all Ricoh Aficio MP C2050 manuals
Add to My Manuals
Save this manual to your list of manuals |
Page 4 highlights
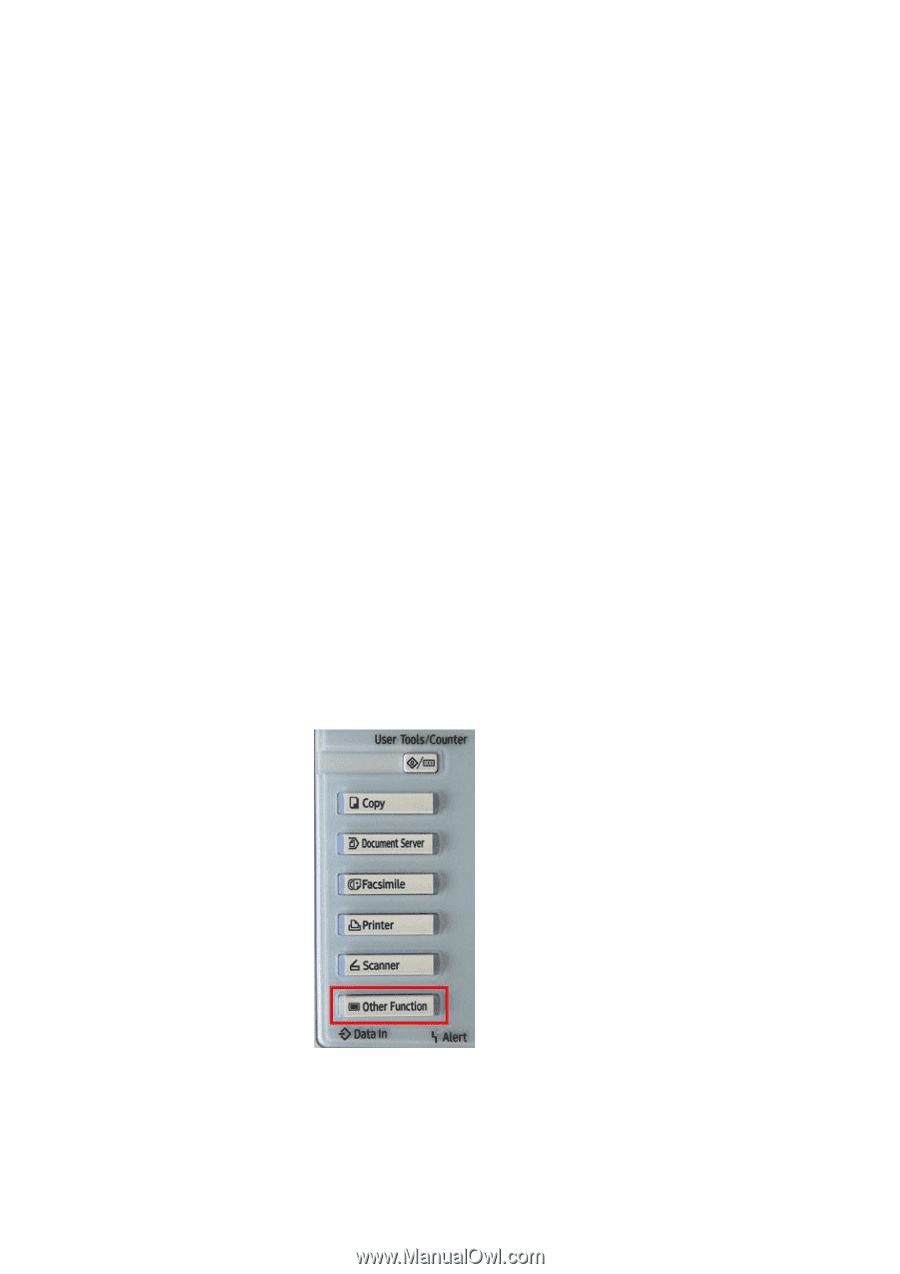
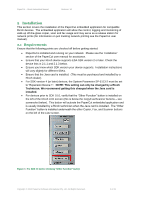
PaperCut - Ricoh Embedded Manual Revision: 19 2012-10-26 2 Installation This section covers the installation of the PaperCut embedded application for compatible Ricoh devices. The embedded application will allow the control, logging and monitoring of walk-up off-the-glass copier, scan and fax usage and may serve as a release station for network prints (for information on just tracking network printing see the PaperCut user manual). 2.1 Requirements Ensure that the following points are checked off before getting started: PaperCut is installed and running on your network. Please see the 'Installation' section of the PaperCut user manual for assistance. Ensure that your Ricoh device supports ESA SDK version 2 or later. Check the device lists in 2.1.1 and 2.1.3 below. Ensure you know which SDK version your device supports. Installation instructions will vary slightly for different SDKs. Ensure that the Java card is installed. (This must be purchased and installed by a Ricoh dealer). For SDK version 4 (or later) devices, the System Parameter SP-5113-2 must be set to "Expansion Device 1". NOTE: This setting can only be changed by a Ricoh Technician. We recommend getting this changed when the Java card is installed. For devices prior to SDK 10.0, verify that the "Other Function" button is installed on the left of the Ricoh LCD screen (this is below the Copy/Fax/Scanner buttons - see screenshot below). This button will activate the PaperCut embedded application and is usually installed by a Ricoh technician when the Java card is installed. The "Other Function" button is installed underneath the other Copier, Fax, and Scanner buttons on the left of the LCD screen. Figure 1: Pre SDK 10 device showing "Other Function" button Copyright © 2012 PaperCut Software International Pty. Ltd., All Rights Reserved. 4 of 41
-
 1
1 -
 2
2 -
 3
3 -
 4
4 -
 5
5 -
 6
6 -
 7
7 -
 8
8 -
 9
9 -
 10
10 -
11
-
12
-
13
-
14
-
15
-
16
-
17
-
18
-
19
-
20
-
21
-
22
-
23
-
24
-
25
-
26
-
27
-
28
-
29
-
30
-
31
-
32
-
33
-
34
-
35
-
36
-
37
-
38
-
39
-
40
-
41
 |
 |