Ryobi RMX001 Operation Manual - Page 13
Securing The Drum, Caution, Installing The Mixing Tines
 |
View all Ryobi RMX001 manuals
Add to My Manuals
Save this manual to your list of manuals |
Page 13 highlights
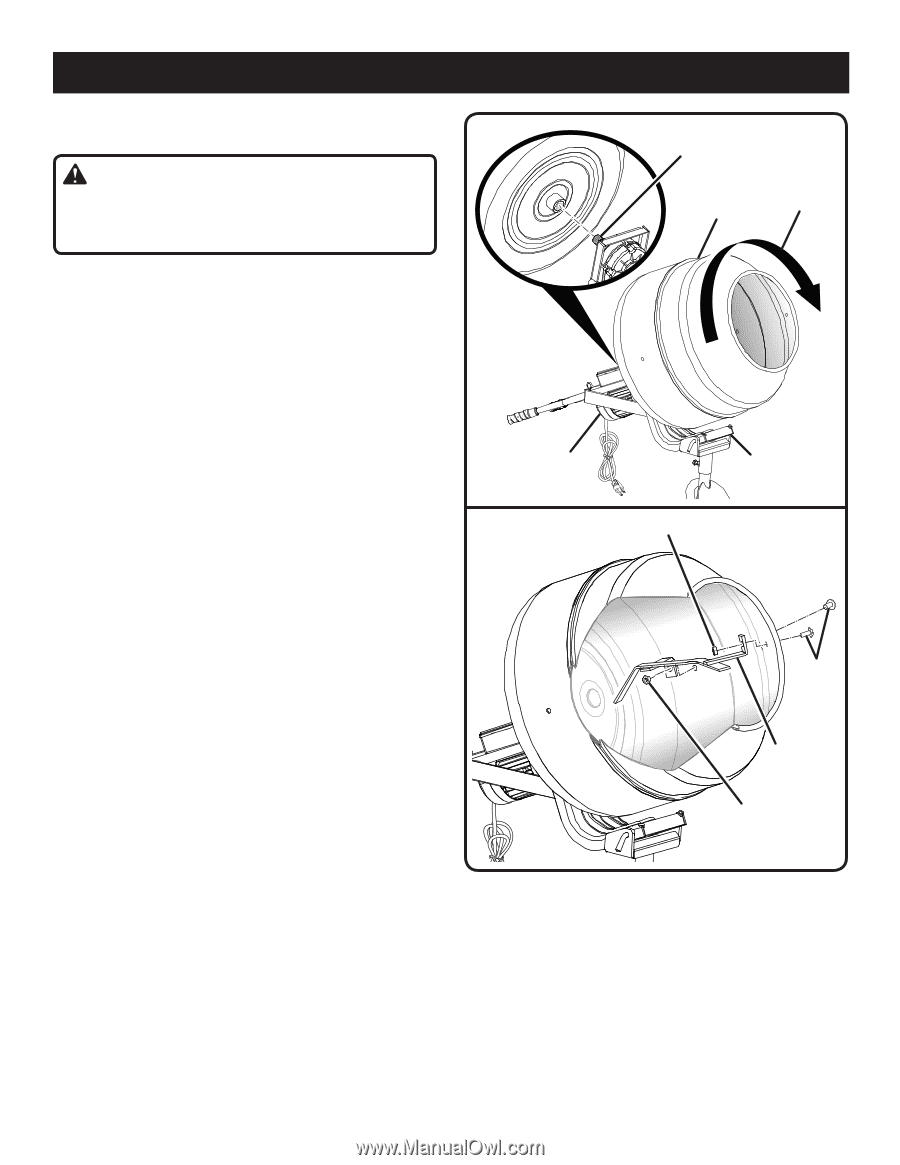
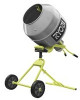
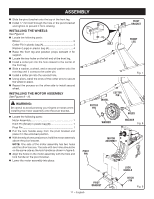
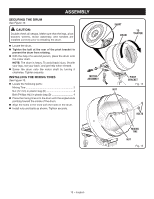
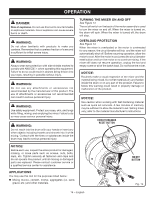
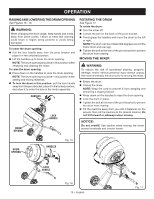
ASSEMBLY SECURING THE DRUM See Figure 12. CAUTION: Double check all setups. Make sure that the legs, pivot bracket, wheels, motor assembly, and handles are installed correctly prior to installing the drum. Locate the drum. Tighten the bolt at the rear of the pivot bracket to prevent the drum from rotating. With the help of a second person, place the drum onto the motor shaft. NOTE: The drum is heavy. To avoid back injury, lift with your legs, not your back, and get help when needed. Screw the drum onto the motor shaft by turning it clockwise. Tighten securely. INSTALLING THE MIXING TINES See Figure 13. Locate the following parts: Mixing Tine 2 Nut (12 mm) in plastic bag (D 4 Bolt (Phillips Hd.) in plastic bag (D 4 Place the mixing tines into the drum with the angled ends pointing toward the inside of the drum. Align the holes in the tines with the holes in the drum. Install nuts and bolts as shown. Tighten securely. MOTOR ASSEMBLY SHAFT DRUM TO TIGHTEN PIVOT BRACKET Fig. 12 NUT BOLTS MIXING TINE NUT Fig. 13 13 − English
-
 1
1 -
2
-
3
-
4
-
5
-
6
-
7
-
 8
8 -
 9
9 -
 10
10 -
 11
11 -
 12
12 -
 13
13 -
 14
14 -
 15
15 -
 16
16 -
 17
17 -
 18
18 -
19
-
20
-
21
-
22
-
23
-
24
-
25
-
26
-
27
-
28
-
29
-
30
-
31
-
32
-
33
-
34
-
35
-
36
-
37
-
38
-
39
-
40
-
41
-
42
-
43
-
44
-
45
-
46
-
47
-
48
-
49
-
50
-
51
-
52
-
53
-
54
-
55
-
56
 |
 |