Ryobi RMX001 Operation Manual - Page 17
Emptying The Drum, Warning
 |
View all Ryobi RMX001 manuals
Add to My Manuals
Save this manual to your list of manuals |
Page 17 highlights
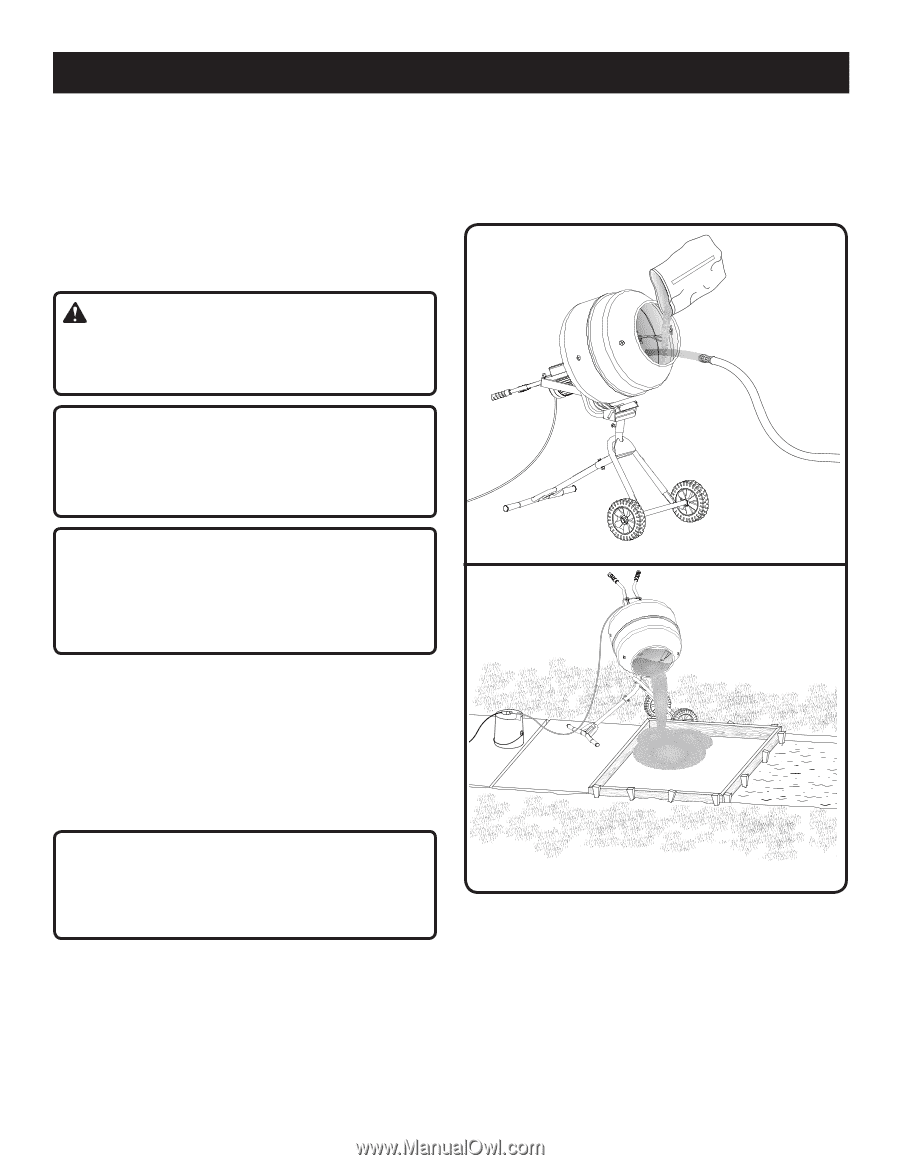
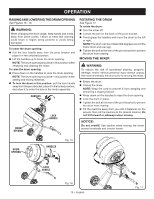
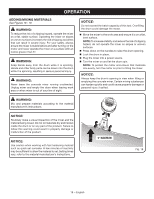
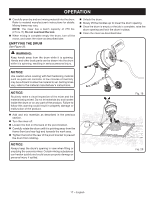
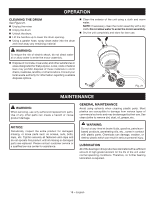
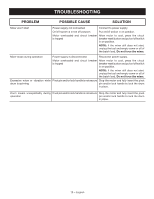
OPERATION Carefully pour dry and wet mixing material into the drum. Refer to material manufacturer's instructions for details. Mixing times may vary. NOTE: The mixer has a batch capacity of 270 lbs. (2.5 cu. ft). Do not overload the tool. When mixing is complete empty the drum, turn off the motor, and clean the mixer as described later. EMPTYING THE DRUM See Figure 20. Unlock the drum. Slowly lift the handles up to lower the drum opening. Once the drum is empty or the job is complete, raise the drum opening and lock the drum in place. Clean the mixer as described later. CEMENT WARNING: Keep hands away from the drum while it is spinning. Hands and other body parts can be drawn into the drum while it is spinning, resulting in serious personal injury. NOTICE: Use caution when working with fast hardening material such as quick set concrete. A few minutes of inactivity may be sufficient to allow the material to set. Setting times vary, refer to the material manufacturer's instructions. NOTICE: Routinely make a visual inspection of the mixer and the material being mixed. Do not let materials dry and harden inside the drum or on any part of the product. Failure to follow this warning could result in property damage or malfunction of the product. Add and mix materials as described in the previous section. Turn the mixer off. Loosen the bolt on the back of the pivot bracket. Carefully rotate the drum until it is pointing away from the frame (front and rear leg) and towards the work area. Tighten the bolt at the rear of the pivot bracket to prevent the drum from rotating. NOTICE: Always keep the drum's opening in view when filling or emptying the concrete mixer. Certain mixing substances can harden quickly and could cause property damage or personal injury if spilled. Fig. 19 Fig. 20 17 − English
-
 1
1 -
2
-
3
-
4
-
5
-
6
-
7
-
8
-
9
-
10
-
11
-
 12
12 -
 13
13 -
 14
14 -
 15
15 -
 16
16 -
 17
17 -
 18
18 -
 19
19 -
 20
20 -
 21
21 -
 22
22 -
23
-
24
-
25
-
26
-
27
-
28
-
29
-
30
-
31
-
32
-
33
-
34
-
35
-
36
-
37
-
38
-
39
-
40
-
41
-
42
-
43
-
44
-
45
-
46
-
47
-
48
-
49
-
50
-
51
-
52
-
53
-
54
-
55
-
56
 |
 |