Samsung SC-DC564 User Manual (user Manual) (ver.1.0) (English, French) - Page 57
Setting the Custom White Balance, Réglage du mode Custom White Balance, <Set White Balance>
 |
UPC - 036725301542
View all Samsung SC-DC564 manuals
Add to My Manuals
Save this manual to your list of manuals |
Page 57 highlights
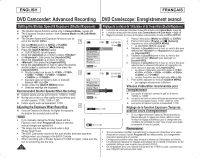
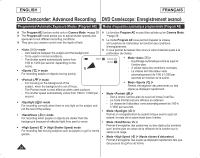
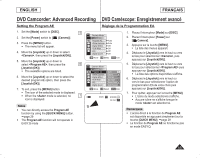
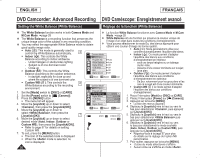
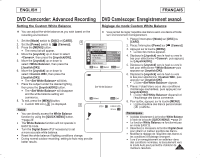
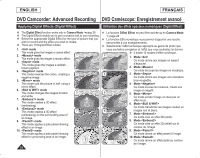
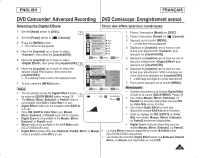
ENGLISH FRANÇAIS DVD Camcorder: Advanced Recording DVD Caméscope: Enregistrement avancé Setting the Custom White Balance Réglage du mode Custom White Balance You can adjust the white balance as you wish based on the recording environment. Vous permet de régler l'équilibre des blancs selon vos désirs et fondé sur l'environnement d'enregistrement. 1. Set the [Mode] switch to [DISC] or [CARD]. 2. Set the [Power] switch to [ (Camera)]. 6 3. Press the [MENU] button. The menu list will appear. 4. Move the [Joystick] up or down to select , then press the [Joystick(OK)]. 5. Move the [Joystick] up or down to select , then press the Camera Mode ►Camera Program AE White Balance Digital Effect 16:9 Wide DIS Digital Zoom Auto A Indoor Outdoor Custom WB [Joystick(OK)]. Move OK Select MENU Exit 6. Move the [Joystick] up or down to select , then press the [Joystick(OK)]. The will blink. 7. Place the subject under the desired lighting, then press the [Joystick(OK)] button. Set White Balance The will disappear and the white balance setting will commence. 8. To exit, press the [MENU] button. OK Select MENU Exit Custom WB icon ( ) is displayed. 8 STBY SP 0:00:00 -RW Notes 30 min VR You can directly access the White Balance function by using the [QUICK MENU] button. page 29 The White Balance function will not operate in EASY.Q mode. Turn the Digital Zoom off (if necessary) to set a more accurate white balance. Reset the white balance if lighting conditions change. During normal outdoor recording, setting to Auto may provide better results. 1. Placez l'interrupteur [Mode] sur [DISC] ou [CARD]. 2. Placez l'interrupteur [Power] sur [ (Camera)]. 3. Appuyez sur la touche [MENU]. La liste des menus apparaît. 4. Déplacez le [Joystick] vers le haut ou vers le bas pour sélectionner , puis appuyez sur [Joystick(OK)]. 5. Déplacez le [Joystick] vers le haut ou vers le bas pour sélectionner puis appuyez sur [Joystick(OK)]. 6. Déplacez le [Joystick] vers le haut ou vers le bas pour sélectionner , puis appuyez sur [Joystick(OK)]. L'icône clignote. 7. Placez l'objet blanc sous des conditions d'éclairage souhaitées, puis appuyez sur [Joystick(OK)]. L'icône disparraît et l'équilibrage des blancs commence. 8. Pour quitter, appuyez sur la touche [MENU]. L'icône Équilibre des blancs personnalisés ( ) s'affiche. Remarques Accédez directement à la fonction White Balance à l'aide de la touche [QUICK MENU]. page 29 La fonction White Balance ne fonctionne pas en mode EASY.Q. Désactivez si nécessaire la fonction Digital Zoom pour obtenir un meilleur équilibre des blancs. Modifiez le réglage de l'équilibre des blancs si les conditions d'éclairage changent. Lors d'un enregistrement en extérieur dans des conditions normales, le basculement vers le mode Auto peut permettre d'obtenir de meilleurs résultats. 57
-
 1
1 -
2
-
3
-
4
-
5
-
6
-
7
-
8
-
9
-
10
-
11
-
12
-
13
-
14
-
15
-
16
-
17
-
18
-
19
-
20
-
21
-
22
-
23
-
24
-
25
-
26
-
27
-
28
-
29
-
30
-
31
-
32
-
33
-
34
-
35
-
36
-
37
-
38
-
39
-
40
-
41
-
42
-
43
-
44
-
45
-
46
-
47
-
48
-
49
-
50
-
51
-
 52
52 -
 53
53 -
 54
54 -
 55
55 -
 56
56 -
 57
57 -
 58
58 -
 59
59 -
 60
60 -
 61
61 -
 62
62 -
63
-
64
-
65
-
66
-
67
-
68
-
69
-
70
-
71
-
72
-
73
-
74
-
75
-
76
-
77
-
78
-
79
-
80
-
81
-
82
-
83
-
84
-
85
-
86
-
87
-
88
-
89
-
90
-
91
-
92
-
93
-
94
-
95
-
96
-
97
-
98
-
99
-
100
-
101
-
102
-
103
-
104
-
105
-
106
-
107
-
108
-
109
-
110
-
111
-
112
-
113
-
114
-
115
-
116
-
117
-
118
-
119
-
120
-
121
-
122
-
123
-
124
-
125
-
126
-
127
-
128
-
129
-
130
-
131
-
132
 |
 |
