Samsung SCH-U450 User Manual (user Manual) (ver.f3) (English) - Page 9
Activating Your Phone - charger
 |
View all Samsung SCH-U450 manuals
Add to My Manuals
Save this manual to your list of manuals |
Page 9 highlights
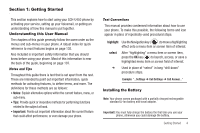
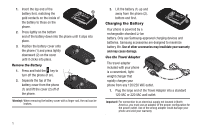
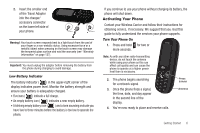
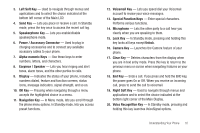
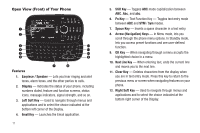
2. Insert the smaller end of the Travel Adapter into the charger/ accessory connector on the lower left side of your phone. Correct Incorrect Warning!: Your touch screen responds best to a light touch from the pad of your finger or a non-metallic stylus. Using excessive force or a metallic object when pressing on the touch screen may damage the tempered glass surface and void the warranty (see "Warranty Information" on page 127). Important!: You must unplug the adapter before removing the battery from the phone during charging to avoid damage. Low Battery Indicator The battery indicator ( ) in the upper-right corner of the display indicates power level. Monitor the battery strength and ensure your battery is adequately charged. • Five bars ( ) indicate a full charge. • An empty battery icon ( ) indicates a near empty battery. • A blinking empty battery icon ( ) and a tone sounding indicate you have two to three minutes before the battery is too low to operate the phone. If you continue to use your phone without charging its battery, the phone will shut down. Activating Your Phone Contact your Wireless Carrier and follow their instructions for obtaining service, if necessary. We suggest that you read this guide to fully understand the services your phone supports. Turn Your Phone On 1. Press and hold for two or more seconds. Note: As with any other radio-transmitting device, do not touch the antenna while using your phone as this can affect call quality and can cause the phone to operate at a higher power level than is necessary. 2. The phone begins searching for a network signal. 3. Once the phone finds a signal, the time, date, and day appear in the second line of the display. 4. You're now ready to place and receive calls. Press & Hold Antenna Getting Started 6
-
 1
1 -
2
-
3
-
 4
4 -
 5
5 -
 6
6 -
 7
7 -
 8
8 -
 9
9 -
 10
10 -
 11
11 -
 12
12 -
 13
13 -
 14
14 -
15
-
16
-
17
-
18
-
19
-
20
-
21
-
22
-
23
-
24
-
25
-
26
-
27
-
28
-
29
-
30
-
31
-
32
-
33
-
34
-
35
-
36
-
37
-
38
-
39
-
40
-
41
-
42
-
43
-
44
-
45
-
46
-
47
-
48
-
49
-
50
-
51
-
52
-
53
-
54
-
55
-
56
-
57
-
58
-
59
-
60
-
61
-
62
-
63
-
64
-
65
-
66
-
67
-
68
-
69
-
70
-
71
-
72
-
73
-
74
-
75
-
76
-
77
-
78
-
79
-
80
-
81
-
82
-
83
-
84
-
85
-
86
-
87
-
88
-
89
-
90
-
91
-
92
-
93
-
94
-
95
-
96
-
97
-
98
-
99
-
100
-
101
-
102
-
103
-
104
-
105
-
106
-
107
-
108
-
109
-
110
-
111
-
112
-
113
-
114
-
115
-
116
-
117
-
118
-
119
-
120
-
121
-
122
-
123
-
124
-
125
-
126
-
127
-
128
-
129
-
130
-
131
-
132
-
133
-
134
-
135
-
136
-
137
-
138
-
139
-
140
-
141
-
142
 |
 |
