Seagate FreeAgent ater User Guide - Page 9
Connecting a FreeAgent Drive or External USB, Drive, Navigating the Media Player Screens and Menus
 |
View all Seagate FreeAgent ater manuals
Add to My Manuals
Save this manual to your list of manuals |
Page 9 highlights
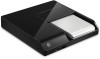
Connecting a FreeAgent Drive or External USB Drive If you haven't done so already, insert a FreeAgent drive containing your movie, picture, and music files into your media player, as shown in the printed Quick Start Guide. Alternatively, you can connect an external USB drive (such as a flash drive or thumb drive) containing your media files to the USB connector on the media player. TIP: You can use the included Seagate Media software to organize the media files on your computer and transfer them to a FreeAgent or external USB drive. See Chapter 7 "Syncing Your Media Files" on page 31 to get started. You can also connect a digital camera or camcorder to the USB connector on the media player. (For help viewing photos and videos from your digital camera or camcorder, see "Playing a Personal Video from a Digital Camcorder" on page 17 or "Viewing Pictures from a Digital Camera" on page 22.) When you connect a new device to your media player, the Home screen opens and the device appears as an icon on the Home screen. Your media player automatically searches the device and creates an index of all the video, picture, and music files it finds. This may take a few moments, depending on how many files you have on the device; an 'Indexing' message appears at the bottom of the screen while the media player builds the index. You can start browsing and enjoying your media files right away, even if the index isn't complete yet. See the chapters on watching movies, viewing pictures, and listening to music for help getting started. Navigating the Media Player Screens and Menus The user interface (UI) of your media player is easy to navigate using the included remote control. This section describes the main screens, how to use the remote, and how to find the screens you're looking for. Note: In this User Guide, all instructions refer to the remote. For instance, "Press Menu, select Pictures, then press OK" means to press the Menu button on the remote, use the arrow buttons to select Pictures on the on-screen menu, then press the OK button on the remote. Getting to Know the Main Screens and Menus This section introduces the main media player screens and menus: • "The Home Screen" on page 10 • "The Main Menu" on page 10 • "The Screen Menus" on page 10 9
-
 1
1 -
2
-
3
-
 4
4 -
 5
5 -
 6
6 -
 7
7 -
 8
8 -
 9
9 -
 10
10 -
 11
11 -
 12
12 -
 13
13 -
 14
14 -
15
-
16
-
17
-
18
-
19
-
20
-
21
-
22
-
23
-
24
-
25
-
26
-
27
-
28
-
29
-
30
-
31
-
32
-
33
-
34
-
35
-
36
-
37
-
38
-
39
-
40
-
41
-
42
-
43
-
44
-
45
-
46
-
47
-
48
-
49
-
50
-
51
-
52
-
53
-
54
-
55
-
56
-
57
-
58
-
59
-
60
-
61
 |
 |
