Seagate Maxtor Shared Storage II User Guide - Page 13
Advanced Web Folder Tags - not working
 |
View all Seagate Maxtor Shared Storage II manuals
Add to My Manuals
Save this manual to your list of manuals |
Page 13 highlights
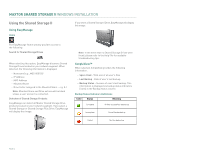
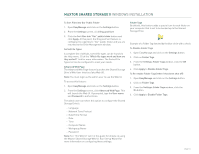
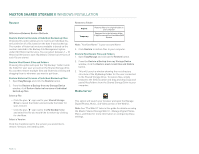
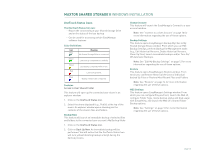
MAXTOR SHARED STORAGE II WINDOWS INSTALLATION To Sort Files into Our Public Folder 1. Open EasyManage and click on the Settings button. 2. From the Settings screen, click Drag and Sort. 3. Click the Sort files into "Our" public folder button and click Apply. At this point, the Drag and Sort feature is configured to copy files to "Our" public folder and you are returned to the Drive Management window. Sorted File Types A complete list of default, sorted file types can be found via the Help menu. Click the "Which file types work and how are they sorted?" link for more information. The Sorted File Types list can be configured to meet your needs. Advanced Web Page The Advanced Web Page feature launches the Shared Storage Drive's Web User Interface (aka Web UI). Note: You must login as the admin user to use the Web UI. To access this feature: 1. Open EasyManage and click on the Settings button. 2. From the Settings screen, click Advanced Web Page. This will launch the Web UI. If prompted, type the User name and Password to authenticate. The admin user can select this option to configure the Shared Storage Drive's: - Language - Network Time Protocol - Date/Time Format - Date - Time - Computer Name - Workgroup Name - Password Note: See "The Web UI" later in this guide for details on using the Maxtor Shared Storage Web UI. Run Set-up Wizard for more information on configuring these settings. Folder Tags By default, this feature adds a special icon to each folder on your computer that is set to be backed up to the Shared Storage Drive. Example of a Folder Tag denoted by the blue circle with a check. To Disable Folder Tags 1. Open EasyManage and click on the Settings button. 2. Click on Folder Tags. 3. From the Settings: Folder Tags window, click the Off button. 4. Click Apply to Disable Folder Tags. To Re-enable Folder Tags (when it has been shut off) 1. Open EasyManage and click on the Settings button. 2. Click on Folder Tags. 3. From the Settings: Folder Tags window, click the On button. 4. Click Apply to Enable Folder Tags. PAGE 11
-
 1
1 -
2
-
3
-
4
-
5
-
6
-
7
-
 8
8 -
 9
9 -
 10
10 -
 11
11 -
 12
12 -
 13
13 -
 14
14 -
 15
15 -
 16
16 -
 17
17 -
 18
18 -
19
-
20
-
21
-
22
-
23
-
24
-
25
-
26
-
27
-
28
-
29
-
30
-
31
-
32
-
33
-
34
-
35
-
36
-
37
-
38
-
39
-
40
-
41
-
42
-
43
-
44
-
45
-
46
-
47
-
48
-
49
-
50
-
51
-
52
-
53
 |
 |
