Seagate Maxtor Shared Storage II User Guide - Page 40
Run Set-up Wizard - default password
 |
View all Seagate Maxtor Shared Storage II manuals
Add to My Manuals
Save this manual to your list of manuals |
Page 40 highlights
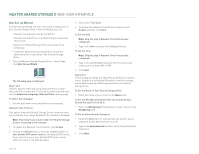
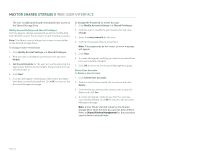
MAXTOR SHARED STORAGE II WEB USER INTERFACE Run Set-up Wizard The Run Set-up Wizard will aid in the initial configuration of your Shared Storage Drive. From the Wizard, you can: - Change the language used by the Web UI - Manually set Date/Time or enable/configure a Network Time Server - Name your Shared Storage Drive and assign it to a workgroup - Create the administrative password to secure the administrative functionality of the Shared Storage Drive 1. From the Maxtor Shared Storage Drive - Home Page, click Run Set-up Wizard. The following page is displayed: Step 1 of 2 Use this page to enter your language preference, today's date, and the current time. To change the date and time later, use the Advanced, Language, Date and Time settings page. To Select the Language 1. Use the pull down menu and select your language. Network Time Protocol This option allows the Shared Storage Drive to maintain time via an Internet time server. By default, this feature is disabled. Note: This feature can only be used if the Shared Storage Drive is connected to the Internet. 1. To enable the Network Time Protocol, click Enable. 2. Choose a continent (Asia or Europe), country (USA) or a user defined NTP server name as the default NTP server. If you choose to use a user defined NTP server name, enter the name in the field provided. 3. Select your Time Zone. 4. To disable the Network Time Protocol feature, click Disable and then click Next. To Set the Date Note: Skip this step if Network Time Protocol was configured. 1. Type in the Date using the (mm/dd/yyyy) format. To Set the Time Note: Skip this step if Network Time Protocol was configured. 1. Type in the current time using the (hh:mm:ss) format, make sure to indicate AM or PM. 2. Click Next. Step 2 of 2 Use this page to assign the Shared Storage Drive a network name, identify the workgroup (Domain) to which it belongs, and to add/change the Admin password for your Shared Storage Drive. To Set the Name of Your Shared Storage Drive 1. Enter the name of your choice in the Name field. To Set the Workgroup (Domain) that you would like your Shared Storage Drive to be in 1. Enter the Workgroup (Domain) name of your choice in the Workgroup field. To Set an Administrator Password 1. Select the Yes button to indicate that you want to have a password on the Administrator account. 2. Type in the new password and then verify the password by retyping it. 3. Click Next. PAGE 38
-
 1
1 -
2
-
3
-
4
-
5
-
6
-
7
-
8
-
9
-
10
-
11
-
12
-
13
-
14
-
15
-
16
-
17
-
18
-
19
-
20
-
21
-
22
-
23
-
24
-
25
-
26
-
27
-
28
-
29
-
30
-
31
-
32
-
33
-
34
-
 35
35 -
 36
36 -
 37
37 -
 38
38 -
 39
39 -
 40
40 -
 41
41 -
 42
42 -
 43
43 -
 44
44 -
 45
45 -
46
-
47
-
48
-
49
-
50
-
51
-
52
-
53
 |
 |
