Seagate Maxtor Shared Storage II User Guide - Page 28
Creating a Public/Home User Account, Creating a Public/Business User Account, Creating a Public/None
 |
View all Seagate Maxtor Shared Storage II manuals
Add to My Manuals
Save this manual to your list of manuals |
Page 28 highlights
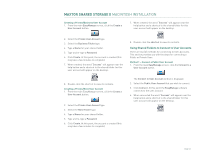
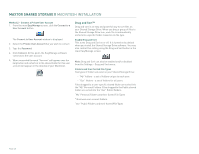
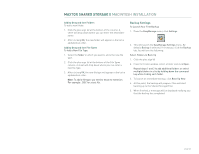
MAXTOR SHARED STORAGE II MACINTOSH INSTALLATION Creating a Public/Home User Account 1. From the main EasyManage screen, click the Create a User Account button. Creating a Public/None User Account 1. From the main EasyManage screen, click the Create a User Account button. 2. Select the Public User Account type. 3. Select the Home Folder type. 4. Type a Name for your shared folder. 5. Click Create. At this point, the account is created (this may take a few minutes to complete). 6. When created, the word "Success" will appear near the help button and a shortcut to the shared folder for this user account will appear on the desktop. 2. Select the Public User Account type. 3. Select the None Folder type. 4. Type a Name for your shared folder. 5. Click Create. At this point, the account is created (this may take a few minutes to complete). 6. When created, the word "Success" will appear near the help button and a shortcut to the shared folder for this user account will appear on the desktop. 7. Double-click the shortcut to view its contents. Creating a Public/Business User Account 1. From the main EasyManage screen, click the Create a User Account button. 7. Double-click the shortcut to view its contents. Creating a Private/Home User Account 1. From the main EasyManage screen, click the Create a User Account button. 2. Select the Public User Account type. 3. Select the Business Folder type. 4. Type a Name for your shared folder. 5. Click Create. At this point, the account is created (this may take a few minutes to complete). 6. When created, the word "Success" will appear near the help button and a shortcut to the shared folder for this user account will appear on the desktop. 2. Select the Private User Account type. 3. Select the Home Folder type. 4. Type a Name for your shared folder. 5. Type and re-type a Password. 6. Click Create. At this point, the account is created (this may take a few minutes to complete). 7. When created, the word "Success" will appear near the help button and a shortcut to the shared folder for this user account will appear on the desktop. 7. Double-click the shortcut to view its contents. PAGE 26 8. Double-click the shortcut to view its contents.
-
 1
1 -
2
-
3
-
4
-
5
-
6
-
7
-
8
-
9
-
10
-
11
-
12
-
13
-
14
-
15
-
16
-
17
-
18
-
19
-
20
-
21
-
22
-
 23
23 -
 24
24 -
 25
25 -
 26
26 -
 27
27 -
 28
28 -
 29
29 -
 30
30 -
 31
31 -
 32
32 -
 33
33 -
34
-
35
-
36
-
37
-
38
-
39
-
40
-
41
-
42
-
43
-
44
-
45
-
46
-
47
-
48
-
49
-
50
-
51
-
52
-
53
 |
 |
