Sharp DT 400 DT-400 Operation Manual - Page 31
Using the Adjustment
 |
UPC - 074000364332
View all Sharp DT 400 manuals
Add to My Manuals
Save this manual to your list of manuals |
Page 31 highlights
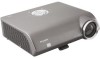
Using the Adjustment Feet The height of the projector can be adjusted using the adjustment feet at the front and rear of the projector when the screen is located higher than the projector, the screen is inclined or when the installation site is slightly inclined. Install the projector so that it is as perpendicular to the screen as possible. Side View Lens center Top View 1 Lift the projector to adjust its height while pressing the HEIGHT ADJUST button. • The projector is adjustable up to approximately 12 degrees (6 steps). • When lowering the projector, it may be difficult to move the front adjustment foot because the installation surface is difficult to slide. In this case, pull the projector back slightly and adjust its height. 2 Remove your hands from the HEIGHT ADJUST button of the projector after its height has been finely adjusted. HEIGHT ADJUST button Front adjustment foot 3 Finely adjust the height and in- clination by turning the rear ad- justment feet. Note • When adjusting the projected image position, trapezoidal distortion occurs. In this case, see "Keystone Correction" on page 32. Info • Do not press the HEIGHT ADJUST button when the front adjustment foot comes out without firmly holding the projector. • Do not hold the lens when lifting or lowering the projector. • When lowering the projector, be careful not to get your fingers caught in the area between the adjustment foot and the projector. Basic Operation Rear adjustment feet -31
-
 1
1 -
2
-
3
-
4
-
5
-
6
-
7
-
8
-
9
-
10
-
11
-
12
-
13
-
14
-
15
-
16
-
17
-
18
-
19
-
20
-
21
-
22
-
23
-
24
-
25
-
 26
26 -
 27
27 -
 28
28 -
 29
29 -
 30
30 -
 31
31 -
 32
32 -
 33
33 -
 34
34 -
 35
35 -
 36
36 -
37
-
38
-
39
-
40
-
41
-
42
-
43
-
44
-
45
-
46
-
47
-
48
-
49
-
50
-
51
-
52
-
53
-
54
-
55
-
56
-
57
-
58
-
59
-
60
-
61
-
62
-
63
-
64
-
65
-
66
-
67
 |
 |
