Sharp PG-M25X PGM25X Operation Manual - Page 32
Connecting the Projector to Other Devices cont.
 |
View all Sharp PG-M25X manuals
Add to My Manuals
Save this manual to your list of manuals |
Page 32 highlights
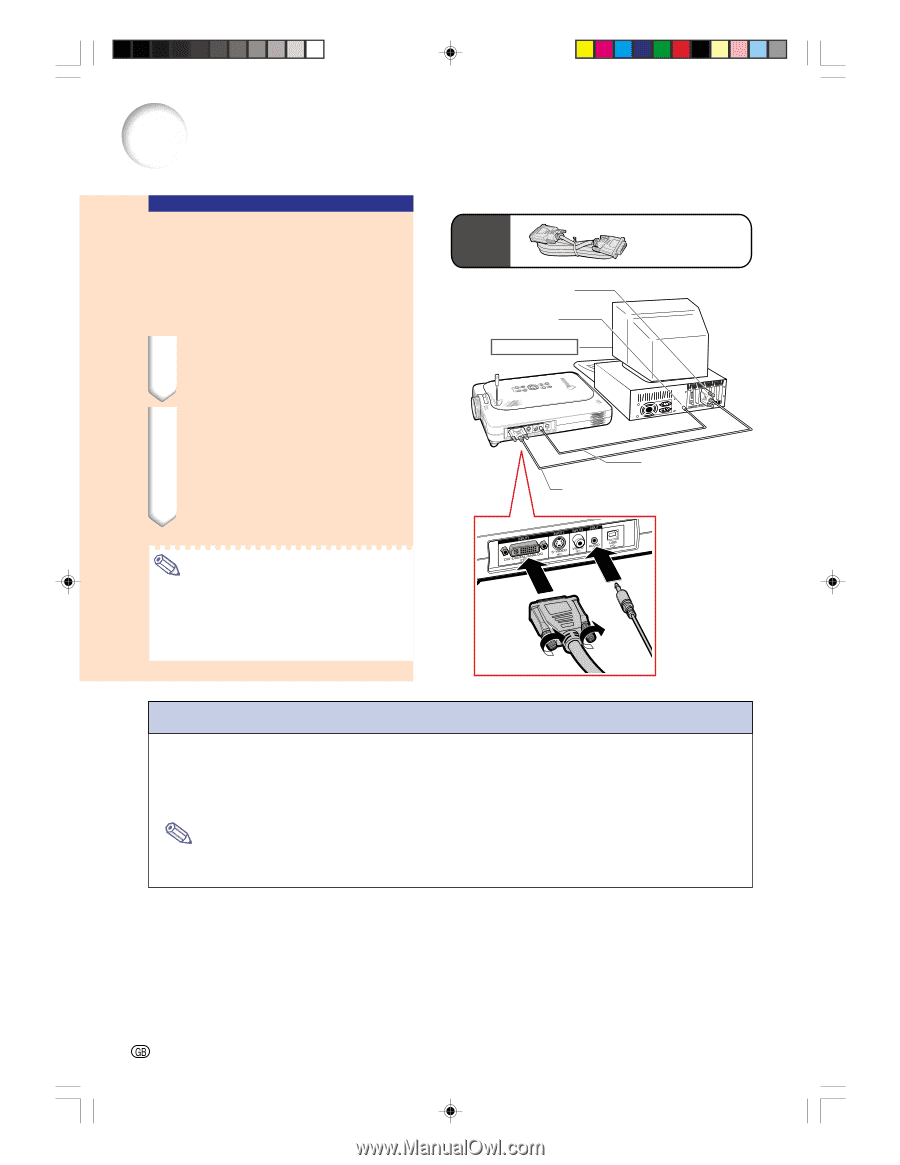
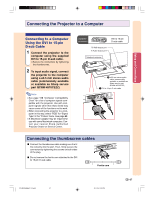
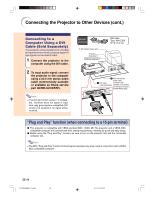
Connecting the Projector to Other Devices (cont.) Connecting to a Computer Using a DVI Cable (Sold Separately) This projector comes installed with a DVI digital input terminal in which computer digital image signals can be directly input. 1 Connect the projector to the computer using the DVI cable. 2 To input audio signal, connect the projector to the computer using a ø3.5 mm stereo audio cable (commercially available or available as Sharp service part QCNW-4870CEZZ). Note • This DVI port is DVI version 1.0 compat- ible. Therefore when the signal is input from copy guard system compatible (DVI version 2.0) equipment, no signal will be received. Optional accessory To DVI Digital Output port To Audio Output port Desktop computer DVI cable Type: AN-C3DV (9'10" (3.0 m)) 2 ø3.5 mm stereo audio cable 1 DVI cable (commercially (sold separately) available or available as Sharp service part QCNW-4870CEZZ) "Plug and Play" function (when connecting to a 15-pin terminal) ■ This projector is compatible with VESA-standard DDC 1/DDC 2B. The projector and a VESA DDC compatible computer will communicate their setting requirements, allowing for quick and easy setup. ■ Before using the "Plug and Play" function, be sure to turn on the projector first and the connected computer last. Note • The DDC "Plug and Play" function of this projector operates only when used in conjunction with a VESA DDC compatible computer. -28 PG-M25X#E#p21_32.p65 28 02.4.29, 3:09 PM
-
 1
1 -
2
-
3
-
4
-
5
-
6
-
7
-
8
-
9
-
10
-
11
-
12
-
13
-
14
-
15
-
16
-
17
-
18
-
19
-
20
-
21
-
22
-
23
-
24
-
25
-
26
-
 27
27 -
 28
28 -
 29
29 -
 30
30 -
 31
31 -
 32
32 -
 33
33 -
 34
34 -
 35
35 -
 36
36 -
 37
37 -
38
-
39
-
40
-
41
-
42
-
43
-
44
-
45
-
46
-
47
-
48
-
49
-
50
-
51
-
52
-
53
-
54
-
55
-
56
-
57
-
58
-
59
-
60
-
61
-
62
-
63
-
64
-
65
-
66
-
67
-
68
-
69
-
70
-
71
-
72
-
73
-
74
-
75
-
76
-
77
-
78
-
79
-
80
-
81
-
82
-
83
-
84
-
85
-
86
-
87
-
88
-
89
-
90
-
91
-
92
-
93
-
94
-
95
-
96
-
97
-
98
-
99
-
100
-
101
-
102
-
103
-
104
-
105
-
106
-
107
-
108
-
109
-
110
-
111
-
112
-
113
-
114
-
115
-
116
-
117
-
118
-
119
-
120
-
121
-
122
-
123
-
124
-
125
-
126
-
127
-
128
-
129
-
130
 |
 |