Sony CCD-FX520 Primary User Manual - Page 4
Charging, Installing, Battery
 |
View all Sony CCD-FX520 manuals
Add to My Manuals
Save this manual to your list of manuals |
Page 4 highlights
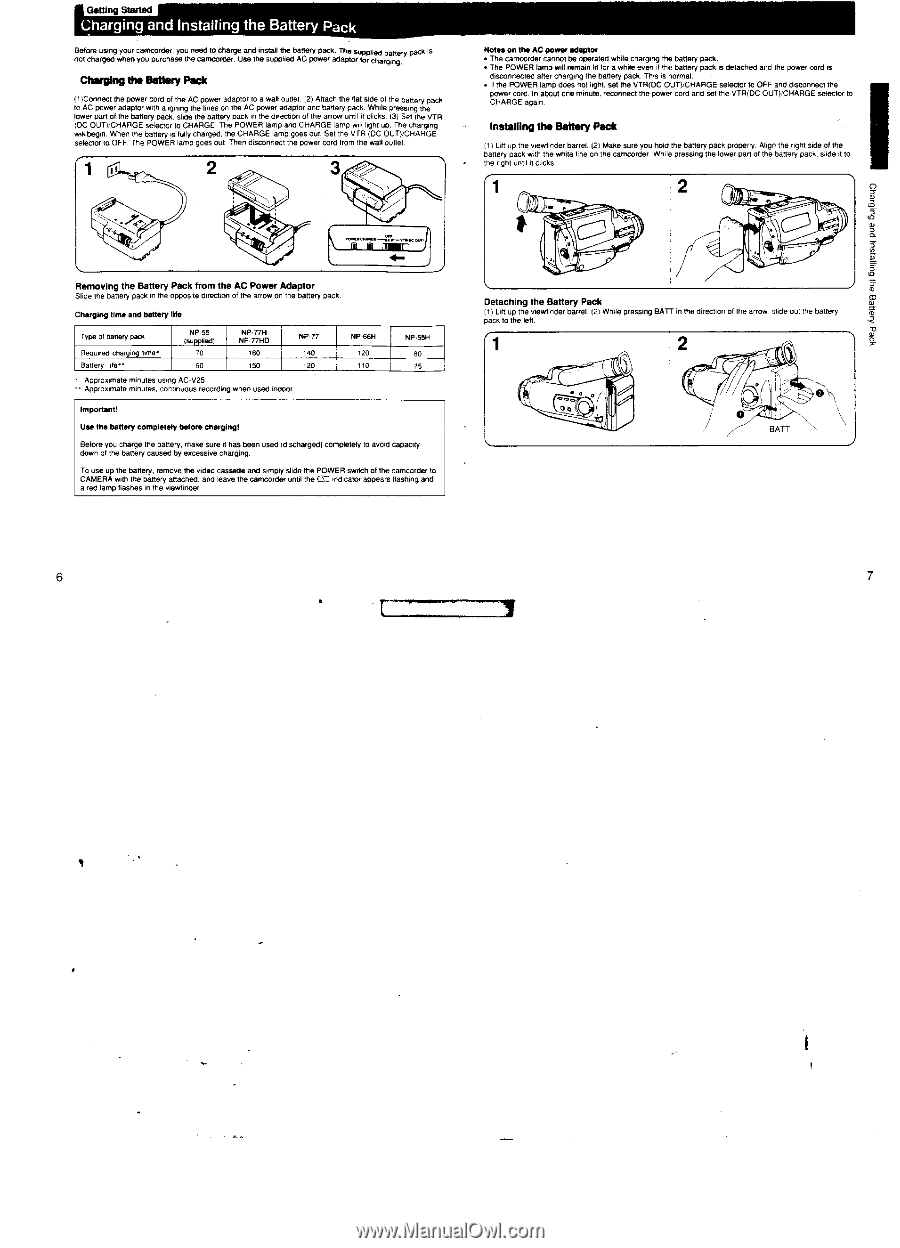
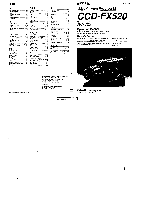
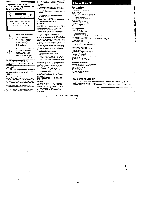
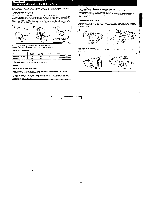
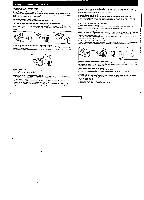
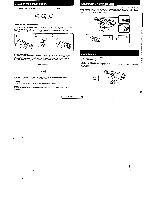
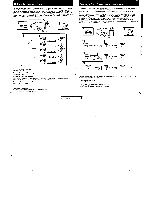
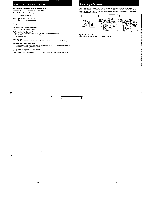
Getting Started Charging and Installing the Battery Pack Before using your camcorder. you need to charge and rnstall the battery pack. The supplied battery pack Is not charged when you purchase the camcorder. Use the supplied AC power adaptor for charging. Charging the Battery Pack 111Connect the power cord of the AC power adaptor to a wall outlet. (2) Attach the flat Ode of the banary pads to AC power adaptor wth aligning the lines on the AC power adaptor and battery pack. While pressing the lower part of the battery pack sloe the battery pack or the direction of the arrow until II clicks. 13) Set the VTR MC OUT) CHARGE selector to CHARGE. The POWER lamp and CHARGE lamp will light up. The chaning wabegin. When the battery is fully charged, the CHARGE lamp goes out. Set the VTR (DC OUT)'CHARGE selector to OFF. The POWER lamp goes out Then disconnect the power cord trom the wall outlet 2 3 I- osek--47-oiss, Removing the Battery Pack from the AC Power Adaptor Slide the battery pack m the opposite direction of the arrow on the battery pack. Charging time and battery life Type of battery pack Required charging timeBattery lifv. NP-55 (supplied, 70 60 NP,H NP-77HD 160 150 NP, 120 Approximate minutes using AC-V25 • Approximate minutes, continuous recording when used Indoor NP-603H 120 110 NP 55H 75 Important! Use the battery completely before chording! Before you charge the battery, make sure it has been used ldschargedl completely to avoid capacity down of the battery caused by excessive charging. To use up the battery, remove the video cassette and simply side the POWER switch of the camcorder to CAMERA with the battery attached, and leave the camcorder until the 07 ode., appears flashing and a red lamp hashes In the viewfinder Motes on the AC power adaptor • The camcorder cannot be operated white charging the battery pack. • The POWER lamp will remain lit fora while even if the battery pack is detached and the power cord is disconnected aher charging the battery pack. This is normal. • II the POWER lamp does not light. set the VTR(DC OUT)/CHARGE selector to OFF and disconnect the power cord. In about one minute, reconnect the power cord and set the VTR(DC OUThCHARGE selector to CHARGE again. Installing the Battery Pack LA, up the viewfinder barrel (21 Make sure you hold the battery pack properly. Align the right side of the battery pack with the white fine on the camcorder. WhIle pressing the lower own of the battery pack, slide it to the nght unfit ,' cficks 2 3, Detaching the Battery Pack II) Ult up the viewfinder barrel. 121 While pressing BATT in the direction of the arrow. slide out the battery pack to the ley. 2 rW 0 BATT
-
 1
1 -
 2
2 -
 3
3 -
 4
4 -
 5
5 -
 6
6 -
 7
7 -
 8
8 -
 9
9 -
 10
10 -
11
-
12
-
13
-
14
-
15
-
16
-
17
-
18
-
19
-
20
-
21
-
22
-
23
-
24
-
25
-
26
 |
 |