Sony DCR-HC26 Operating Guide - Page 39
When the PLAY/EDIT lamp lights, SELF TIMER, LCD BRT LCD bright, VOL* Volume - clock
 |
UPC - 027242688711
View all Sony DCR-HC26 manuals
Add to My Manuals
Save this manual to your list of manuals |
Page 39 highlights
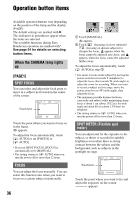
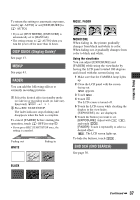
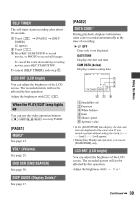
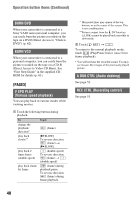
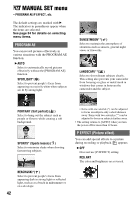
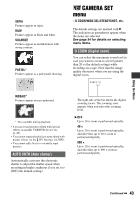
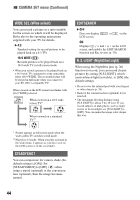
SELF TIMER The self-timer starts recording after about 10 seconds. 1 Touch TIMER]. t [PAGE2] t [SELF appears. 2 Touch . 3 Press REC START/STOP to record movies, or PHOTO to record still images. To cancel the count down during recording movies, press REC START/STOP. To cancel [SELF TIMER], redo step 1. LCD BRT (LCD bright) You can adjust the brightness of the LCD screen. The recorded picture will not be affected by this operation. Adjust the brightness with / . When the PLAY/EDIT lamp lights up You can use the video operation buttons ( / / / ) on every PAGE. [PAGE1] MENU* See page 41. VOL* (Volume) See page 25. END SCH (END SEARCH) See page 30. DISP GUIDE (Display Guide)* See page 17. [PAGE2] DATA CODE* During playback, displays information (data code) recorded automatically at the time of recording. B OFF Data code is not displayed. DATE/TIME Displays the date and time. CAM DATA (below) Displays camera setting data. 60min 0:00:00:00 AUTO 100 AWB F1. 8 9dB FN 1 2 3 654 A SteadyShot off B Exposure C White balance D Gain E Shutter speed F Aperture value • In the [DATE/TIME] data display, the date and time are displayed in the same area. If you record a picture without setting the clock and [--:--:--] will appear. • During Easy Handycam operation, you can set [DATE/TIME] only. LCD BRT (LCD bright) You can adjust the brightness of the LCD screen. The recorded picture will not be affected by this operation. Adjust the brightness with / . Continued , 39 Using the Menu
-
 1
1 -
2
-
3
-
4
-
5
-
6
-
7
-
8
-
9
-
10
-
11
-
12
-
13
-
14
-
15
-
16
-
17
-
18
-
19
-
20
-
21
-
22
-
23
-
24
-
25
-
26
-
27
-
28
-
29
-
30
-
31
-
32
-
33
-
 34
34 -
 35
35 -
 36
36 -
 37
37 -
 38
38 -
 39
39 -
 40
40 -
 41
41 -
 42
42 -
 43
43 -
 44
44 -
45
-
46
-
47
-
48
-
49
-
50
-
51
-
52
-
53
-
54
-
55
-
56
-
57
-
58
-
59
-
60
-
61
-
62
-
63
-
64
-
65
-
66
-
67
-
68
-
69
-
70
-
71
-
72
-
73
-
74
-
75
-
76
-
77
-
78
-
79
-
80
-
81
-
82
-
83
-
84
-
85
-
86
-
87
-
88
-
89
-
90
-
91
-
92
 |
 |
