Sony DCR-HC26 Operating Guide - Page 72
during USB Streaming., You cannot view the video recorded on a tape on the Macintosh computer. - drivers
 |
UPC - 027242688711
View all Sony DCR-HC26 manuals
Add to My Manuals
Save this manual to your list of manuals |
Page 72 highlights
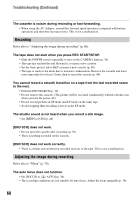
Troubleshooting (Continued) You cannot view the video your camcorder is seeing on the computer. • Disconnect the cable from the computer, turn on the camcorder, then connect it again. • Slide the POWER switch repeatedly to turn on the CAMERA lamp on your camcorder, and set [USB STREAM] to [ON] (p. 47). (Only when connected to the Windows computer with the USB cable) You cannot view the video recorded on a tape on the computer. • Disconnect the cable from the computer, then connect it again. • Slide the POWER switch repeatedly to turn on the PLAY/EDIT lamp on your camcorder and set [USB STREAM] to [ON] (p. 47). (Only when connected to the Windows computer with the USB cable) You cannot view the video recorded on a tape on the Macintosh computer. • When you connect your camcorder to a Macintosh computer using a USB cable, you cannot copy pictures recorded on a tape to the computer. To copy recordings from a tape, connect your camcorder to the computer with an i.LINK cable and use the standard software in the OS. The image on tape does not appear on the screen of the Windows computer during USB Streaming. • The USB driver has been registered incorrectly as the computer was connected to your camcorder before the installation of the USB driver was completed. Follow the procedure below to install the USB driver correctly. x For Windows Me 1 Check that your camcorder is connected to a computer. 2 Right-click [My Computer], then click [Properties]. The [System Properties] screen appears. 3 Click the [Device Manager] tab. 4 If the devices below are already installed, right-click them, then click [Remove] to delete them. - [USB Audio Device] in the [Sound, video and game controllers] folder - [USB Device] in the [Other devices] folder - [USB Composite Device] in the [Universal Serial Bus Controller] folder 5 When the [Confirm Device Removal] screen appears, click [OK]. 6 Turn off the power of your camcorder, disconnect the USB cable, then restart the computer. 7 Place the supplied CD-ROM in the disc drive of your computer. 72
-
 1
1 -
2
-
3
-
4
-
5
-
6
-
7
-
8
-
9
-
10
-
11
-
12
-
13
-
14
-
15
-
16
-
17
-
18
-
19
-
20
-
21
-
22
-
23
-
24
-
25
-
26
-
27
-
28
-
29
-
30
-
31
-
32
-
33
-
34
-
35
-
36
-
37
-
38
-
39
-
40
-
41
-
42
-
43
-
44
-
45
-
46
-
47
-
48
-
49
-
50
-
51
-
52
-
53
-
54
-
55
-
56
-
57
-
58
-
59
-
60
-
61
-
62
-
63
-
64
-
65
-
66
-
 67
67 -
 68
68 -
 69
69 -
 70
70 -
 71
71 -
 72
72 -
 73
73 -
 74
74 -
 75
75 -
 76
76 -
 77
77 -
78
-
79
-
80
-
81
-
82
-
83
-
84
-
85
-
86
-
87
-
88
-
89
-
90
-
91
-
92
 |
 |