Sony DCR-HC26 Operating Guide - Page 53
To check the recorded sound, Dubbing/Editing
 |
UPC - 027242688711
View all Sony DCR-HC26 manuals
Add to My Manuals
Save this manual to your list of manuals |
Page 53 highlights
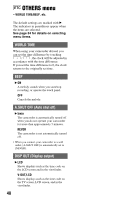
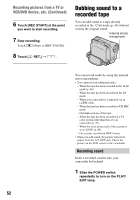
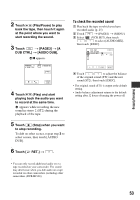
Dubbing/Editing 2 Touch (Play/Pause) to play back the tape, then touch it again at the point where you want to start recording the sound. 3 Touch t [PAGE3] t [A DUB CTRL] t [AUDIO DUB]. X appears. 60min A DUB CTRL 0:00:00:00 RET. AUDIO DUB 4 Touch (Play) and start playing back the audio you want to record at the same time. appears while recording the new sound in stereo 2 (ST2) during the playback of the tape. 5 Touch (Stop) when you want to stop recording. To dub on other scenes, repeat step 2 to select scenes, then touch [AUDIO DUB]. 6 Touch [ RET.] t . To check the recorded sound 1 Play back the tape on which you have recorded audio (p. 25). 2 Touch t [PAGE1] t [MENU]. 3 Select (VCR SET), then touch / to select [AUDIO MIX], then touch [EXEC]. VCR SET HiFi SOUND AUDIO MIX ST1 ST2 EXEC RET. 4 Touch / to adjust the balance of the original sound (ST1) and the new sound (ST2), then touch [EXEC]. • The original sound (ST1) is output at the default setting. • Audio balance adjustment returns to the default setting after 12 hours of turning the power off. • You can only record additional audio over a tape recorded on your camcorder. The sound may deteriorate when you dub audio on a tape recorded on other camcorders (including other camcorders (DCR-HC26)). 53
-
 1
1 -
2
-
3
-
4
-
5
-
6
-
7
-
8
-
9
-
10
-
11
-
12
-
13
-
14
-
15
-
16
-
17
-
18
-
19
-
20
-
21
-
22
-
23
-
24
-
25
-
26
-
27
-
28
-
29
-
30
-
31
-
32
-
33
-
34
-
35
-
36
-
37
-
38
-
39
-
40
-
41
-
42
-
43
-
44
-
45
-
46
-
47
-
 48
48 -
 49
49 -
 50
50 -
 51
51 -
 52
52 -
 53
53 -
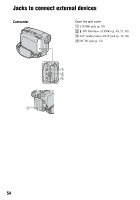 54
54 -
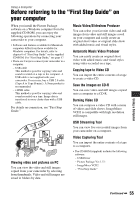 55
55 -
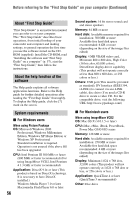 56
56 -
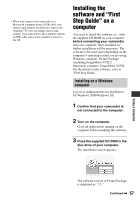 57
57 -
 58
58 -
59
-
60
-
61
-
62
-
63
-
64
-
65
-
66
-
67
-
68
-
69
-
70
-
71
-
72
-
73
-
74
-
75
-
76
-
77
-
78
-
79
-
80
-
81
-
82
-
83
-
84
-
85
-
86
-
87
-
88
-
89
-
90
-
91
-
92
 |
 |