Sony DSC-H9B Cyber-shot® Handbook
Sony DSC-H9B - Cyber-shot Digital Still Camera Manual
 |
View all Sony DSC-H9B manuals
Add to My Manuals
Save this manual to your list of manuals |
Sony DSC-H9B manual content summary:
- Sony DSC-H9B | Cyber-shot® Handbook - Page 1
Digital Still Camera Cyber-shot Handbook DSC-H7/H9 Before operating the unit, please read this Handbook thoroughly together with the "Instruction Manual" and the "Cyber-shot Step-up Guide", and retain them for future reference. © 2007 Sony Corporation VCLICK! Table of contents Basic Operations - Sony DSC-H9B | Cyber-shot® Handbook - Page 2
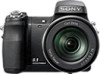
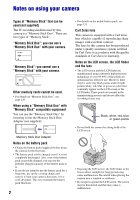
battery pack, see page 131. Carl Zeiss lens This camera is equipped with a Carl Zeiss lens which is capable of reproducing sharp images with excellent contrast. The lens for this camera for effective use. However, there may be some tiny black points and/or bright points (white, red, blue or - Sony DSC-H9B | Cyber-shot® Handbook - Page 3
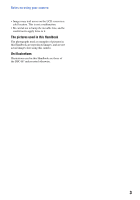
not to apply force to it. The pictures used in this Handbook The photographs used as examples of pictures in this Handbook are reproduced images, and are not actual images shot using this camera. On illustrations Illustrations used in this Handbook are those of the DSC-H7 unless noted otherwise. 3 - Sony DSC-H9B | Cyber-shot® Handbook - Page 4
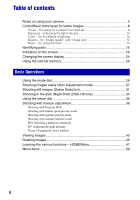
mode 27 Shooting still images (Scene Selection 31 Shooting in the dark (Night Shot) (DSC-H9 only 34 Using the wheel dial 35 Shooting with manual adjustment 36 Shooting with Program Shift Shooting with shutter speed priority mode Shooting with aperture priority mode Shooting with manual exposure - Sony DSC-H9B | Cyber-shot® Handbook - Page 5
anti-blur mode SETUP: Selecting the shooting settings Using functions for viewing Playing back images from the HOME screen 62 (Single Image): Playing back a single image (Index Display): Playing back a list of images (Slide Show): Playing back a series of images Viewing menu 65 (Delete): Deleting - Sony DSC-H9B | Cyber-shot® Handbook - Page 6
Grid Line AF Mode Digital Zoom Conversion Lens Shooting Settings - Shooting Settings 2 81 Flash Sync. Auto Orientation Auto Review Expanded Focus Clock Settings 83 Language Setting 84 Viewing images on a TV Viewing images on a TV 85 Viewing images by connecting your camera to a TV with the - Sony DSC-H9B | Cyber-shot® Handbook - Page 7
Printing images directly using a PictBridge compliant printer 108 Printing at a shop 111 Troubleshooting Troubleshooting 113 Warning indicators and messages 125 Others To use your camera abroad - Power sources 128 On the "Memory Stick 129 On the battery pack 131 On the battery charger 132 - Sony DSC-H9B | Cyber-shot® Handbook - Page 8
suddenly. Press the shutter AE/AF lock button halfway indicator down. flashing , lit/beeps Then press the shutter button fully down. To shoot a still image difficult to focus on t [Focus] (page 40) If the image looks blurred even after focusing, it may be because of camera shake. t See "Hints - Sony DSC-H9B | Cyber-shot® Handbook - Page 9
Scene Selection. • Select a higher ISO sensitivity to make the shutter speed faster, and press the shutter button before the subject moves. Notes • The anti-blur function is enabled in the factory default settings so that the camera shake is reduced automatically. However, this is not effective for - Sony DSC-H9B | Cyber-shot® Handbook - Page 10
Underexposure = too little light Darker image The exposure is automatically set to the proper value in the auto adjustment mode. However, you can adjust it manually using the functions below. Manual exposure: Allows you to adjust the shutter speed and aperture value manually (page 38). Adjusting EV - Sony DSC-H9B | Cyber-shot® Handbook - Page 11
of the exposure in the + (plus) direction is effective. Adjust in the + direction When shooting a darker overall image, the camera judges that the subject is dark and may set a brighter exposure for the image. In such cases, adjustment of the exposure in the - (minus) direction is effective. Adjust - Sony DSC-H9B | Cyber-shot® Handbook - Page 12
adjust color tones manually with [White Bal] (page 57). Quality On "image quality" and "image size" A digital image is made up camera, the fine detail and data processing time differ when the image is printed or displayed on a computer screen. Description of the pixels and the image size 1 Image - Sony DSC-H9B | Cyber-shot® Handbook - Page 13
ControlBasic techniques for better images The default settings are marked with . Image size 8M (3264×2448) 3:21) (3264×2176) 5M (2592×1944) 3M (2048×1536) VGA (640×480) Guidelines For prints up to A3 (11×17") Shoot in 3:2 aspect ratio For prints up to A4 (8.5×11") For prints up to 10×15 cm (4×6") - Sony DSC-H9B | Cyber-shot® Handbook - Page 14
open in a dark place. Camera Eye Retina How can the "Red-eye phenomenon" be reduced? • Set [Red Eye Reduction] to shutter speed might be slower under low-light conditions, or in a dark place. In that case, use a tripod or hold your shooting arm firmly at your side after pressing the shutter button - Sony DSC-H9B | Cyber-shot® Handbook - Page 15
parts See the pages in parentheses for details of operation. DSC-H9 only A POWER button/POWER lamp B Mode dial (26) C Shutter button (27) D Remote sensor E AF illuminator (78)/Self-timer lamp (29) F Lens G Flash (29) H Finder adjustment dial • When you select with the FINDER/LCD button to shoot - Sony DSC-H9B | Cyber-shot® Handbook - Page 16
various shooting situation. E MENU button (49) F Control button (inside)/Wheel dial (outside) (35) Menu on: v/V/b/B/z (49) Menu off: DISP/ / / (24, 29) 16 • You cannot charge the battery pack by connecting your camera to the AC-LS5K AC Adaptor. Use the battery charger to charge the battery pack - Sony DSC-H9B | Cyber-shot® Handbook - Page 17
the slide show by pressing this button. D MENU button (49) E SHUTTER button (27) • Cannot press halfway down. F For shooting: Zoom (W/T) button (28) For viewing: / (Playback zoom) button/ (Index) button (43, 44) • You cannot zoom in fast even if you press the zoom button of the Remote Control fully - Sony DSC-H9B | Cyber-shot® Handbook - Page 18
When you shoot in bright lighting conditions, such as outdoors, we recommend that you use the lens hood to reduce the image quality The AF illuminator light may be blocked. - The infrared light of Night Shot may be blocked. (DSC-H9 only) - The flash light may be blocked, causing the shadow - Sony DSC-H9B | Cyber-shot® Handbook - Page 19
parts Storing the lens hood The lens hood can be attached in the reverse direction to store it with the camera shots or zoom-in shots on distant objects, attach a conversion lens. 1 Attach the adaptor ring. 2 Attach a conversion lens. • When shooting with the conversion lens, go through the settings - Sony DSC-H9B | Cyber-shot® Handbook - Page 20
for details of operation. When shooting still images Display BRK ±1.0 When shooting movies A Display E Indication Battery remaining Low battery warning (125) Image size (51) P S A M Mode dial/Menu (Scene Selection) (31) Mode dial (26) Night Shot (34) (DSC-H9 only) Indication White balance - Sony DSC-H9B | Cyber-shot® Handbook - Page 21
function activates automatically to reduce the picture noise. Shutter speed Aperture value Exposure Value (40) Recording time AF range finder frame indicator (40) Manual focus (42) Macro (29) Operation guide for shooting image Manual focus bar (42) C Display 96 00:00:00 REAR D Display C:32:00 - Sony DSC-H9B | Cyber-shot® Handbook - Page 22
When playing back movies A Display Indication Battery remaining Image size (51) VOL. B Display N 00:00:12 101-0012 2007 1 1 9:30 AM z PLAY z STOP BACK/ NEXT V VOLUME Protect (67) Volume (43) Print order (DPOF) mark (111) PictBridge connecting (109) Zoom scaling (43) PictBridge connecting (110 - Sony DSC-H9B | Cyber-shot® Handbook - Page 23
number/Number of images recorded in selected folder Change folder (69) • This does not appear when using internal memory. Metering mode (56) Flash White balance (57) C:32:00 ISO400 +2.0EV 500 F3.5 Self-diagnosis display (125) ISO number (39) Exposure Value (40) Shutter speed Aperture value 23 - Sony DSC-H9B | Cyber-shot® Handbook - Page 24
zoom. - When you are rotating still images. - During playback of movies • A large difference in the histogram displayed when shooting and during playback may occur when: - The flash strobes. - The shutter speed is slow or fast. • The histogram may not appear for images recorded using other cameras - Sony DSC-H9B | Cyber-shot® Handbook - Page 25
memory. This memory is not removable. Even when there is no "Memory Stick Duo" inserted in the camera, you can record images using this internal memory. • Movies with the image size set to [640(Fine)] cannot be recorded using the internal memory. When a "Memory Stick Duo" is inserted B [Recording - Sony DSC-H9B | Cyber-shot® Handbook - Page 26
the desired function. Mode dial Control button : Auto Adjustment mode for Still Image Allows easy shooting with the settings adjusted automatically (page 27). P: Program Auto* Allows you to shoot with the exposure adjusted automatically (both the shutter speed and the aperture value) (page - Sony DSC-H9B | Cyber-shot® Handbook - Page 27
) Mode dial Finder FINDER/LCD button Zoom button MENU button HOME button Shutter button Macro button DISP button Flash button Self-timer button z button v/V/b/B button Control button 1 Select the desired function from the mode dial. When shooting still images (Auto Adjustment mode): Select . When - Sony DSC-H9B | Cyber-shot® Handbook - Page 28
zooms slowly and pressing the button fully down zooms fast. • When the zoom scale exceeds 15×, the camera uses the Digital Zoom function. For details on the [Digital Zoom] settings and the image quality, see page 79. • Even if you press the button fully down, the camera zooms slowly while shooting - Sony DSC-H9B | Cyber-shot® Handbook - Page 29
drops when you shoot images in the Macro. Using the self-timer Press V ( ) on the control button repeatedly until the desired mode is selected. (No indicator): Not using the self-timer : Setting the 10-second delay self-timer : Setting the 2-second delay self-timer Press the shutter button, the self - Sony DSC-H9B | Cyber-shot® Handbook - Page 30
Shooting images easily (Auto Adjustment mode) Self-timer lamp To cancel, press V ( ) again. • Use the 2-second delay self-timer to prevent blur of an image made by the shaking of the camera when pressing the shutter button. Adjusting the angle of the LCD screen You can adjust the angle of the LCD - Sony DSC-H9B | Cyber-shot® Handbook - Page 31
the menu screen 1 Select SCN with the mode dial. 2 Press MENU button, and select from / / / by using b/B of the control button (page 49). 3 Shoot with the shutter button. • For details on mode, see next page. To cancel the Scene selection Set the mode dial to other than the mode of Scene Selection - Sony DSC-H9B | Cyber-shot® Handbook - Page 32
from the mode dial High Sensitivity Allows you to shoot images without a flash under low light conditions, reducing blur Shoots with backgrounds blur away, and the subject is sharpened. Advanced Sports Shooting Suitable for shooting scenes with fast movements such as sports. • While the shutter - Sony DSC-H9B | Cyber-shot® Handbook - Page 33
can use in Scene Selection For shooting an image appropriately according to the scene condition, a combination of functions is determined by the camera. Some functions are not available, depending on the Scene Selection mode. ( : you can select the desired setting) Macro Flash Face Detection Burst - Sony DSC-H9B | Cyber-shot® Handbook - Page 34
. Shutter button Mode dial Infrared ray emitter NIGHTSHOT switch 1 Set NIGHTSHOT switch to ON. and "Night Shot" indicators lights for about five seconds. 2 Shoot the image. To cancel the Night Shot function Set NIGHTSHOT switch to OFF. • While using the Night Shot function, the camera will - Sony DSC-H9B | Cyber-shot® Handbook - Page 35
when shooting with the manual adjustment modes (shutter speed priority mode, aperture priority mode, manual exposure mode), ISO sensitivity adjustment, the focus method adjustment or the EV adjustment. By turning the wheel dial, you can also easily view the next/previous image. Select Set Wheel - Sony DSC-H9B | Cyber-shot® Handbook - Page 36
Shooting with manual adjustment The camera automatically adjusts the focus and the exposure, however, you can manually adjust these settings. Mode dial Wheel dial MENU button z button HOME button Characteristics of "shutter speed" AF range finder frame indicator Exposure value Aperture value - Sony DSC-H9B | Cyber-shot® Handbook - Page 37
Shooting with manual adjustment Basic Operations 3 Shoot the image. To cancel Program Shift, turn the wheel dial to return the indication from P* to P. • You cannot shift the aperture value and shutter speed combination when the shutter button is pressed halfway down. • When the brightness changes - Sony DSC-H9B | Cyber-shot® Handbook - Page 38
an aperture from F4.5 to F8.0. 3 Shoot the image. • The shutter speed is automatically adjusted from 1/2000 to 8 seconds. • If the proper exposure is not obtained after making the settings, the setting value indicators on the screen flash when the shutter button is pressed halfway down. You can - Sony DSC-H9B | Cyber-shot® Handbook - Page 39
Shooting with manual 2 Press z on the control button. ISO value turns yellow. ISO shooting or exposure bracket is set, ISO can be selected only from Auto or from 80 to 400. • When shooting under brighter conditions, the camera automatically increases its tone reproduction and helps prevent images - Sony DSC-H9B | Cyber-shot® Handbook - Page 40
. 0EV: The exposure is determined automatically by the camera. Toward -: Darkens an image. 4 Press z. • For details on the exposure t page 14 • The compensation value can be set in 1/3EV increments (+2.0EV to -2.0EV). • If a subject is being shot in extremely bright or dark conditions, or the flash - Sony DSC-H9B | Cyber-shot® Handbook - Page 41
to the subject. • To set distance, see page 42. • When shooting a subject through a net or through window glass, it is difficult to get the proper focus in auto focus mode. In these cases, the manual focus mode is convenient. • AF stands for Auto Focus. • When you use Digital Zoom or AF Illuminator - Sony DSC-H9B | Cyber-shot® Handbook - Page 42
Shooting with manual adjustment To set button image shot. Wipe the lens clean using a soft cloth, etc. • Distance setting information in manual focus is approximate. If you point the lens up or down, the error increases. • The distance selection is limited according to the zoom scaling or the setting - Sony DSC-H9B | Cyber-shot® Handbook - Page 43
button HOME button (Playback zoom) button Wheel dial z button v/V/b/B button Control button (inside)/ Wheel dial (outside) 1 Press (Playback) button. • If you press (Playback) when the camera is powered off, the camera is turned on automatically and set to playback mode. To switch to the shooting - Sony DSC-H9B | Cyber-shot® Handbook - Page 44
, select the folder selection bar with b, then select the desired folder with v/V. • You can also access the index screen by selecting [ Index Display] from (View Images) on the HOME screen. • Each time you press (Index), the number of pictures on the index screen changes. 44 - Sony DSC-H9B | Cyber-shot® Handbook - Page 45
Basic Operations Deleting images (Index) button (Playback) button MENU button z button v/V/b/B button Control button 1 Press (Playback) button. 2 Press MENU while display in single-image mode or in index mode. 3 Select [Delete] with v on the control button. 4 Select the desired deletion - Sony DSC-H9B | Cyber-shot® Handbook - Page 46
Select [OK] with v, then press z. When you select [Multiple Images] Selects and deletes multiple images at once. 1 Select the images you want to delete, then press z. mark is checked in the checkbox of the image. Single Image Index Display 2 Press MENU. 3 Select [OK] with v, then press z. When - Sony DSC-H9B | Cyber-shot® Handbook - Page 47
. Category Item Guide 2 Select a category with b/B on the control button. 3 Select an item with v/V, then press z. • You cannot display the HOME screen when a PictBridge connection or a USB connection is made. • The camera is set to the shooting mode by pressing the shutter button halfway down. 47 - Sony DSC-H9B | Cyber-shot® Handbook - Page 48
75) Beep Initialize Function Guide Main Settings 2 (page 76) USB Connect Video Out COMPONENT Shooting Settings Shooting Settings 1 (page 78) AF Illuminator AF Mode Conversion Lens Grid Line Digital Zoom Shooting Settings 2 (page 81) Flash Sync. Auto Review Auto Orientation Expanded Focus - Sony DSC-H9B | Cyber-shot® Handbook - Page 49
the menu items Basic Operations MENU button 1 Press MENU to display the menu. z button v/V/b/B button Control button Function Guide Setting [Function Guide] to [Off] turns off the function guide (page 75). • The menu will be displayed only during shooting and playback mode. • Different items - Sony DSC-H9B | Cyber-shot® Handbook - Page 50
the camera mode. The shooting menu is available only in the shooting S A M Scene Menu for shooting (page 51) Scene Selection - - - - - * - Image Size Face Detection - - - can be set on the menu screen only on DSC-H7. To set Menu items on DSC-H9, press the buttons for each - Sony DSC-H9B | Cyber-shot® Handbook - Page 51
the Scene Selection mode Selects a Scene Selection mode within the menu. Images can be shot with settings adjusted for each situation (page 32). Image Size: Selecting the image size For still images Selects image size for shooting still images. For details, see pages 12, 13. For movie (Fine - Sony DSC-H9B | Cyber-shot® Handbook - Page 52
your subjects can be detected when you shoot images with Portrait. • When the camera detects more than subjects, the camera will judge which is the main subject and set focus by priority. • The frame which the focus is set will turn green by pressing the shutter button half way down. Even when the - Sony DSC-H9B | Cyber-shot® Handbook - Page 53
Selects whether the camera performs continuous shooting or not when you press the shutter button. (Normal) Does not shoot continuously. (Burst) Records up to 100 images in succession when you press and hold down the shutter button. BRK ±0.3EV BRK ±0.7EV BRK ±1.0EV • The flash is set to (Flash - Sony DSC-H9B | Cyber-shot® Handbook - Page 54
Bracket • The focus and white balance are adjusted for the first image, and these settings are also used for the other images. • You cannot select when the shutter speed is set at 1/3 second or slower. • When the exposure is manually adjusted (page 40), the exposure is shifted based on the adjusted - Sony DSC-H9B | Cyber-shot® Handbook - Page 55
the image, accompanied by effects. (Normal) (Vivid) Sets the image to bright and deep color. (Natural) Sets the image to quiet color. (Sepia) Sets the image to sepia color. (B & W) Sets the image to monochromatic color. • You can select only [Normal], [Sepia] or [B & W] when shooting movies - Sony DSC-H9B | Cyber-shot® Handbook - Page 56
the metering mode that sets which part of the subject to measure to determine the exposure. (Multi) Divides into multiple regions and measures each region. The camera determines a well-balanced exposure (Multi-pattern metering). (Center) Measures the center of the image, and determines the - Sony DSC-H9B | Cyber-shot® Handbook - Page 57
shooting Shooting menu For details on the operation 1 page 49 White Bal: Adjusting the color tones Adjusts the color tones according to the lighting condition in a situation, for example, when the colors of an image under incandescent lamp, or under bright lighting, such as in a photo studio. 57 - Sony DSC-H9B | Cyber-shot® Handbook - Page 58
turns black. When the white balance has been adjusted and stored in the memory, [One Push] is selected again. • If the indicator flashes while shooting, the white balance is either not set or cannnot be set. Use automatic white balance. • Do not shake or strike the camera while [One Push Set] is - Sony DSC-H9B | Cyber-shot® Handbook - Page 59
camera adjusts automatically. m -2.0EV Toward -: Makes the flash level lower. • The flash level can be set flash strobes two or more times before shooting to reduce the red-eye phenomenon when using takes about a second until the shutter clicks, hold the camera firmly to prevent the effects of - Sony DSC-H9B | Cyber-shot® Handbook - Page 60
the shutter button halfway down. Always activates the anti-blur function. You can stabilize images even when zooming up a far subject. • Battery consumption is faster than in [Shooting] mode. Does not use anti-blur mode. • In Auto Adjustment mode, the anti-blur mode will be set to [Shooting]. • For - Sony DSC-H9B | Cyber-shot® Handbook - Page 61
Shooting menu For details on the operation 1 page 49 SETUP: Selecting the shooting settings Select the settings for the shooting function. These items appearing in this menu are same ones as those in [ Shooting Settings] on the HOME screen. See page 48. Using functions for shooting 61 - Sony DSC-H9B | Cyber-shot® Handbook - Page 62
HOME screen You can select the ways to playback images. HOME button 1 Press HOME. 2 Select (View Images) with b/B on the control button. 3 Select the desired viewing method with v/V. (Single Image): Playing back a single image Displays the image shot last. This is the same as pressing the (Playback - Sony DSC-H9B | Cyber-shot® Handbook - Page 63
high-tempo slide show suitable for active scenes. A basic slide show switching images at a predetermined interval. • When set to [Simple], [Nostalgic], [Stylish] or [Active] only still images are displayed. • Music is not played (set to [Off]) during a [Normal] slide show. The sound of movies will - Sony DSC-H9B | Cyber-shot® Handbook - Page 64
sec 1 min Auto Sets the display interval of images for a [Normal] slide show. The interval is set to suit the selected [Effects] item. The setting is fixed to [ and 106. • You can record up to four pieces of music on the camera (The four preset pieces (Music 1-4) can be replaced with the ones you - Sony DSC-H9B | Cyber-shot® Handbook - Page 65
images This item has same function as [ Slide Show] on the HOME screen. See page 62. (Retouch): Retouching still images after shooting The trimmed image Using functions for viewing 1 Set the center point of the desired image to retouch with v/V/ b/B, then press MENU button. 2 Select [Level] with - Sony DSC-H9B | Cyber-shot® Handbook - Page 66
. 3 Select [OK] with v/V, then press z. Records the zoomed playback image. 1 Press W/T button to zoom in on the trimming range. 2 Set the point with v/V/b/B, then press MENU button. 3 Select the image size with v/V and press z. Select the image size to record with v/V, then press z again. 4 Select - Sony DSC-H9B | Cyber-shot® Handbook - Page 67
Select [Protect] with v/V, and select [Multiple Images] with b/B, then press z. In single-image mode: 3 Select the image you want to protect with b/B on the control button, then press z. is attached to the selected image. 4 Press b/B to display other images you want to protect, then press z. 5 Press - Sony DSC-H9B | Cyber-shot® Handbook - Page 68
[OK] with v, then press z. In index mode: 3 Select the image you want to protect with v/V/b/B on the control button, then press z. is attached to the selected image. 4 To protect other images, repeat step 3. 5 To select all the images in a folder, select the folder selection bar with b, then press - Sony DSC-H9B | Cyber-shot® Handbook - Page 69
on the control button, then press z. 4 Select [ ], then rotate the image with b/B. 5 Select [OK] with v/V, then press z. • You cannot rotate protected images or movies. • You may not be able to rotate images shot with other cameras. • When viewing images on a computer, the image rotation information - Sony DSC-H9B | Cyber-shot® Handbook - Page 70
on the HOME screen. Control button z button v/V/b/B button HOME button 1 Press HOME to display the HOME screen. 2 Select (Manage Memory) or (Settings) with b/B on the control button. 3 Select the desired item with v/V, then press z. 4 Press B and select the desired setting with v/V, then press z. 70 - Sony DSC-H9B | Cyber-shot® Handbook - Page 71
then press z. To cancel the setting change Select [Cancel] if it is one of the setting item, then press z. If not, press b on the control button. • This setting is maintained even when the power is turned off. • The camera is set to the shooting mode by pressing the shutter button halfway down. 71 - Sony DSC-H9B | Cyber-shot® Handbook - Page 72
70 Memory Tool - Memory Stick Tool This item appears only when a "Memory Stick Duo" is inserted in the camera including even protected images. 1 Select [Format] with v/V/b/B on the control button, then press z. with the camera. To delete a folder, use your computer, etc. • Up to 4,000 images can be - Sony DSC-H9B | Cyber-shot® Handbook - Page 73
For details on the operation 1 page 70 Change REC. Folder Changes the folder currently used for recording images. 1 Select [Change REC. Folder] with v/V/b/B on the control button, then press z. The folder selection screen appears. Customizing the settings 2 Select the desired folder with b/B, and - Sony DSC-H9B | Cyber-shot® Handbook - Page 74
when a "Memory Stick Duo" is inserted in the camera. Format Formats the internal memory. • Note that formatting irrevocably erases all data in the internal memory, including even protected images. 1 Select [Format] with v/V/b/B on the control button, then press z. The message "All data in internal - Sony DSC-H9B | Cyber-shot® Handbook - Page 75
button/press the shutter button. Off Turns off the beep/shutter sound. Function Guide When you operate the camera, the description of functions is displayed. On Displays the function guide. Off Does not display the function guide. Initialize Initializes the setting to the default setting - Sony DSC-H9B | Cyber-shot® Handbook - Page 76
, and the images in the recording folder on the camera are copied to the computer. (with Windows XP, Mac OS X) Mass Storage Establishes a Mass Storage connection between the camera and a computer or other USB device (page 92). Auto The camera recognizes automatically and sets up communication - Sony DSC-H9B | Cyber-shot® Handbook - Page 77
70 Video Out Sets the video signal output according to the TV color system of the connected video equipment. Different countries and regions use different TV color systems. If you want to view images on a TV screen, check page 87 for the TV color system of the country or region where the camera - Sony DSC-H9B | Cyber-shot® Handbook - Page 78
1 page 70 Shooting Settings - Shooting Settings 1 The default settings are marked with . AF Illuminator The AF illuminator supplies fill light to focus more easily on a subject in dark surroundings. The AF illuminator emits red light allowing the camera to focus easily when the shutter button is - Sony DSC-H9B | Cyber-shot® Handbook - Page 79
focusing. • Battery consumption is faster than in [Single] mode. • The AF mode is disabled when [Face Detection] is set to [On] or is selected in the Scene Selection. (Advanced Sports Shooting mode) Digital Zoom Selects the digital zoom mode. The camera enlarges the image using optical zoom (up - Sony DSC-H9B | Cyber-shot® Handbook - Page 80
For details on the operation 1 page 70 Conversion Lens Sets for achieving appropriate focus when attaching a conversion lens (not supplied). blocked, causing the shadow to appear. • The available zoom area is limited. • The available focusing area is limited. • For details, see the operating - Sony DSC-H9B | Cyber-shot® Handbook - Page 81
speed is too fast, the [Rear] setting effect may not be available. • When the red-eye reduction is selected, the red-eye reduction effect may not be available at slower shutter speeds. Auto Orientation When the camera is rotated to shoot a portrait image, the camera records its position change and - Sony DSC-H9B | Cyber-shot® Handbook - Page 82
Settings For details on the operation 1 page 70 Auto Review Displays the recorded image on the screen for approximately two seconds immediately after shooting a still image. On Use the Auto Review. Off Does not use Auto Review. • If you press the shutter button halfway down during this - Sony DSC-H9B | Cyber-shot® Handbook - Page 83
For details on the operation 1 page 70 Clock Settings Clock Settings Sets the date and time. 1 Select [ Clock Settings] from (Settings) on the HOME screen. 2 Select the date display format with v/V, then press z. 3 Select each item with b/B and set the numeric value with v/V, then press - Sony DSC-H9B | Cyber-shot® Handbook - Page 84
Settings For details on the operation 1 page 70 Language Setting Language Setting Selects the language to be used to display the menu items, warnings, and messages. 84 - Sony DSC-H9B | Cyber-shot® Handbook - Page 85
on the TV and set the TV/video input switch to "video". • For details, see the operating instructions supplied with the TV. 3 Press (Playback) to turn on the camera. Images shot with the camera appear on the TV screen. Press b/B on the control button to select the desired image. • When using your - Sony DSC-H9B | Cyber-shot® Handbook - Page 86
) button Green/Blue/Red Component video cable (not supplied) White/Red 2 To the multi connector • The cable for video jacks (Green/Blue/Red) is the same color as the respective jacks. 2 Turn on the TV and set the TV/video input switch to "video". • For details, see the operating instructions - Sony DSC-H9B | Cyber-shot® Handbook - Page 87
) to turn on the camera. Images shot with the camera appear on the TV screen. Press b/B on the control button to select the desired image. • Set [COMPONENT] to [HD(1080i)] in [Main Settings 2] by selecting (Settings) on the HOME screen (page 76). • When using your camera abroad, it may be necessary - Sony DSC-H9B | Cyber-shot® Handbook - Page 88
saved on your computer • Viewing photos organized by date • Editing images • Displaying the shooting locations of still images on maps online (To do this, your computer needs to be connected to the Internet.) • Creates a disc with the images shot (requires CD or DVD disc writing drive) • Printing - Sony DSC-H9B | Cyber-shot® Handbook - Page 89
connected to the camera. Recommended environment for copying images OS (pre- camera and your computer may not recover at the same time. Technical Support Additional information on this product and answers to frequently asked questions can be found at the Sony Customer Support Website. http://www.sony - Sony DSC-H9B | Cyber-shot® Handbook - Page 90
2000, do not connect the camera to the computer before installation then click [Next]. The [Location Settings] screen appears. 4 Select the [ button next to [I accept the terms of the license agreement] and then click [Next]. 5 Follow the instructions support. http://www.sony.net/registration/di 90 - Sony DSC-H9B | Cyber-shot® Handbook - Page 91
and the computer 1 Insert a "Memory Stick Duo" with recorded images into the camera. • When copying images in the internal memory, this step is unnecessary. 2 Insert the sufficiently charged battery pack in the camera, or connect the camera to a wall outlet (wall socket) with the AC Adaptor (not - Sony DSC-H9B | Cyber-shot® Handbook - Page 92
. "Connecting to Mass Storage..." appears on the screen of the camera. • If "Connecting to Mass Storage..." does not appear, set [USB Connect] to [Mass Storage] (page 76). • When the software (supplied) has been installed, the [Import Images] screen (page 98) may be displayed. In this case, you - Sony DSC-H9B | Cyber-shot® Handbook - Page 93
" folder. 5 Click the radio button next to [Nothing. I'm finished working with these pictures] to select it, then click [Next]. 1 2 The "Completing the Scanner and Camera Wizard" screen appears. 6 Click [Finish]. The wizard screen closes. • To continue copying other images, disconnect the cable for - Sony DSC-H9B | Cyber-shot® Handbook - Page 94
one, the original file data is deleted. To copy an image file to the computer without overwriting, change the file name to a different name and then copy the image file. However, note that if you change the file name (page 97), you may not be able to playback that image with your camera. 94 - Sony DSC-H9B | Cyber-shot® Handbook - Page 95
the cable for multi-use terminal • Removing a "Memory Stick Duo" • Inserting a "Memory Stick Duo" into the camera after copying images from the internal memory • Turning off the camera 1 Double-click on the tasktray. Double-click here 2 Click (USB Mass Storage Device) t [Stop]. 3 Confirm the - Sony DSC-H9B | Cyber-shot® Handbook - Page 96
• For more information about folders, see pages 69 and 72. A Folder containing image data recorded using a camera not equipped with the folder creating function B Folder containing image data recorded using this camera When no new folders are created, there are folders as follows: - "Memory Stick - Sony DSC-H9B | Cyber-shot® Handbook - Page 97
Stick Duo". • Step 1 is not necessary if the file name set with your camera has not been changed. • You may be unable to playback some images depending on the image size. • When an image file has been processed by a computer or when the image file was recorded using a model other than that of your - Sony DSC-H9B | Cyber-shot® Handbook - Page 98
, such as software updates. You can change the setting later. Exiting the "Picture Motion Browser" Click button in the top right corner of the screen. Basic instructions Follow these steps to import and view images from the camera. Importing images 1 Make sure "Media Check Tool"* is running. Look - Sony DSC-H9B | Cyber-shot® Handbook - Page 99
importing. • For instructions on changing the "Folder to be imported", refer to page 102. • The "My Pictures" folder is set as the default folder in "Viewed folders". • You can double-click a thumbnail to display the image by itself. 2 Viewing images in "Viewed folders" arranged by shooting date on - Sony DSC-H9B | Cyber-shot® Handbook - Page 100
display screen 4 Hour display screen • You can edit displayed images by clicking the button in the toolbar. Displaying images in full-screen mode To display a slide show of current images in full-screen mode, click the button. • To list images from a particular year or month, click that period on - Sony DSC-H9B | Cyber-shot® Handbook - Page 101
, press and hold down "Ctrl" key while clicking images. 2 Click the bar. button on the tool The [Create Data Disc] display appears. 3 Click [Start]. 4 Follow the display instructions to proceed with creating the data disc. • To add desired images, drag and drop on the [Create Data Disc] display - Sony DSC-H9B | Cyber-shot® Handbook - Page 102
registered. Changing the "Folder to be imported" To change the "Folder to be imported", access the "Import Settings" screen. Updating image registration information To update image information, choose [Update Database] from the [Tools] menu. • Updating the database may take a while. • If you rename - Sony DSC-H9B | Cyber-shot® Handbook - Page 103
To uninstall the "Picture Motion Browser" 1 Click [Start] t [Control Panel] (in Windows 2000, [Start] t [Settings] t [Control Panel]), then double-click [Add/ Remove Programs]. 2 Select [Sony Picture Utility], then click [Remove] (in Windows 2000, [Change/ Remove]) to execute the uninstallation. 103 - Sony DSC-H9B | Cyber-shot® Handbook - Page 104
) with b/B on the control button, select [ Music Tool] with v/V, then press z. 3 Select [Download Music] with v/V/b/B, then press z. The message "Connect to PC" appears. 4 Make a USB connection between the camera and your computer. 5 Start "Music Transfer". 6 Follow the instructions on the screen to - Sony DSC-H9B | Cyber-shot® Handbook - Page 105
computer connected to the camera. Recommended environment for copying images OS (pre-installed): advanced transfer (high speed transfer) as this camera is compatible with HiSpeed USB (USB 2.0 compliant). • There are three modes for a USB connection when connecting a computer, [Auto] (default setting - Sony DSC-H9B | Cyber-shot® Handbook - Page 106
image file in the folder containing the copied files to open that image Duo" into the camera after copying images from the internal memory • Turning off the camera Drag and drop the on CDs • Preset-music saved on this camera To install "Music Transfer" • Shut down Support Additional information on this product and - Sony DSC-H9B | Cyber-shot® Handbook - Page 107
the images. You can insert the date on the image and print it (page 102). Printing at a shop (page 111) You can take a "Memory Stick Duo" containing images shot with your camera to a photo printing service shop. You can make a (Print order) mark on images which you want to print out in advance. 107 - Sony DSC-H9B | Cyber-shot® Handbook - Page 108
with the cable for multi-use terminal. When connecting the camera to a printer that is recognized when [USB Connect] is set to [Auto], Stage 1 is unnecessary. MENU button Control button HOME button • It is recommended to use a fully charged battery pack to prevent the power from turning off partway - Sony DSC-H9B | Cyber-shot® Handbook - Page 109
by selecting the folder selection bar with b and attaching a mark on the folder. Stage 4: Printing 1 Select print settings with the control button. Printing still images The camera is set to playback mode, then an image and the print menu appear on the screen. [Quantity] When the [Layout] is - Sony DSC-H9B | Cyber-shot® Handbook - Page 110
[1-up/Border]: Select the number of sets of images that you want to print as an index image. If you selected [This Image] in step 1, select the number of the same image you want to print side by side on a sheet as an index image. • The designated number of images may not all fit onto a single sheet - Sony DSC-H9B | Cyber-shot® Handbook - Page 111
at a shop You can take a "Memory Stick Duo" containing images shot with your camera to a photo printing service shop. As long as the shop supports photo printing services conforming to the DPOF, you can make a (Print order) mark on images in advance so that you do not need to reselect them when you - Sony DSC-H9B | Cyber-shot® Handbook - Page 112
mode or in index mode. 2 Select [DPOF] with v/V and select [Multiple Images] with b/B, then press z. 3 Select an image to mark with the control button, then press z. mark is attached to the selected image. Single Image Index Display 4 Press MENU. 5 Select [OK] with v, then press z. mark appears - Sony DSC-H9B | Cyber-shot® Handbook - Page 113
and cause or the appropriate corrective action. Battery pack and power 114 "Memory Stick Duo" 121 Shooting still images/movies 114 Internal memory 121 Viewing images 118 Printing 122 Troubleshooting Deleting/Editing images 118 PictBridge compliant printer 122 Computers 119 Others - Sony DSC-H9B | Cyber-shot® Handbook - Page 114
. Cannot charge the battery pack. • You cannot charge the battery pack using the AC Adapter (not supplied). Shooting still images/movies The screen does not turn on even when the power is turned on. • The finder is turned on. Turn on the LCD screen using the FINDER/LCD button. The image not clear on - Sony DSC-H9B | Cyber-shot® Handbook - Page 115
. • The smart zoom cannot be used when the image size is set to [8M] or [3:2]. • The digital zoom cannot be used while shooting movies. • You cannot use the Digital Zoom when [Face Detection] is set to [On] or (Advanced Sports Shooting mode) is selected in the Scene Selection. 115 Troubleshooting - Sony DSC-H9B | Cyber-shot® Handbook - Page 116
use the flash when: - [REC Mode] is set to [Burst] or Exposure Bracket (page 53). - (High Sensitivity mode), (Advanced Sports Shooting mode), (Twilight mode) or (Fireworks mode) is selected in the Scene mode (page 33). - Shooting movies. - Night Shot (DSC-H9 only) • Set the flash to (Flash forced on - Sony DSC-H9B | Cyber-shot® Handbook - Page 117
(page 2). Cannot shoot images in succession. • The internal memory or "Memory Stick Duo" is full. Delete unnecessary images (page 45). • The battery level is low. Install charged battery pack. • The camera is in Night Shot mode (DSC-H9 only). Cancel Night Shot mode (page 34). 117 Troubleshooting - Sony DSC-H9B | Cyber-shot® Handbook - Page 118
Troubleshooting Viewing images Your camera cannot playback images. • Press (Playback) button (page 43). • The folder/file name has been changed on your computer (page 97). • When an image file has been processed by a computer or when the image file was recorded using a model other than that of your - Sony DSC-H9B | Cyber-shot® Handbook - Page 119
Sony should contact those manufacturers. • If "Memory Stick PRO Duo" is not supported, connect the camera camera. • Turn on the camera. • When the battery level is low, install the charged battery pack or use the AC adaptor (not supplied) (page 91). • Set Right-click [ Sony DSC], then click [ - Sony DSC-H9B | Cyber-shot® Handbook - Page 120
Troubleshooting You cannot copy images. • Connect the camera and your computer correctly making a USB connection (page 92). • Follow the designated copy procedure for your OS (pages 92 and 105). • When you shoot images with a "Memory Stick Duo" formatted by a computer, you may not be able to copy - Sony DSC-H9B | Cyber-shot® Handbook - Page 121
"Picture Motion Browser" to register it in "Viewed folders" (page 102). The date of all imported images is displayed differently from the date on the calendar. • The date on the camera is not set correctly. Set the date and time correctly (page 83). is displays on the screen. • The recorded data is - Sony DSC-H9B | Cyber-shot® Handbook - Page 122
to the camera. • Set [USB Connect] to [PictBridge] (page 76). • Disconnect and connect the cable for multi-use terminal again. If an error message is indicated on the printer, refer to the operating instructions supplied with the printer. Cannot print images. • Check that the camera and the - Sony DSC-H9B | Cyber-shot® Handbook - Page 123
on the printer. Consult the printer manufacturer. is printed on the date-inserted part of the image. • Images that do not have the recording data cannot be printed with the date inserted. Set [Date] to [Off] and print the image again (page 109). Cannot select the print size. • Consult the printer - Sony DSC-H9B | Cyber-shot® Handbook - Page 124
does not move when you turn off the camera. • The battery pack is discharged. Replace it with a charged battery pack. The camera becomes warm when you use it for a long time. • This is not a malfunction. The Clock Set screen appears when you turn on the camera. • Set the date and time again (page 83 - Sony DSC-H9B | Cyber-shot® Handbook - Page 125
. If you are unable to solve the problem even after trying the following corrective actions a few times, your camera may need repair. Contact your Sony dealer or local authorized Sony service facility. C:32:ss • There is trouble with your camera's hardware. Turn the power off and on again. C:13 - Sony DSC-H9B | Cyber-shot® Handbook - Page 126
You cannot create any folders if this is the case. File error • An error occurred while the image was playing back. Read only folder • You have selected a folder that cannot be set as a recording folder on your camera. Select another folder (page 73). File protect • Release the protection (page 67 - Sony DSC-H9B | Cyber-shot® Handbook - Page 127
The camera is playing back images image. Metering mode operations are not available • The metering mode is unavailable under these settings. Burst is invalid • The burst is unavailable under these settings. Self-Timer is invalid • The self-timer is unavailable under these settings. Troubleshooting - Sony DSC-H9B | Cyber-shot® Handbook - Page 128
abroad - Power sources You can use your camera, the battery charger (supplied), and the AC-LS5K AC Adaptor (not supplied) in any country or region where the power supply is within 100 V to 240 V AC, 50/ - Sony DSC-H9B | Cyber-shot® Handbook - Page 129
that requires MagicGate functions cannot be performed with this camera. *2 Supports high-speed data transfer using a parallel interface. a "Memory Stick Duo" (not supplied) • You cannot record, edit or delete images if you slide the write-protect switch to LOCK with a fine-tipped object. Terminal - Sony DSC-H9B | Cyber-shot® Handbook - Page 130
) "Memory Stick PRO Duo" with a capacity up to 8 GB have been confirmed to operate properly with this camera. Notes on using "Memory Stick Micro" (not supplied) • To use a "Memory Stick Micro" with this camera, be sure to insert the "Memory Stick Micro" into an "M2" Adaptor as large as of Duo size - Sony DSC-H9B | Cyber-shot® Handbook - Page 131
it in your camera immediately before you start shooting. • The battery pack will run out quickly if you use the flash or zoom frequently. • We recommend having spare battery packs handy for two or three times the expected shooting time, and making trial shots before taking the actual shots. • Do not - Sony DSC-H9B | Cyber-shot® Handbook - Page 132
On the battery charger On the battery charger • Do not charge any other battery pack other than the NP-BG type battery packs in the battery charger supplied with your camera. Batteries other than the specified kind may leak, overheat, or explode if you attempt to charge them, posing a risk of injury - Sony DSC-H9B | Cyber-shot® Handbook - Page 133
Adjusting EV 24 Advanced Sports Shooting mode 32 AE/AF lock indicator............27 AF Illuminator 78 AF Mode 79 AF range finder frame ..........41 Aperture 10 Auto Adjustment mode.........27 Auto Focus 8 Auto Orientation 81 Auto Review 82 B B & W 55 Battery charger 132 battery pack 131 - Sony DSC-H9B | Cyber-shot® Handbook - Page 134
Night Shot 34 NR slow shutter 21 NTSC 77 O One Push 58 One Push Set 58 Optical zoom 28, Settings 75 SETUP 61 Sharpness 60 Shooting 51 Movies 27, 28 Still image 27 Shooting Settings 1 78 Shooting Settings 2 81 Shooting with manual adjustment 36 Shutter speed 10 Single 79 Single Image - Sony DSC-H9B | Cyber-shot® Handbook - Page 135
metering cross hairs......56 SteadyShot 60 T Trimming 66 Troubleshooting 113 TV 85 Twilight mode 32 Twilight Portrait mode ..........32 U Underexposure 10 USB Connect 76 Using your camera abroad 128 V VGA 13 Video Out 77 Viewing images 43 Viewing menu 65 Vivid 55 Volume 43 W Warning - Sony DSC-H9B | Cyber-shot® Handbook - Page 136
Public License (hereinafter referred to as "LGPL") are included in the camera. This informs you that you have a right to have access to, is provided on the web. Use the following URL to download it. http://www.sony.net/Products/Linux/ We would prefer you do not contact us about the contents of - Sony DSC-H9B | Cyber-shot® Handbook - Page 137
Additional information on this product and answers to frequently asked questions can be found at our Customer Support Website.
-
 1
1 -
 2
2 -
 3
3 -
 4
4 -
 5
5 -
 6
6 -
 7
7 -
8
-
9
-
10
-
11
-
12
-
13
-
14
-
15
-
16
-
17
-
18
-
19
-
20
-
21
-
22
-
23
-
24
-
25
-
26
-
27
-
28
-
29
-
30
-
31
-
32
-
33
-
34
-
35
-
36
-
37
-
38
-
39
-
40
-
41
-
42
-
43
-
44
-
45
-
46
-
47
-
48
-
49
-
50
-
51
-
52
-
53
-
54
-
55
-
56
-
57
-
58
-
59
-
60
-
61
-
62
-
63
-
64
-
65
-
66
-
67
-
68
-
69
-
70
-
71
-
72
-
73
-
74
-
75
-
76
-
77
-
78
-
79
-
80
-
81
-
82
-
83
-
84
-
85
-
86
-
87
-
88
-
89
-
90
-
91
-
92
-
93
-
94
-
95
-
96
-
97
-
98
-
99
-
100
-
101
-
102
-
103
-
104
-
105
-
106
-
107
-
108
-
109
-
110
-
111
-
112
-
113
-
114
-
115
-
116
-
117
-
118
-
119
-
120
-
121
-
122
-
123
-
124
-
125
-
126
-
127
-
128
-
129
-
130
-
131
-
132
-
133
-
134
-
135
-
136
-
137
 |
 |

© 2007 Sony Corporation
3-196-620-
11
(1)
Digital Still Camera
Cyber-shot Handbook
DSC-H7/H9
Before operating the unit, please read this
Handbook thoroughly together with the
“Instruction Manual”
and the
“Cyber-shot
Step-up Guide”
, and retain them for future
reference.
Table of contents
Basic Operations
Using functions for
shooting
Using functions for
viewing
Customizing the settings
Viewing images on a TV
Using your computer
Printing still images
Troubleshooting
Others
Index
V
CLICK!
GB