Sony DSC-H9B Cyber-shot® Handbook - Page 68
DPOF: Adding a Print order mark, (Print): Printing images using a printer, To cancel the protection
 |
View all Sony DSC-H9B manuals
Add to My Manuals
Save this manual to your list of manuals |
Page 68 highlights
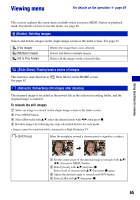
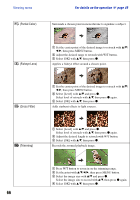
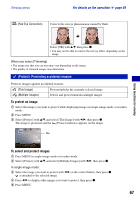
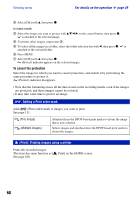
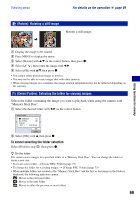
Viewing menu For details on the operation 1 page 49 6 Select [OK] with v, then press z. In index mode: 3 Select the image you want to protect with v/V/b/B on the control button, then press z. is attached to the selected image. 4 To protect other images, repeat step 3. 5 To select all the images in a folder, select the folder selection bar with b, then press z. is attached to the selected folder. 6 Press MENU. 7 Select [OK] with v, then press z. (Protect) indicator appears on the selected images. To cancel the protection Select the image for which you want to cancel protection, and unlock it by performing the same procedure to protect it. (Protect) indicator disappears. • Note that the formatting erases all the data stored on the recording media, even if the images are protected, and these images cannot be restored. • It may take some time to protect an image. : Adding a Print order mark Adds (Print order) mark to images you want to print. See page 111. (This Image) (Multiple Images) Attaches/clears the DPOF-based print marks to (from) the image that is now selected. Selects images and attaches/clears the DPOF-based print marks to (from) the images. (Print): Printing images using a printer Prints the recorded images. This item has same function as [ See page 108. Print] on the HOME screen. 68
-
 1
1 -
2
-
3
-
4
-
5
-
6
-
7
-
8
-
9
-
10
-
11
-
12
-
13
-
14
-
15
-
16
-
17
-
18
-
19
-
20
-
21
-
22
-
23
-
24
-
25
-
26
-
27
-
28
-
29
-
30
-
31
-
32
-
33
-
34
-
35
-
36
-
37
-
38
-
39
-
40
-
41
-
42
-
43
-
44
-
45
-
46
-
47
-
48
-
49
-
50
-
51
-
52
-
53
-
54
-
55
-
56
-
57
-
58
-
59
-
60
-
61
-
62
-
 63
63 -
 64
64 -
 65
65 -
 66
66 -
 67
67 -
 68
68 -
 69
69 -
 70
70 -
 71
71 -
 72
72 -
 73
73 -
74
-
75
-
76
-
77
-
78
-
79
-
80
-
81
-
82
-
83
-
84
-
85
-
86
-
87
-
88
-
89
-
90
-
91
-
92
-
93
-
94
-
95
-
96
-
97
-
98
-
99
-
100
-
101
-
102
-
103
-
104
-
105
-
106
-
107
-
108
-
109
-
110
-
111
-
112
-
113
-
114
-
115
-
116
-
117
-
118
-
119
-
120
-
121
-
122
-
123
-
124
-
125
-
126
-
127
-
128
-
129
-
130
-
131
-
132
-
133
-
134
-
135
-
136
-
137
 |
 |