Sony DSC-H9B Cyber-shot® Handbook - Page 102
Other functions, Saving images with the date
 |
View all Sony DSC-H9B manuals
Add to My Manuals
Save this manual to your list of manuals |
Page 102 highlights
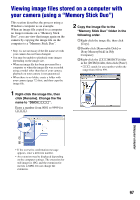
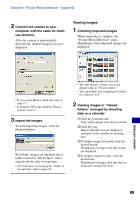
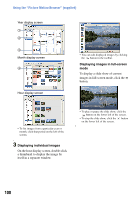
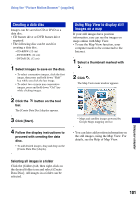
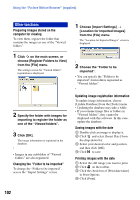
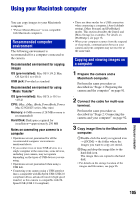
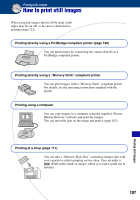
Using the "Picture Motion Browser" (supplied) Other functions Preparing images stored on the computer for viewing To view them, register the folder that contains the images as one of the "Viewed folders". 1 Click on the main screen, or choose [Register Folders to View] from the [File] menu. The settings screen for "Viewed folders" registration is displayed. 1 Choose [Import Settings] t [Location for Imported Images] from the [File] menu. The "Location for Imported Images" screen is displayed. 2 Choose the "Folder to be imported". • You can specify the "Folder to be imported" from folders registered as "Viewed folders". 2 Specify the folder with images for importing to register the folder as one of the "Viewed folders". 3 Click [OK]. The image information is registered in the database. • Images in any subfolders of "Viewed folders" are also registered. Changing the "Folder to be imported" To change the "Folder to be imported", access the "Import Settings" screen. Updating image registration information To update image information, choose [Update Database] from the [Tools] menu. • Updating the database may take a while. • If you rename image files or folders in "Viewed folders", they cannot be displayed with this software. In this case, update the database. Saving images with the date 1 Double-click an image to display it. 2 Click and select [Insert Date] from the drop-down list. 3 Select your desired color and position, and then click [OK]. 4 Click to save. Printing images with the date 1 Select the still image you want to print. 2 Click on the toolbar. 3 Click the check box of [Print date taken] in Print Options. 4 Click [Print]. 102
-
 1
1 -
2
-
3
-
4
-
5
-
6
-
7
-
8
-
9
-
10
-
11
-
12
-
13
-
14
-
15
-
16
-
17
-
18
-
19
-
20
-
21
-
22
-
23
-
24
-
25
-
26
-
27
-
28
-
29
-
30
-
31
-
32
-
33
-
34
-
35
-
36
-
37
-
38
-
39
-
40
-
41
-
42
-
43
-
44
-
45
-
46
-
47
-
48
-
49
-
50
-
51
-
52
-
53
-
54
-
55
-
56
-
57
-
58
-
59
-
60
-
61
-
62
-
63
-
64
-
65
-
66
-
67
-
68
-
69
-
70
-
71
-
72
-
73
-
74
-
75
-
76
-
77
-
78
-
79
-
80
-
81
-
82
-
83
-
84
-
85
-
86
-
87
-
88
-
89
-
90
-
91
-
92
-
93
-
94
-
95
-
96
-
 97
97 -
 98
98 -
 99
99 -
 100
100 -
 101
101 -
 102
102 -
 103
103 -
 104
104 -
 105
105 -
 106
106 -
 107
107 -
108
-
109
-
110
-
111
-
112
-
113
-
114
-
115
-
116
-
117
-
118
-
119
-
120
-
121
-
122
-
123
-
124
-
125
-
126
-
127
-
128
-
129
-
130
-
131
-
132
-
133
-
134
-
135
-
136
-
137
 |
 |
