Sony DSC-HX90V Help Guide (Printable PDF) - Page 114
Smile/Face Detect.
 |
View all Sony DSC-HX90V manuals
Add to My Manuals
Save this manual to your list of manuals |
Page 114 highlights
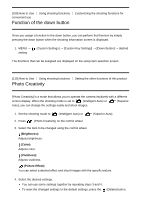
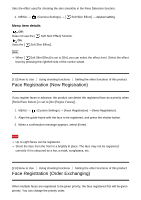
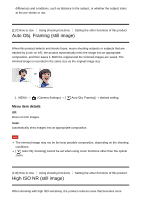
(Brightness), (Color) and (Vividness) are set to [AUTO], and Effect) is set to . (Picture 5. For shooting still images: Press the shutter button. When recording movies: Press the MOVIE button to start recording. Note When you record movies using the [Photo Creativity] function, you cannot change any settings during the recording. If you switch the shooting mode to [Intelligent Auto] mode or [Superior Auto] mode, or turn off the product, the settings you have changed revert to the default settings. When the shooting mode is set to [Superior Auto], and you use [Photo Creativity], the product does not perform the overlay processing of images. [111] How to Use Using shooting functions Setting the other functions of this product Smile/Face Detect. Detects the faces of your subjects and adjusts the focus, exposure, flash settings and performs image processing automatically. 1. MENU → (Camera Settings) → [Smile/Face Detect.] → desired setting. Menu item details Off: Does not use the Face Detection function. On (Regist. Faces): Detects the registered face with higher priority using [Face Registration]. On: Detects a face without giving higher priority to the registered face. Smile Shutter: Automatically detects and shoots a smile. Face Detection frame When the product detects a face, the gray face detection frame appears. When the product determines that autofocus is enabled, the face detection frame turns white. When you press the shutter button halfway down, the frame turns green. In case you have registered the priority order for each face using [Face Registration], the product automatically selects the first prioritized face and the face detection frame over that face turns white. The face detection frames of other registered faces turn reddish-
-
 1
1 -
2
-
3
-
4
-
5
-
6
-
7
-
8
-
9
-
10
-
11
-
12
-
13
-
14
-
15
-
16
-
17
-
18
-
19
-
20
-
21
-
22
-
23
-
24
-
25
-
26
-
27
-
28
-
29
-
30
-
31
-
32
-
33
-
34
-
35
-
36
-
37
-
38
-
39
-
40
-
41
-
42
-
43
-
44
-
45
-
46
-
47
-
48
-
49
-
50
-
51
-
52
-
53
-
54
-
55
-
56
-
57
-
58
-
59
-
60
-
61
-
62
-
63
-
64
-
65
-
66
-
67
-
68
-
69
-
70
-
71
-
72
-
73
-
74
-
75
-
76
-
77
-
78
-
79
-
80
-
81
-
82
-
83
-
84
-
85
-
86
-
87
-
88
-
89
-
90
-
91
-
92
-
93
-
94
-
95
-
96
-
97
-
98
-
99
-
100
-
101
-
102
-
103
-
104
-
105
-
106
-
107
-
108
-
 109
109 -
 110
110 -
 111
111 -
 112
112 -
 113
113 -
 114
114 -
 115
115 -
 116
116 -
 117
117 -
 118
118 -
 119
119 -
120
-
121
-
122
-
123
-
124
-
125
-
126
-
127
-
128
-
129
-
130
-
131
-
132
-
133
-
134
-
135
-
136
-
137
-
138
-
139
-
140
-
141
-
142
-
143
-
144
-
145
-
146
-
147
-
148
-
149
-
150
-
151
-
152
-
153
-
154
-
155
-
156
-
157
-
158
-
159
-
160
-
161
-
162
-
163
-
164
-
165
-
166
-
167
-
168
-
169
-
170
-
171
-
172
-
173
-
174
-
175
-
176
-
177
-
178
-
179
-
180
-
181
-
182
-
183
-
184
-
185
-
186
-
187
-
188
-
189
-
190
-
191
-
192
-
193
-
194
-
195
-
196
-
197
-
198
-
199
-
200
-
201
-
202
-
203
-
204
-
205
-
206
-
207
-
208
-
209
-
210
-
211
-
212
-
213
-
214
-
215
-
216
-
217
-
218
-
219
 |
 |