Sony DSC-HX90V Help Guide (Printable PDF) - Page 130
Rotate, Protect
 |
View all Sony DSC-HX90V manuals
Add to My Manuals
Save this manual to your list of manuals |
Page 130 highlights
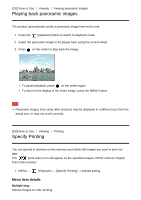
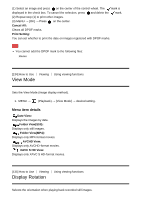
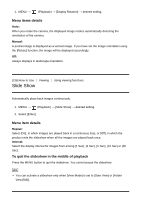
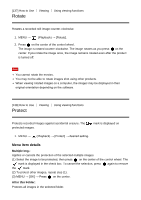
[137] How to Use Rotate Viewing Using viewing functions Rotates a recorded still image counter-clockwise. 1. MENU → (Playback) → [Rotate]. 2. Press on the center of the control wheel. The image is rotated counter-clockwise. The image rotates as you press on the center. If you rotate the image once, the image remains rotated even after the product is turned off. Note You cannot rotate the movies. You may not be able to rotate images shot using other products. When viewing rotated images on a computer, the images may be displayed in their original orientation depending on the software. [138] How to Use Viewing Using viewing functions Protect Protects recorded images against accidental erasure. The protected images. mark is displayed on 1. MENU → (Playback) → [Protect] → desired setting. Menu item details Multiple Img.: Applies or cancels the protection of the selected multiple images. (1) Select the image to be protected, then press on the center of the control wheel. The mark is displayed in the check box. To cancel the selection, press again to remove the mark. (2) To protect other images, repeat step (1). (3) MENU → [OK] → Press on the center. All in this Folder: Protects all images in the selected folder.
-
 1
1 -
2
-
3
-
4
-
5
-
6
-
7
-
8
-
9
-
10
-
11
-
12
-
13
-
14
-
15
-
16
-
17
-
18
-
19
-
20
-
21
-
22
-
23
-
24
-
25
-
26
-
27
-
28
-
29
-
30
-
31
-
32
-
33
-
34
-
35
-
36
-
37
-
38
-
39
-
40
-
41
-
42
-
43
-
44
-
45
-
46
-
47
-
48
-
49
-
50
-
51
-
52
-
53
-
54
-
55
-
56
-
57
-
58
-
59
-
60
-
61
-
62
-
63
-
64
-
65
-
66
-
67
-
68
-
69
-
70
-
71
-
72
-
73
-
74
-
75
-
76
-
77
-
78
-
79
-
80
-
81
-
82
-
83
-
84
-
85
-
86
-
87
-
88
-
89
-
90
-
91
-
92
-
93
-
94
-
95
-
96
-
97
-
98
-
99
-
100
-
101
-
102
-
103
-
104
-
105
-
106
-
107
-
108
-
109
-
110
-
111
-
112
-
113
-
114
-
115
-
116
-
117
-
118
-
119
-
120
-
121
-
122
-
123
-
124
-
 125
125 -
 126
126 -
 127
127 -
 128
128 -
 129
129 -
 130
130 -
 131
131 -
 132
132 -
 133
133 -
 134
134 -
 135
135 -
136
-
137
-
138
-
139
-
140
-
141
-
142
-
143
-
144
-
145
-
146
-
147
-
148
-
149
-
150
-
151
-
152
-
153
-
154
-
155
-
156
-
157
-
158
-
159
-
160
-
161
-
162
-
163
-
164
-
165
-
166
-
167
-
168
-
169
-
170
-
171
-
172
-
173
-
174
-
175
-
176
-
177
-
178
-
179
-
180
-
181
-
182
-
183
-
184
-
185
-
186
-
187
-
188
-
189
-
190
-
191
-
192
-
193
-
194
-
195
-
196
-
197
-
198
-
199
-
200
-
201
-
202
-
203
-
204
-
205
-
206
-
207
-
208
-
209
-
210
-
211
-
212
-
213
-
214
-
215
-
216
-
217
-
218
-
219
 |
 |