Sony DSC-RX1R Cyber-shot® User Guide (Printable PDF) - Page 45
Superior Auto, Top gt; Shooting > Setting REC mode > Superior Auto
 |
View all Sony DSC-RX1R manuals
Add to My Manuals
Save this manual to your list of manuals |
Page 45 highlights
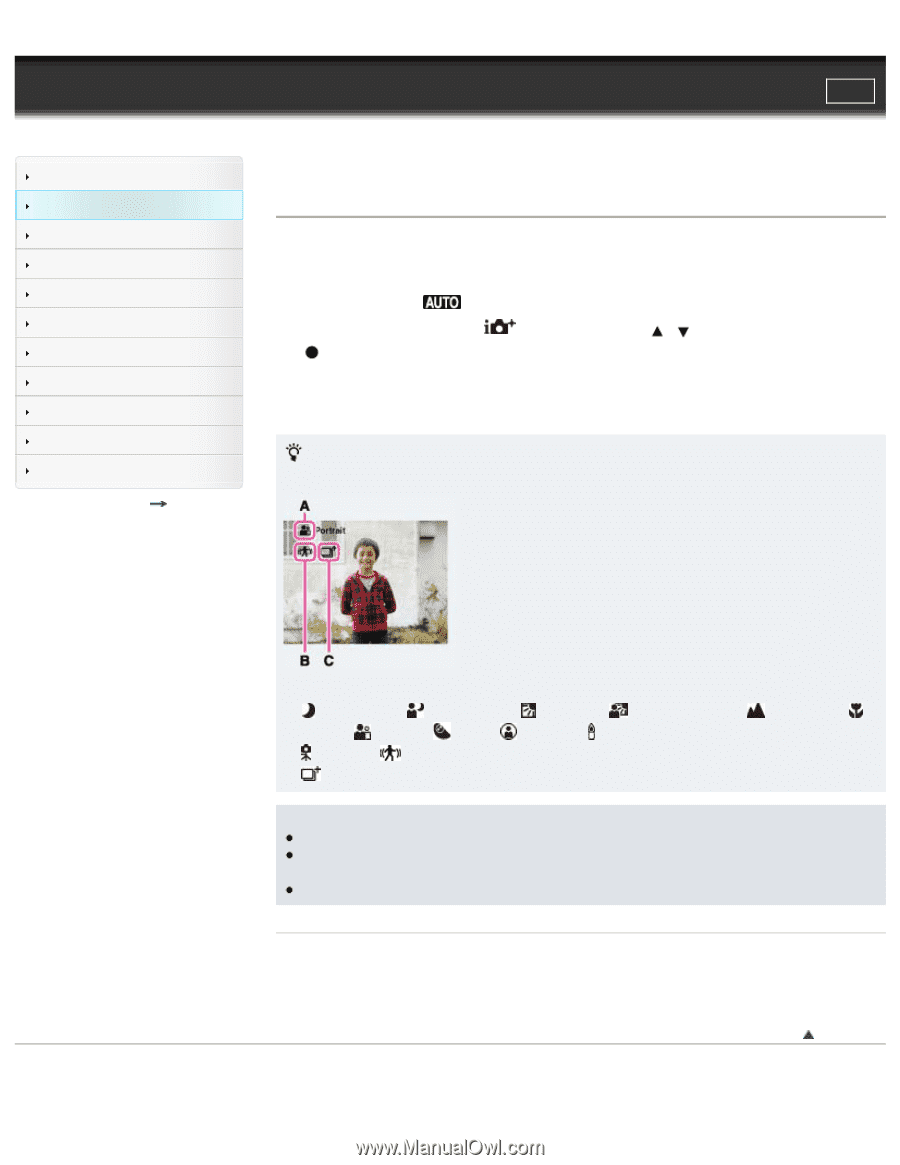
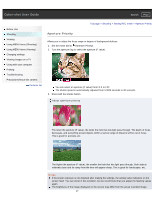
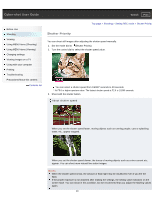
Cyber-shot User Guide Search Print Before Use Shooting Viewing Using MENU items (Shooting) Using MENU items (Viewing) Changing settings Viewing images on a TV Using with your computer Printing Troubleshooting Precautions/About this camera Contents list Top page > Shooting > Setting REC mode > Superior Auto Superior Auto The camera combines Scene Recognition and high-quality image technology to automatically shoot images with the optimal settings. For details on the Scene Recognition function, see "Scene Recognition." [Details] 1. Set the mode dial to (Auto Mode). 2. Press the Fn button and select . (Superior Auto) using / on the control wheel, then press 3. Shoot with the shutter button. The camera shoots burst images when needed and overlays the multiple images. By overlaying the images, the camera records an image with less subject blur and noise. What is the difference between [Superior Auto] mode and [Intelligent Auto] mode ? A: Recognized scene (Night Scene), (Night Portrait), (Backlight), (Backlight Portrait), (Macro), (Portrait), (Baby), (Spotlight), (Low Brightness) B: (Tripod) or C: (Overlay) (Move) (Landscape), Notes When the camera overlays the images, it takes more time to record an image. In low light conditions such as night scenes, set [Flash Mode] to [Flash Off] to achieve the optimal effect of the overlaid images. When [Quality] is set to [RAW] or [RAW & JPEG], the camera does not overlay the images. Related Topic Functions not available in some REC modes Still shooting menu items not available in some REC modes Copyright 2013 Sony Corporation Back to top 45
-
 1
1 -
2
-
3
-
4
-
5
-
6
-
7
-
8
-
9
-
10
-
11
-
12
-
13
-
14
-
15
-
16
-
17
-
18
-
19
-
20
-
21
-
22
-
23
-
24
-
25
-
26
-
27
-
28
-
29
-
30
-
31
-
32
-
33
-
34
-
35
-
36
-
37
-
38
-
39
-
 40
40 -
 41
41 -
 42
42 -
 43
43 -
 44
44 -
 45
45 -
 46
46 -
 47
47 -
 48
48 -
 49
49 -
 50
50 -
51
-
52
-
53
-
54
-
55
-
56
-
57
-
58
-
59
-
60
-
61
-
62
-
63
-
64
-
65
-
66
-
67
-
68
-
69
-
70
-
71
-
72
-
73
-
74
-
75
-
76
-
77
-
78
-
79
-
80
-
81
-
82
-
83
-
84
-
85
-
86
-
87
-
88
-
89
-
90
-
91
-
92
-
93
-
94
-
95
-
96
-
97
-
98
-
99
-
100
-
101
-
102
-
103
-
104
-
105
-
106
-
107
-
108
-
109
-
110
-
111
-
112
-
113
-
114
-
115
-
116
-
117
-
118
-
119
-
120
-
121
-
122
-
123
-
124
-
125
-
126
-
127
-
128
-
129
-
130
-
131
-
132
-
133
-
134
-
135
-
136
-
137
-
138
-
139
-
140
-
141
-
142
-
143
-
144
-
145
-
146
-
147
-
148
-
149
-
150
-
151
-
152
-
153
-
154
-
155
-
156
-
157
-
158
-
159
-
160
-
161
-
162
-
163
-
164
-
165
-
166
-
167
-
168
-
169
-
170
-
171
-
172
-
173
-
174
-
175
-
176
-
177
-
178
-
179
-
180
-
181
-
182
-
183
-
184
-
185
-
186
-
187
-
188
-
189
-
190
-
191
-
192
-
193
-
194
-
195
-
196
-
197
-
198
-
199
-
200
-
201
-
202
-
203
-
204
-
205
-
206
-
207
-
208
-
209
-
210
-
211
-
212
-
213
-
214
-
215
-
216
-
217
-
218
-
219
-
220
-
221
-
222
-
223
-
224
-
225
-
226
-
227
-
228
-
229
-
230
-
231
-
232
-
233
-
234
-
235
-
236
-
237
-
238
-
239
-
240
-
241
-
242
-
243
-
244
-
245
-
246
-
247
-
248
-
249
-
250
-
251
-
252
-
253
-
254
-
255
-
256
-
257
-
258
-
259
-
260
-
261
-
262
-
263
-
264
-
265
-
266
-
267
 |
 |