Sony HTIS100 Operating Instructions - Page 67
Turn on the subwoofer., secure the wireless transmitter.
 |
UPC - 027242731332
View all Sony HTIS100 manuals
Add to My Manuals
Save this manual to your list of manuals |
Page 67 highlights
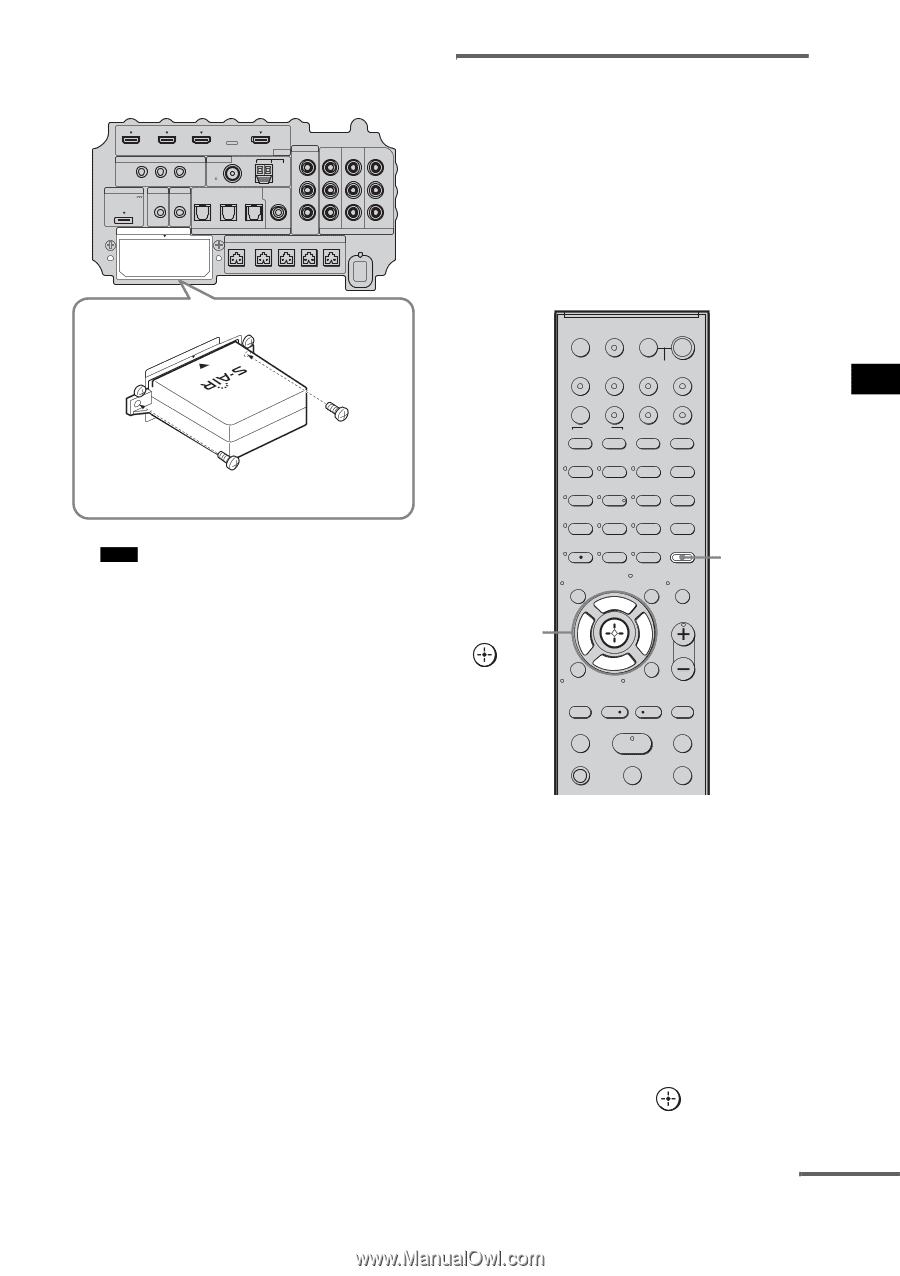
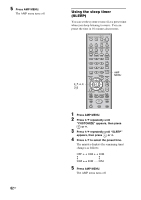
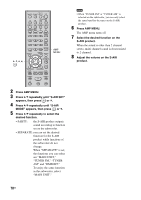
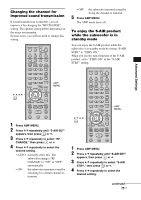
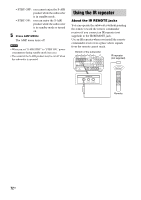
Advanced Settings 3 Make sure to use the same screws to secure the wireless transmitter. BD IN DVD IN IR REMOTE SAT IN ANTENNA FM TV OUT HDMI AM VIDEO VIDEO IN DVD IN SAT IN MONITOR OUT Y IR IN IR OUT1 IR OUT2 DMPORT ECM-AC2 IR-R100 DC 5V 0.7A MAX 75 COAXIAL OPTICAL ASSIGNABLE L COAXIAL R EZW-T100 TV IN DVD IN SAT IN DIGITAL SPEAKER SAT IN AUDIO IN ASSIGNABLE ONLY FOR SS-IS15 PB/ CB PR/ CR COMPONENT VIDEO CENTER FRONT R FRONT L SUR R SUR L EZW-T100 Note • Do not use other screws to fasten the wireless transmitter. To insert the wireless transceiver into the S-AIR product For details on installing the wireless transceiver into the S-AIR product, refer to the operating instructions of the S-AIR product. Establishing sound transmission between the subwoofer and the S-AIR product To establish sound transmission, set the S-AIR products that you use. After inserting the wireless transmitter/ transceiver, connect the AC power cord (mains lead). C, X, x, c, TV ?/1 THEATER TV INPUT AV ?/1 ?/1 SYSTEM STANDBY TV BD DVD SAT SOUND FIELD VIDEO TUNER/BAND DMPORT BD/DVD TOP MENU MENU F1 F2 JUMP PICTURE WIDE FAVORITE GUIDE 123 TONE 456 NIGHT MODE 789 CLEAR DISPLAY AMP MENU 0 ENTER TOOLS/ OPTIONS MUTING F TV VOL MASTER VOL G g f RETURN/EXIT MENU/HOME TV CH - TV CH + PRESET - REPLAY ADVANCE PRESET + .< > < TUNING m TUNING + H M TV X x AMP MENU To set the ID of the subwoofer Simply by matching the ID of the subwoofer and the S-AIR product, you can establish sound transmission. You can use multiple S-AIR products by setting a different ID for each component. 1 Turn on the subwoofer. The subwoofer turns on. 2 Press AMP MENU. 3 Press x/X repeatedly until "S-AIR SET" appears, then press or c. continued 67US
-
 1
1 -
2
-
3
-
4
-
5
-
6
-
7
-
8
-
9
-
10
-
11
-
12
-
13
-
14
-
15
-
16
-
17
-
18
-
19
-
20
-
21
-
22
-
23
-
24
-
25
-
26
-
27
-
28
-
29
-
30
-
31
-
32
-
33
-
34
-
35
-
36
-
37
-
38
-
39
-
40
-
41
-
42
-
43
-
44
-
45
-
46
-
47
-
48
-
49
-
50
-
51
-
52
-
53
-
54
-
55
-
56
-
57
-
58
-
59
-
60
-
61
-
 62
62 -
 63
63 -
 64
64 -
 65
65 -
 66
66 -
 67
67 -
 68
68 -
 69
69 -
 70
70 -
 71
71 -
 72
72 -
73
-
74
-
75
-
76
-
77
-
78
-
79
-
80
-
81
-
82
-
83
-
84
-
85
-
86
-
87
-
88
-
89
-
90
-
91
-
92
-
93
-
94
-
95
-
96
-
97
-
98
-
99
-
100
-
101
-
102
-
103
-
104
-
105
-
106
-
107
-
108
-
109
-
110
-
111
-
112
-
113
-
114
-
115
-
116
-
117
-
118
-
119
-
120
-
121
-
122
-
123
-
124
-
125
-
126
-
127
-
128
-
129
-
130
-
131
-
132
-
133
-
134
-
135
-
136
-
137
-
138
-
139
-
140
-
141
-
142
-
143
-
144
-
145
-
146
-
147
-
148
-
149
-
150
-
151
-
152
-
153
-
154
-
155
-
156
-
157
-
158
-
159
-
160
-
161
-
162
-
163
-
164
-
165
-
166
-
167
-
168
 |
 |