Sony NEX-VG30H "Handycam" Handbook - Page 76
Audio Rec Level, Guide Frame, Zebra, Peaking, Reset, On/Off, Color, Level
 |
View all Sony NEX-VG30H manuals
Add to My Manuals
Save this manual to your list of manuals |
Page 76 highlights
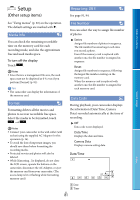
Audio Rec Level Zebra Table of Contents Search image You can adjust the volume when recording. is displayed on the recording screen when you change the volume. Reset Returns to the normal level. Tips We recommend that you use headphones to check the level when adjusting the setting. Set a lower level to naturally capture continuous loud sound. To capture quieter sound at an easy-to-hear level, increase this setting. The limiter is always working regardless of the Audio Rec Level setting. This function is not available when using an audio input device connected to the multi interface shoe. Guide Frame You can display the frame and check that the subject is horizontal or vertical. The frame is not recorded. Off Does not display the guide frame. On Displays the guide frame. Tips Positioning the subject at the cross point of the guide frame makes a balanced composition. The outer frame of [Guide Frame] shows the display area of a TV which is not compatible with full pixel display. You can display a zebra pattern as a guide for adjusting brightness. The zebra pattern will not be recorded with the image. Off Does not display the zebra pattern. On and the brightness level appear on the screen. Adjust the brightness level with +/-. Notes With a subject that exceeds a brightness level of 100 IRE, the image may become overexposed. Tips IRE (Institute of Radio Engineers) is a measure of the video signal level that is used as the bases of brightness; the reference level (pedestal level) is set to 0 (%) and the maximum level (completely white level) is set to 100 (%). Peaking On/Off When you select [On], / / appears and you can display an image on the screen with its outlines enhanced. This function helps you to adjust the focus. The default setting is [Off]. Color You can select peaking color from [White], [Red] and [Yellow]. The default setting is [White]. Level You can select a peaking sensitivity from [High], [Middle] and [Low]. The default setting is [Middle]. Notes The outlines of the recorded images to the media are not enhanced. Index Tips You can focus more easily using this function in combination with the expanded focus function (p. 42). US 76
-
 1
1 -
2
-
3
-
4
-
5
-
6
-
7
-
8
-
9
-
10
-
11
-
12
-
13
-
14
-
15
-
16
-
17
-
18
-
19
-
20
-
21
-
22
-
23
-
24
-
25
-
26
-
27
-
28
-
29
-
30
-
31
-
32
-
33
-
34
-
35
-
36
-
37
-
38
-
39
-
40
-
41
-
42
-
43
-
44
-
45
-
46
-
47
-
48
-
49
-
50
-
51
-
52
-
53
-
54
-
55
-
56
-
57
-
58
-
59
-
60
-
61
-
62
-
63
-
64
-
65
-
66
-
67
-
68
-
69
-
70
-
 71
71 -
 72
72 -
 73
73 -
 74
74 -
 75
75 -
 76
76 -
 77
77 -
 78
78 -
 79
79 -
 80
80 -
 81
81 -
82
-
83
-
84
-
85
-
86
-
87
-
88
-
89
-
90
-
91
-
92
-
93
-
94
-
95
-
96
-
97
-
98
-
99
-
100
-
101
-
102
-
103
-
104
-
105
-
106
-
107
-
108
-
109
-
110
-
111
-
112
-
113
-
114
-
115
-
116
 |
 |
