Sony STR-DA4400ES Operating Instructions (Large File - 23.37 MB)
Sony STR-DA4400ES - 7.1 Channel Es Receiver Manual
 |
View all Sony STR-DA4400ES manuals
Add to My Manuals
Save this manual to your list of manuals |
Sony STR-DA4400ES manual content summary:
- Sony STR-DA4400ES | Operating Instructions (Large File - 23.37 MB) - Page 1
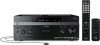
Printed in Malaysia 3-875-807-13(1) Multi Channel AV Receiver Operating Instructions GB Mode d'emploi FR STR-DA4400ES ©2008 Sony Corporation - Sony STR-DA4400ES | Operating Instructions (Large File - 23.37 MB) - Page 2
the user to the presence of important operating and maintenance (servicing) instructions in the literature accompanying the appliance. 2GB Owner's Record The model and serial numbers are located on the rear of the unit. Record these numbers in the space provided below. Refer to them whenever you - Sony STR-DA4400ES | Operating Instructions (Large File - 23.37 MB) - Page 3
About This Manual • The instructions in this manual are for model STR-DA4400ES. Check your model number by looking at the lower right corner of the front panel. • The instructions in this manual describe the controls on the supplied remote. You can also use the controls on the receiver if they have - Sony STR-DA4400ES | Operating Instructions (Large File - 23.37 MB) - Page 4
25 4b: Connecting the video components .......30 5: Connecting the antennas (aerials 39 6: Preparing the receiver and the remote ....40 7: Displaying the Selecting a channel of the satellite radio ....67 Presetting satellite radio channels 68 Restricting access to specific channels (Parental Lock - Sony STR-DA4400ES | Operating Instructions (Large File - 23.37 MB) - Page 5
several commands in sequence automatically (Macro Play 127 Setting remote commander codes that are not stored in the remote 129 Clearing all the contents of the remote's memory 131 Additional Information Glossary 132 Precautions 135 Troubleshooting 136 Specifications 141 Index 143 5GB - Sony STR-DA4400ES | Operating Instructions (Large File - 23.37 MB) - Page 6
of reach from children. Status of the POWER button Off The receiver is turned off (initial setting). Press POWER to turn the receiver on. You cannot turn the receiver on using the remote. On/Standby Press ?/1 on the remote to turn the receiver on or set it to the standby mode. When you press POWER - Sony STR-DA4400ES | Operating Instructions (Large File - 23.37 MB) - Page 7
). TUNING E Remote sensor Receives signals from remote commander. F HDMI IN jacks (page 31). M MULTI IN Press to select the component connected to the MULTI CHANNEL VIDEO 2 IN/ Connect to a portable PORTABLE AV audio/video component IN jacks such as a camcorder or video game. Q MULTI CHANNEL - Sony STR-DA4400ES | Operating Instructions (Large File - 23.37 MB) - Page 8
Name R INPUT SELECTOR S MASTER VOLUME Function Turn to select the input source to play back. To select the input source for zone 2 or zone 3, press ZONE/ SELECT (qa) to select zone 2 or zone 3 first ("ZONE 2 INPUT" or "ZONE 3 INPUT" appears on the display), then turn INPUT SELECTOR to select the - Sony STR-DA4400ES | Operating Instructions (Large File - 23.37 MB) - Page 9
Name A SW Function Lights up when subwoofer is connected and the audio signal is output from the SUBWOOFER jack. While this indicator lights up, the receiver creates a subwoofer signal based on the L.F.E. signal in the disc being played back or the low frequency components of the front - Sony STR-DA4400ES | Operating Instructions (Large File - 23.37 MB) - Page 10
the corresponding indicators that indicate the current input status. The receiver recognizes a component connected via an HDMI IN jacks. The DIGITAL MEDIA PORT adapter is connected and "DMPORT" is selected. The multi-channel input is selected. Lights up with the corresponding indicators that - Sony STR-DA4400ES | Operating Instructions (Large File - 23.37 MB) - Page 11
being played back contains an L.F.E. (Low Frequency Effects) channel and the L.F.E. channel signal is actually being reproduced, the bars underneath the letters -HD Master Audio DTS-HD Low Bit Rate Audio DTS-HD High Resolution Audio Lights up when the receiver is decoding Dolby TrueHD. Lights up when - Sony STR-DA4400ES | Operating Instructions (Large File - 23.37 MB) - Page 12
Lights up one of the respective indictors when the receiver applies Dolby Pro Logic processing to 2 channel signals in order to output the center and surround channel signals. ;PL Dolby Pro Logic ;PLII Dolby Pro Logic II ;PLIIx S DTS(-ES) indicators Dolby Pro Logic IIx Note This indicator does - Sony STR-DA4400ES | Operating Instructions (Large File - 23.37 MB) - Page 13
26, 31, 34, 35). HDMI IN/ OUT* jacks Connect to REMOTE Connect an IR IN/OUT jacks repeater (page 83). TRIGGER OUT jacks Connect to interlock on/off of the power supply of other 12V TRIGGER compliant components, or the amplifier/receiver of zone 2 or zone 3 (page 111). C DMPORT Connect to a Sony - Sony STR-DA4400ES | Operating Instructions (Large File - 23.37 MB) - Page 14
audio jack for 7.1 channel or 5.1 channel sound (page 28). PRE OUT jacks Connect to an external power amplifier. H VIDEO/AUDIO INPUT/OUTPUT section AUDIO image when you connect the HDMI OUT jack or MONITOR OUT jacks to a TV (page 23). You can operate this receiver using a GUI (Graphical User - Sony STR-DA4400ES | Operating Instructions (Large File - 23.37 MB) - Page 15
commander You can use the supplied remote to operate the receiver and to control the Sony audio/video components that the remote is assigned to operate. Main remote commander (RM-AAL016) The RM-AAL016 remote is used for illustration purpose. Name A AV ?/1 (on/ standby) B ?/1 (on/ standby) Function - Sony STR-DA4400ES | Operating Instructions (Large File - 23.37 MB) - Page 16
enter the value after selecting a channel, disc, or track using the receiver, DVD player, TV, or Blu-ray Disc Player, etc. Press to display the menu used to operate audio/video remote (page 99). Press to turn the Theater mode on and off when connecting the receiver to products featuring "BRAVIA" Sync - Sony STR-DA4400ES | Operating Instructions (Large File - 23.37 MB) - Page 17
channels. wj -/-- Press to select - track numbers over 10 of the VCR, satellite tuner, CD player or MD deck. - channel numbers HDMI video signals are not output while the PIP window is displayed. es the menu or on-screen guide of the VCR, DVD not work depending on the model. • The above explanation - Sony STR-DA4400ES | Operating Instructions (Large File - 23.37 MB) - Page 18
can only be used to operate the receiver. You can control the main functions of the receiver with simple operations using this remote. Name A ?/1 (on/ standby) B 2CH/ A.DIRECT A.F.D. MOVIE MUSIC C GUI MODE D V/v/B/b Function Press to turn a receiver on or off. Press to select sound field (page - Sony STR-DA4400ES | Operating Instructions (Large File - 23.37 MB) - Page 19
Getting Started Getting Started 1: Installing speakers This receiver allows you to use a 7.1 channel system (7 speakers and one subwoofer). Enjoying a 5.1/7.1 channel system To fully enjoy theater-like multi-channel surround sound requires five speakers (two front speakers, a center speaker, and - Sony STR-DA4400ES | Operating Instructions (Large File - 23.37 MB) - Page 20
Tips • The angle A should be the same. • When you connect a 6.1 channel speaker system, place the surround back speaker behind the seating position. • Since the subwoofer does not emit highly directional signals, you can place it wherever you want. 20GB - Sony STR-DA4400ES | Operating Instructions (Large File - 23.37 MB) - Page 21
Getting Started 2: Connecting speakers Before connecting cords, make sure to disconnect the AC power cord (mains lead). H G F E B B FRONT SPEAKERS B terminals a) A B B D C B A A Monaural audio cord (not supplied) B Speaker cords (not supplied) AFront speaker A (L) BFront speaker A - Sony STR-DA4400ES | Operating Instructions (Large File - 23.37 MB) - Page 22
b) When you connect a subwoofer with an auto standby function, turn off the function when watching movies. If the auto standby function is set to on, it turns to standby mode automatically based on the level of the input signal to a subwoofer, then sound may not be output. c) If you connect only one - Sony STR-DA4400ES | Operating Instructions (Large File - 23.37 MB) - Page 23
You can watch the selected input image when you connect the HDMI OUT jack or MONITOR OUT jacks to a TV. You can operate this receiver using a GUI (Graphical User Interface). It is not necessary to connect all the cables. Connect audio and video cords according to the jacks of your components. Audio - Sony STR-DA4400ES | Operating Instructions (Large File - 23.37 MB) - Page 24
image on the TV screen may be distorted. In this case, place the antenna (aerial) farther away from the receiver. Tips • The receiver has a video conversion function. For details, see "Notes on converting video signals" (page 38). • The sound of the TV is output from the speakers connected to the - Sony STR-DA4400ES | Operating Instructions (Large File - 23.37 MB) - Page 25
your components This section describes how to hook up your components to this receiver. Before you begin, refer to "Component to be connected" below for Audio CD player/ CD player With digital audio output With multi-channel audio output With analog audio output only MD player With digital - Sony STR-DA4400ES | Operating Instructions (Large File - 23.37 MB) - Page 26
PORT adapter, observe the following precautions. - Remove the DIGITAL MEDIA PORT adapter after removing the cord when cords are connected to the COMPONENT VIDEO jack. - Remove the DIGITAL MEDIA PORT adapter by squeezing the sides of the connector, since the connector is locked in place. Tip All - Sony STR-DA4400ES | Operating Instructions (Large File - 23.37 MB) - Page 27
Audio CD, connect the player to the MULTI CHANNEL INPUT or SA-CD/CD IN jacks. Refer to the operating instructions supplied with the Super Audio CD player. • Connect a player which can output DSD signals from the HDMI jack to the receiver using an HDMI cable. • You cannot make digital recordings of - Sony STR-DA4400ES | Operating Instructions (Large File - 23.37 MB) - Page 28
If your DVD player, Blu-ray Disc Player or Super Audio CD player is equipped with multi-channel output jacks, you can connect them to the MULTI CHANNEL INPUT jacks of this receiver to enjoy multi-channel sound. Alternatively, the multi-channel input jacks can be used to connect an external multi - Sony STR-DA4400ES | Operating Instructions (Large File - 23.37 MB) - Page 29
Getting Started Connecting components with analog audio jacks The following illustration shows how to connect a component with analog jacks, such as tape deck, turntable, etc. Super Audio CD player, CD player Tape deck A A A A MD deck Turntable A Audio cord (not supplied) Notes • If your - Sony STR-DA4400ES | Operating Instructions (Large File - 23.37 MB) - Page 30
: Connecting the video components How to hook up your components This section describes how to hook up your components to this receiver. Before you HDMI jack DVD player, Blu-ray Disc Player Satellite tuner, Set-top box DVD recorder, VCR Camcorder, video game, etc. Page 23 31 34 35 36 36 Video - Sony STR-DA4400ES | Operating Instructions (Large File - 23.37 MB) - Page 31
to 8 channels can be received with this receiver using the HDMI IN jack. • Analog video signals input to the VIDEO jack, or COMPONENT VIDEO jacks can be output as HDMI signals. Audio signals are not output from an HDMI OUT jack when the image is converted. • This receiver supports DSD transmission - Sony STR-DA4400ES | Operating Instructions (Large File - 23.37 MB) - Page 32
We recommend that you use a Sony HDMI cable. B Optical digital cord (not supplied) C Audio cord (not supplied) To enjoy TV multi channel surround sound broadcasting You can listen to TV multi channel surround sound broadcasting from the speakers connected to the receiver. Connect the OPTICAL output - Sony STR-DA4400ES | Operating Instructions (Large File - 23.37 MB) - Page 33
be made before you can enjoy DSD and multi-channel Linear PCM. Refer to the operating instructions of the player. • Not every HDMI component supports all functions that are defined by the specified HDMI version. For example, components that support HDMI, ver. 1.3a, may not support Deep Color. 33GB - Sony STR-DA4400ES | Operating Instructions (Large File - 23.37 MB) - Page 34
Assign" in the Input menu. 34GB D Component video cord (not supplied) E Video cord (not supplied) Notes • To output multi-channel digital audio, set the digital audio output setting on the DVD player, Blu-ray Disc Player. Refer to the operating instructions supplied with the DVD player, Blu-ray - Sony STR-DA4400ES | Operating Instructions (Large File - 23.37 MB) - Page 35
to the jacks of your components. Audio signals Satellite tuner, Set-top box Video signals A B C D A Optical digital cord (not supplied) B Audio cord (not supplied) C Component video cord (not supplied) D Video cord (not supplied) Note Before connecting cords, make sure to disconnect the AC - Sony STR-DA4400ES | Operating Instructions (Large File - 23.37 MB) - Page 36
which has analog jacks such as a DVD recorder or VCR, etc. It is not necessary to connect all the cables. Connect audio and video cords according to the jacks of your components. Audio signals DVD recorder, VCR Video signals A B A Audio cord (not supplied) B Video cord (not supplied) 36GB - Sony STR-DA4400ES | Operating Instructions (Large File - 23.37 MB) - Page 37
lead). Function for conversion of video signals This receiver is equipped with a function for converting video signals. • Composite video signals can be output as HDMI video and component video signals. • Component video signals can be output as HDMI video and video signals. As the initial setting - Sony STR-DA4400ES | Operating Instructions (Large File - 23.37 MB) - Page 38
HDMI video signals cannot be converted to component video signals and video signals. • The converted video signals are output only from the MONITOR OUT jacks. They are not output from VIDEO OUT jack or the ZONE 2 VIDEO in the Video settings menu when receiving a signal that supports Closed Captions. - Sony STR-DA4400ES | Operating Instructions (Large File - 23.37 MB) - Page 39
) * The shape of the connector varies depending on the area. Notes • To prevent noise pickup, keep the AM loop antenna (aerial) away from the receiver and other components. • Be sure to fully extend the FM wire antenna (aerial). • After connecting the FM wire antenna (aerial), keep it as horizontal - Sony STR-DA4400ES | Operating Instructions (Large File - 23.37 MB) - Page 40
settings you have made to their factory defaults. POWER TONE MODE HDMI IN 1 Press POWER to turn off the receiver. 2 Hold down POWER while pressing TONE MODE and HDMI IN to turn on the receiver. 3 Release the TONE MODE and HDMI IN after a few seconds. After "MEMORY CLEARING..." appears on the - Sony STR-DA4400ES | Operating Instructions (Large File - 23.37 MB) - Page 41
the TV screen. Tip Refer to "Operating without connecting to a TV" (page 116) if you want to operate the receiver without connecting to a TV. RM-AAL016 RM-AAU038 Notes • Do not leave the remote in an extremely hot or humid place. • Do not use a new battery with old ones. • Do not mix - Sony STR-DA4400ES | Operating Instructions (Large File - 23.37 MB) - Page 42
Set the appropriate speaker impedance for the speakers you are using. AMP The receiver menu is displayed on the TV screen. Tip You can select the language to MENU. V/v/b, MENU 1 Press AMP. The receiver can be operated using the remote. 2 Press MENU. The menu is displayed on the TV screen. 42GB - Sony STR-DA4400ES | Operating Instructions (Large File - 23.37 MB) - Page 43
," then press . To exit the menu Press MENU. Notes • If you are not sure of the impedances of the speakers, refer to the operating instructions supplied with your speakers. (This information is often on the back of the speaker.) • When you connect all speakers with a normal impedance of 8 ohms - Sony STR-DA4400ES | Operating Instructions (Large File - 23.37 MB) - Page 44
19-22). • The AUTO CAL MIC jack is used for the supplied optimizer microphone only. Do not connect other microphones. Doing so may damage the receiver and the microphone. • During the measurement, the sound that comes out of the speakers is very loud. The volume of the sound cannot be adjusted - Sony STR-DA4400ES | Operating Instructions (Large File - 23.37 MB) - Page 45
distance value. However, there will be no problems even if you continue to use the receiver with that value. Performing auto calibration The auto the multi-channel input is selected. The correction is invalid for other speakers. b) The measurement result is not utilized when the multi-channel input - Sony STR-DA4400ES | Operating Instructions (Large File - 23.37 MB) - Page 46
channel input is selected. -"2ch Analog Direct" is being used. • The measurement result is not utilized when Dolby TrueHD signals with a sampling frequency of higher than 96 kHz are being received V/v/B/b, MENU 1 Press AMP. The receiver can be operated using the remote. 2 Press MENU. The menu is - Sony STR-DA4400ES | Operating Instructions (Large File - 23.37 MB) - Page 47
the TV screen even though the speakers are connected properly. This is because of the speakers' specifications. In this case, you can continue to use the receiver. Tips • Operations other than turning the receiver on or off are deactivated during the measurement. • In the following situations, the - Sony STR-DA4400ES | Operating Instructions (Large File - 23.37 MB) - Page 48
one that matches that of the Sony listening room standard. Front Reference Adjusts is not utilized in the following cases. - The multi-channel input is selected. - "2ch Analog Direct" is being a sampling frequency of higher than 96 kHz are being received. Tip The size of a speaker (LARGE/SMALL) is - Sony STR-DA4400ES | Operating Instructions (Large File - 23.37 MB) - Page 49
appears in step 8 of "Performing auto calibration" (page 45), check the problem of the error and perform auto calibration again. 1 Press B/b to select other. • It may be that the volume is too big when you use the receiver as a preamp. The distance and position of a subwoofer cannot be detected. Or - Sony STR-DA4400ES | Operating Instructions (Large File - 23.37 MB) - Page 50
Display Explanation NO WARNING There is no warning information. ---------- No speakers are connected. Tip Depending on the position of the subwoofer, the measurement results for polarity may vary. However, there will be no problems even if you continue to use the receiver with that value. 50GB - Sony STR-DA4400ES | Operating Instructions (Large File - 23.37 MB) - Page 51
Getting Started Guide to on-screen display operation You can display the menu of the receiver on the TV screen and select the function you want to use on the TV screen by pressing V/v/B/b and on the remote. To display the menu of the receiver on the TV screen, make sure that the receiver is in - Sony STR-DA4400ES | Operating Instructions (Large File - 23.37 MB) - Page 52
of the speakers, the surround effect, equalizer, audio, video and other inputs connected to the HDMI jacks (page 102). 3 Press V/v repeatedly to select function without reselecting the menu. 1 Press AMP. The receiver can be operated using the remote. 2 Press MENU. The menu is displayed on the TV - Sony STR-DA4400ES | Operating Instructions (Large File - 23.37 MB) - Page 53
receiver AMP MASTER VOL MUTING V/v/B/b, OPTIONS MENU 1 Press AMP. The receiver can be operated using the remote used Video1, Video2 VIDEO 1, 2 VCR, etc., connected to the VIDEO 1 or VIDEO 2 jack. connected to the MULTI CHANNEL INPUT jack. HDMI1, 2, 3, 4, 5, 6 HDMI components connected to the - Sony STR-DA4400ES | Operating Instructions (Large File - 23.37 MB) - Page 54
MASTER VOL +/- button on the remote. To turn the volume up or remote. To cancel, press MUTING on the remote again or press MASTER VOL + to raise the volume. To avoid damaging your speakers Before you turn off the receiver • Input Assign Input name and audio/video input jack assigned to the input are - Sony STR-DA4400ES | Operating Instructions (Large File - 23.37 MB) - Page 55
"Connecting components with digital audio input/output jacks" (page 26). Sony offers the following DIGITAL MEDIA PORT adapters: • TDM-BT1 Bluetooth also output. AMP V/v/b, MENU MASTER VOL 1 Press AMP. The receiver can be operated using the remote. 2 Press MENU. The menu is displayed on the TV screen - Sony STR-DA4400ES | Operating Instructions (Large File - 23.37 MB) - Page 56
than one of the following is connected. iPod The iPod model recognized is connected. Network The Network Client Client recognized is MEDIA PORT" (page 58). AMP V/v, OPTIONS MENU 1 Press AMP. The receiver can be operated using the remote. 2 Press MENU. The menu is displayed on the TV screen. 3 Press - Sony STR-DA4400ES | Operating Instructions (Large File - 23.37 MB) - Page 57
back the track you want to listen to following the steps outlined in "Operating the TDMiP1/iP50/TDM-NC1 using the GUI menu of the receiver" (page 56). continued 57GB - Sony STR-DA4400ES | Operating Instructions (Large File - 23.37 MB) - Page 58
supported by the DIGITAL MEDIA PORT adapters like TDM-iP1/iP50, TDM-NC1. This mode is not supported Control" is not displayed, see the operating instructions supplied with component for details on operating that be displayed on the GUI screen of the receiver. You can select a track you want and - Sony STR-DA4400ES | Operating Instructions (Large File - 23.37 MB) - Page 59
the operation screen using the DIGITAL MEDIA PORT" (page 58). For details on operating the adapter using the adapter GUI menu, refer to the operating instructions supplied with the adapter you are using. To operate the TDM-iP1/iP50 using the iPod menu Make sure that "iPod" is selected in step - Sony STR-DA4400ES | Operating Instructions (Large File - 23.37 MB) - Page 60
be changed (page 61). SHIFT Numeric buttons AMP V/v/B/b, OPTIONS MENU Tuning into a station automatically (Auto Tuning) 1 Press AMP. The receiver can be operated using the remote. 2 Press MENU. The menu is displayed on the TV screen. 3 Press V/v repeatedly to select " FM" or " AM," then press - Sony STR-DA4400ES | Operating Instructions (Large File - 23.37 MB) - Page 61
Tuning into a station directly (Direct Tuning) Enter the frequency of a station directly by using the numeric buttons. 1 Press AMP. The receiver can be operated using the remote. 2 Press MENU. The menu is displayed on the TV screen. 3 Press V/v repeatedly to select " FM" or " AM," then press or - Sony STR-DA4400ES | Operating Instructions (Large File - 23.37 MB) - Page 62
to. 4 Press V/v to select a preset number, then press . The station is stored as the selected preset number. 5 Repeat steps 1 to 4 to preset ," then press . Tuning to preset stations 1 Press AMP. The receiver can be operated using the remote. 2 Press MENU. The menu is displayed on the TV screen - Sony STR-DA4400ES | Operating Instructions (Large File - 23.37 MB) - Page 63
receiver. XM Radio service About XM Radio XM is North America's number one satellite radio company, offering an extraordinary variety of commercial-free music, plus the best . Channels with frequent explicit language are indicated with an XL. Channel blocking is available for XM radio receivers by - Sony STR-DA4400ES | Operating Instructions (Large File - 23.37 MB) - Page 64
antenna, you are ready to subscribe and begin receiving XM programming. There are three places to find a signal from the satellites to activate the full channel lineup. Activation normally takes 10-15 minutes, but SIRIUS Satellite Radio service SIRIUS Satellite Radio: The Best Radio On Radio SIRIUS - Sony STR-DA4400ES | Operating Instructions (Large File - 23.37 MB) - Page 65
various window locations around your home to see where the best reception will be received. Most XM customers place the antenna in a south- avoid picking up noise. OPTIONS MENU Checking the ID number 1 Press AMP. The receiver can be operated using the remote. 2 Press MENU. The menu is displayed on - Sony STR-DA4400ES | Operating Instructions (Large File - 23.37 MB) - Page 66
then press V/v repeatedly to select "Category Mode." 5 Press V/v to select the channel 0, then press . 6 Check the XM Radio ID or Sirius ID on the best reception. To exit the menu Press MENU. Checking receiving conditions (Antenna Aiming) 1 Press AMP. The receiver can be operated using the remote - Sony STR-DA4400ES | Operating Instructions (Large File - 23.37 MB) - Page 67
the one in the category you want. This is because one channel may belong to more than one category. Selecting a channel by inputting the channel number directly (Direct Tuning) 1 Press AMP. The receiver can be operated using the remote. 2 Press MENU. The menu is displayed on the TV screen. 3 Press - Sony STR-DA4400ES | Operating Instructions (Large File - 23.37 MB) - Page 68
is tune in. Presetting satellite radio channels You can select the channels you want directly by presetting them using the preset numbers. You can preset up to 30 XM Radio channels and 30 SIRIUS Satellite Radio channels. AMP V/v/b, OPTIONS MENU 1 Select a channel you want to preset using Category - Sony STR-DA4400ES | Operating Instructions (Large File - 23.37 MB) - Page 69
AMP. The receiver can be operated using the remote. 2 Press MENU. The menu is displayed on the TV screen. 3 Press V/v repeatedly to select " XM" or " SIRIUS," then press or b. 4 Press V/v to select the preset number from the preset list, then press . You can select stored preset channels from 1 to - Sony STR-DA4400ES | Operating Instructions (Large File - 23.37 MB) - Page 70
the numeric buttons. "The channel has been locked." appears and the Parental Lock is set. To delete the numbers you have entered, go channel has been unlocked." appears and the channel is unlocked. Notes • When you select a channel using Category Mode, locked channels are skipped. • When the receiver - Sony STR-DA4400ES | Operating Instructions (Large File - 23.37 MB) - Page 71
to a wall socket. Invalid Channel You have entered an invalid channel number. The channel to be tuned-in is void due to the change by the broadcast service, or the receiving condition is not good. Locked The selected channel is locked. - Channel Subscription Updated The subscription - Sony STR-DA4400ES | Operating Instructions (Large File - 23.37 MB) - Page 72
(page 66). aimed. See instructions supplied with the XM Mini- channel guide at The channel may have been reassigned www.xmradio.com for the current list of channels. to a different channel number. For cases of a new radio or a radio that has not This message may occur initially with a received - Sony STR-DA4400ES | Operating Instructions (Large File - 23.37 MB) - Page 73
of the software you are using, the playback component connected, or the sound field settings of the receiver. Enjoying Surround Sound 2CH/ A.DIRECT Press 2CH/A.DIRECT repeatedly to select the 2-channel sound mode of the sound output you want. 2CH mode 2ch Stereo 2ch Analog Direct Effect The - Sony STR-DA4400ES | Operating Instructions (Large File - 23.37 MB) - Page 74
audio after decoding (Detecting automatically) (Multi Stereo) - Effect Presets the sound as it was recorded/encoded without adding any surround effects. Outputs 2 channel left/right signals from all speakers. You can select the surround sound effect you want. For details on available surround sound - Sony STR-DA4400ES | Operating Instructions (Large File - 23.37 MB) - Page 75
channel surround sound effect 1 Start playing a sound source you want to listen to (CD, DVD, etc.). 2 Press AMP. The receiver can be operated using the remote mode can reproduce sound in 5.1 channel system for watching videos of overdubbed or old movies. 7-channel signals Performs Dolby Pro Logic - Sony STR-DA4400ES | Operating Instructions (Large File - 23.37 MB) - Page 76
sampling frequency of higher than 96 kHz are being received. • If you set up the sound field effect while the receiver is receiving signals with a sampling frequency of higher than 48 Logic IIx decoding is effective, when 2 channel or 5.1 channel signals are input. • Neural-THX is effective when - Sony STR-DA4400ES | Operating Instructions (Large File - 23.37 MB) - Page 77
can take advantage of surround sound simply by selecting one of the receiver's preprogrammed sound fields. They bring the exciting and powerful sound of hall, which simulates a large sound stage produced by reflectivity. Uses 3D sound imaging to reproduce the sound characteristics of a concert hall, - Sony STR-DA4400ES | Operating Instructions (Large File - 23.37 MB) - Page 78
or A.F.D. Notes • The sound fields for music do not work when the multi-channel input is selected. • The sound fields for music do not work when DTSHD signals with a sampling frequency of higher than 48 kHz are being received. • The sound fields for music do not work when Dolby TrueHD signals with - Sony STR-DA4400ES | Operating Instructions (Large File - 23.37 MB) - Page 79
advantage of surround sound simply by selecting one of the receiver's preprogrammed sound fields. They bring the exciting and powerful sound almost any type of movie. Reproduces the sound characteristics of the Sony Pictures Entertainment "Kim Novak Theater" cinema production studio. This mode - Sony STR-DA4400ES | Operating Instructions (Large File - 23.37 MB) - Page 80
Notes • The sound fields for movies do not work when the multi-channel input is selected. • The sound fields for movies do not work when DTS-HD signals with a sampling frequency of higher than 48 kHz are being received. • The sound fields for movies do not work when Dolby TrueHD signals with a - Sony STR-DA4400ES | Operating Instructions (Large File - 23.37 MB) - Page 81
on digital audio input jacks for the components connected. This receiver supports the following audio formats. Audio format Connection of the playback component and Maximum number the receiver of channels COAXIAL/OPTICAL HDMI Dolby Digital 5.1ch a a Dolby Digital EX 6.1ch a a Dolby - Sony STR-DA4400ES | Operating Instructions (Large File - 23.37 MB) - Page 82
component and Maximum number the receiver of channels COAXIAL/OPTICAL HDMI 5.1ch × a Multi channel Linear PCM a) 7.1ch × a a)Audio signals are output in another format if the playback component does not correspond to the format. For details, refer to the operating instructions of the - Sony STR-DA4400ES | Operating Instructions (Large File - 23.37 MB) - Page 83
you can operate both a component in the main zone and Sony receiver in zone 2 or zone 3 from zone 2 or zone 3. To operate the receiver from zone 2 or zone 3 You can operate the receiver without pointing the remote toward the IR repeater of the receiver if you connect an IR repeater (not supplied) to - Sony STR-DA4400ES | Operating Instructions (Large File - 23.37 MB) - Page 84
2 Outputs sound from speakers in zone 2 using the receiver and another amplifier. Main zone Zone 2 B TV B monitor IR REMOTE IN STR-DA4400ES ZONE 2 VIDEO OUT* C A ZONE 2 AUDIO OUT A IR repeater (not supplied) B Speakers C Sony Amplifier/Receiver * You can also connect to the COMPONENT - Sony STR-DA4400ES | Operating Instructions (Large File - 23.37 MB) - Page 85
2:Zone 3 connections Main room IR REMOTE IN STR-DA4400ES ZONE 3 AUDIO OUT A IR repeater (not supplied) B Speakers C Sony Amplifier/Receiver Zone 3 B B C A RM-AAL016 Using Multi-zone Features 85GB - Sony STR-DA4400ES | Operating Instructions (Large File - 23.37 MB) - Page 86
then press . 8 Press V/v to select "ZONE2," then press . To exit the menu Press MENU. RETURN/ EXIT O V/v/b, MENU 1 Press AMP. The receiver can be operated using the remote. 2 Press MENU. The menu is displayed on the TV screen. 3 Press V/v repeatedly to select " Settings," then press or b. 4 Press - Sony STR-DA4400ES | Operating Instructions (Large File - 23.37 MB) - Page 87
initially set to be used in zone 2. If you want to use them in zone 3, switch the zone setting of the remote. RM SET UP SHIFT ?/1 ZONE 2, 3 Operating the receiver from another zone (ZONE 2/ZONE 3 operations) The following operations are described for connecting an IR repeater and operating the - Sony STR-DA4400ES | Operating Instructions (Large File - 23.37 MB) - Page 88
on the remote to select the source signals you want to output. For zone 2, analog video and audio receiver is standby mode (press ?/1 on the remote to turned off this receiver), the receiver in zone 2 or zone 3 remains turned on. To turn off all receivers, press ?/1 and AV ?/1 on the main remote - Sony STR-DA4400ES | Operating Instructions (Large File - 23.37 MB) - Page 89
may not work. See the operating instructions of the component. Preparing for the "BRAVIA" Sync To use the "BRAVIA" Sync, turn the Control for HDMI function on for both the receiver and the connected component. The receiver is compatible with the "Control for HDMI-Easy Setting" function. When your TV - Sony STR-DA4400ES | Operating Instructions (Large File - 23.37 MB) - Page 90
component video input to the HDMI input using the Input Assign function, you cannot set "Control for HDMI" to "ON." • While "Control for HDMI- is compatible with the "Control for HDMI-Easy Setting" function" (page 89). 2 Press AMP. The receiver can be operated using the remote. 3 Press MENU. The menu - Sony STR-DA4400ES | Operating Instructions (Large File - 23.37 MB) - Page 91
is being output from the TV speaker. • You can adjust the receiver's volume when you adjust the TV volume. You can also operate this function using the TV menu. For details, see the operating instructions of the TV. Notes • When "Control for HDMI" is set to "ON," the "Audio Out" settings in the - Sony STR-DA4400ES | Operating Instructions (Large File - 23.37 MB) - Page 92
the type of material you intend to watch. Press TV, then press AV ?/1. The TV, receiver and connected components are turned off. Notes • Set the TV power instructions of the TV. • Depending on the status, the connected components may not be turned off. For details, see the operating instructions - Sony STR-DA4400ES | Operating Instructions (Large File - 23.37 MB) - Page 93
mode other than the HDMI input, satellite tuner used, or the multi-channel input is selected, audio video jack of the DVD player to the COMPONENT VIDEO IN 1/ COMPONENT VIDEO IN 2, or COMPONENT VIDEO IN 3 jack of this receiver when you want to input the video signals from the DVD player. Assign video - Sony STR-DA4400ES | Operating Instructions (Large File - 23.37 MB) - Page 94
1 Press AMP. The receiver can be operated using the remote. 2 Press MENU. The menu is displayed on the TV screen. 3 Press V/v repeatedly select "Input Assign," then press . 7 Press V/v/B/b to select the audio and/or video signals you want to assign to the input selected in step 4, then press . 94GB - Sony STR-DA4400ES | Operating Instructions (Large File - 23.37 MB) - Page 95
case, the resolution of the GUI output is set to "480p" for both component video input and HDMI video input. Notes • You cannot assign optical signals from an input source to the optical input jacks on the receiver, and you cannot assign coaxial signals from the input source to the coaxial input - Sony STR-DA4400ES | Operating Instructions (Large File - 23.37 MB) - Page 96
SLEEP. The remaining time appears on the display. If you press SLEEP again, the sleep timer will be changed. 1 Press AMP. The receiver can be operated using the remote. 2 Press NIGHT MODE. The NIGHT MODE function is activated. The NIGHT MODE is set to on and off as you press NIGHT MODE - Sony STR-DA4400ES | Operating Instructions (Large File - 23.37 MB) - Page 97
increase, and "D. Range Comp" is automatically set to "MAX." Recording using the receiver You can record from a video/audio component using the receiver. Refer to the operating instructions supplied with your recording component. Input buttons Using Other Features Recording onto a MiniDisc or - Sony STR-DA4400ES | Operating Instructions (Large File - 23.37 MB) - Page 98
HDMI VIDEO 1) for recording. 4 Start recording on the recording component, then start playback on the playback component. Notes • Some sources contain copy guards to prevent recording. In this case, you may not be able to record from the sources. • The audio input signals from the MULTI CHANNEL - Sony STR-DA4400ES | Operating Instructions (Large File - 23.37 MB) - Page 99
, if other Sony component is operated accidentally by the same remote, when you are operating the receiver using the remote supplied with the receiver. The command modes of both the receiver and the remote are those of the initial setting (COMMAND MODE AV 2). The receiver and the remote, on the - Sony STR-DA4400ES | Operating Instructions (Large File - 23.37 MB) - Page 100
Switching the command mode of the sub remote commander DISPLAY Using a bi-amplifier connection If you are . Not doing so may cause a malfunction of the receiver. To set up speakers 1 Press AMP. The receiver can be operated using the remote. 2 Press MENU. The menu is displayed on the TV screen. - Sony STR-DA4400ES | Operating Instructions (Large File - 23.37 MB) - Page 101
3 Press V/v to select " Settings," then press or b. 4 Press V/v to select "Speaker," then press or b. 5 Press V/v to select "Speaker Pattern," then press . 6 Press V/v to select the appropriate speaker pattern so that there are no surround back speakers. 7 Press RETURN/EXIT O. 8 Press V/v to select - Sony STR-DA4400ES | Operating Instructions (Large File - 23.37 MB) - Page 102
to select the menu item you want, then press to enter. Example: When you select "Auto Calibration" OPTIONS MENU 1 Press AMP. The receiver can be operated using the remote. 2 Press MENU. The menu is displayed on the TV screen. 5 Press V/v repeatedly to select the parameter you want, then press to - Sony STR-DA4400ES | Operating Instructions (Large File - 23.37 MB) - Page 103
list Menu icon Auto Calibration Speaker Surround EQ Multi Zone Audio Video HDMI System Description Sets the speaker level or distance and makes the measurement automatically. Sets the speaker position and impedance manually (page 105). Adjusts the sound field (surround effect) you choose (page - Sony STR-DA4400ES | Operating Instructions (Large File - 23.37 MB) - Page 104
, then press . • Full Flat Makes the measurement of frequency from each speaker flat. • Engineer Sets the frequency to match that of the Sony listening room standard. • Front Reference Adjusts the characteristics of all the speakers to match the characteristics of the front speakers. • OFF Sets the - Sony STR-DA4400ES | Operating Instructions (Large File - 23.37 MB) - Page 105
Speaker settings You can adjust each speaker manually. You can also adjust the speaker levels after the SUR BACK jacks of the MULTI CHANNEL INPUT is invalid (page 86). Note Set "Sur Back Assign" to "OFF," then connect the surround back speakers to this receiver when you want to change the connection - Sony STR-DA4400ES | Operating Instructions (Large File - 23.37 MB) - Page 106
can adjust each speaker manually on the Manual Setup screen. You can also adjust the speaker levels after the auto calibration is completed , select "SMALL" to activate the bass redirection circuitry and output the bass frequencies of each channel from the subwoofer or other "LARGE" speakers. 106GB - Sony STR-DA4400ES | Operating Instructions (Large File - 23.37 MB) - Page 107
When the bass is cut from a channel, the bass redirection circuitry sends the corresponding bass frequencies to the subwoofer or other "LARGE" speakers. However, since bass sound has a certain amount of directionality, it is best not to cut it, if possible. Therefore, even when using small speakers - Sony STR-DA4400ES | Operating Instructions (Large File - 23.37 MB) - Page 108
/SBL, SR/SB, SBL/SL, SB/ SL, SL/L, L/SR Lets you output front 2 channel source sound (instead of the test tone) sequentially from adjacent speakers. Some items may not be them slightly. • The speaker cords may have the short-circuit problem. When a test tone is output from a different speaker than - Sony STR-DA4400ES | Operating Instructions (Large File - 23.37 MB) - Page 109
Distance Unit (Distance unit) Lets you select the unit of measure for setting distances. x meter The distance is displayed in meters. x feet The distance is displayed in feet. Surround settings You can adjust the sound effect on the Sound Filed Setup screen. Note The setup items you can adjust on - Sony STR-DA4400ES | Operating Instructions (Large File - 23.37 MB) - Page 110
• This function does not work in the following cases. - The multi-channel input is selected. - Sound Field is set to "2ch Analog Direct." frequency of higher than 96 kHz are being received. • If the equalizer is adjusted while the receiver is receiving signals with a sampling frequency of higher - Sony STR-DA4400ES | Operating Instructions (Large File - 23.37 MB) - Page 111
each zone You can select the source that is output to the zone. Audio and video signals are output to zone 2, while only audio signals are output to zone 3. the main receiver is turned on. x CTRL Lets you turn the output of 12V triggers on or off manually using the CIS command of the IR remote. x - Sony STR-DA4400ES | Operating Instructions (Large File - 23.37 MB) - Page 112
receiver. Tips • Even when this receiver is standby mode (press ?/1 on the remote to turned off this receiver), the receiver receiver is turned on. Audio settings You can make settings for the audio to suit your preference. A/V Sync (Synchronizes audio and video - The multi-channel input is selected - Sony STR-DA4400ES | Operating Instructions (Large File - 23.37 MB) - Page 113
the HDMI IN jack are selected, only PCM signals are output from the connected player. When signals in any other format are received, set Video settings Makes settings for video. Resolution (Converting video signals) Lets you convert the resolution of analog video input signals. For details on video - Sony STR-DA4400ES | Operating Instructions (Large File - 23.37 MB) - Page 114
protection are output as 480p. Notes • Video signals are not output from the COMPONENT VIDEO MONITOR OUT or MONITOR VIDEO OUT jacks when the monitor, etc., is connected to the HDMI OUT jack. • If you select a resolution that the connected TV does not support in the "Resolution" menu, the images - Sony STR-DA4400ES | Operating Instructions (Large File - 23.37 MB) - Page 115
that of the TV, even if you play multi-channel source. • When you connect the receiver to a video component (projector, etc.), sound may not be output from the receiver. In this case, select "AMP." • When you select the input that you have assigned the HDMI input, sound does not output from the TV - Sony STR-DA4400ES | Operating Instructions (Large File - 23.37 MB) - Page 116
GUI menu on the TV connected to the receiver. x OFF The screen saver function is disabled can operate the receiver using the display window of the receiver even if the TV is not connected to the receiver. AMP RS- the display window of the receiver, press GUI MODE to switch the display mode of the menu to - Sony STR-DA4400ES | Operating Instructions (Large File - 23.37 MB) - Page 117
3 Press MENU. The menu is displayed in the display window of the receiver. Example: When you select "Level Settings" 4 Press V/v repeatedly to select the menu, then press or b. 5 Press V/v repeatedly to select the menu item, then press . The - Sony STR-DA4400ES | Operating Instructions (Large File - 23.37 MB) - Page 118
Menu list (in the display window) The following options are available in each menu. "xx..." in the table signifies the parameter for each item. Menu Item Parameter Initial setting Auto Calibration AUTO CAL START? 5 4 3 2 1 MEASURING: TONE MEASURING: T.S.P. MEASURING: WOOFER COMPLETE [ - Sony STR-DA4400ES | Operating Instructions (Large File - 23.37 MB) - Page 119
Menu Item Parameter Speaker Settings SP PATTERN [xxxxx] 2/0 to 3/4.1 (16 patterns) FRONT SP [xxxxx] SMALL, LARGE CENTER SP [xxxxx] SMALL, LARGE SURROUND SP [xxxxx] SMALL, LARGE BI-AMP [xxx] OFF, ON ZONE2 SP [xxx] OFF, ON FRONT L [xxxxxxxxx] FRONT R [xxxxxxxxx] CENTER [xxxxxxxxx] - Sony STR-DA4400ES | Operating Instructions (Large File - 23.37 MB) - Page 120
Menu Sur Settings EQ Settings Tuner Settings Audio Settings Video Settings Item Parameter Initial setting SOUND FIELD SELECT [xxx] YES, NO NO LOCK CODE EDIT ? 0000 SR ANTENNA AIMING SIRIUS ID DISPLAY A/V SYNC [xxxxxxxxx] 0ms to 300ms (10 ms step) 0ms DUAL MONO [xxxxxxxx] MAIN/SUB, MAIN - Sony STR-DA4400ES | Operating Instructions (Large File - 23.37 MB) - Page 121
Item Parameter HDMI Settings CTRL FOR HDMI [xxx] information on the display. 1 Press AMP. The receiver can be operated using the remote. 2 Select the input for which you want been entered. When tuning in a channel from a satellite tuner Channel name t Channel number t Category t Artist name t - Sony STR-DA4400ES | Operating Instructions (Large File - 23.37 MB) - Page 122
you are using with the remote supplied with the receiver. The remote is initially set to control Sony components. When you change the settings of the remote according to the components you are using, you can control non-Sony and other Sony components that the remote is initially unable control (page - Sony STR-DA4400ES | Operating Instructions (Large File - 23.37 MB) - Page 123
Video Digital DSS Digital Tape deck player, Disc Recorder CD CATV (UC) satellite/ A/B DVD/ Player player, terminal terrestrial VHS LD (UC) receiver combo player (EURO) DAT CD DIGITAL deck player, MEDIA MD PORT deck device AV ?/1 zz Video CD only. Using the Remote 123GB - Sony STR-DA4400ES | Operating Instructions (Large File - 23.37 MB) - Page 124
Sony components that the remote is normally unable to control. The procedure below uses as an example a case in which a VCR made by a company other than Sony is connected to the VIDEO 2 IN jacks on the receiver. RM SET UP SHIFT Numeric buttons AV For a TV remote code value, only numbers in the 500 - Sony STR-DA4400ES | Operating Instructions (Large File - 23.37 MB) - Page 125
407 409, 410 414 416, 422 404, 421 418, 420 To control a DVD/VIDEO COMBO (recorder) Maker SONY Code(s) 411 To control a HDD/DVD COMBO (recorder) Maker SONY Code(s) 401, 402, 403 To control a TV Maker SONY AIWA AKAI AOC CENTURION CORONADO CURTIS-MATHES DAYTRON DAEWOO FISHER FUNAI FUJITSU Code - Sony STR-DA4400ES | Operating Instructions (Large File - 23.37 MB) - Page 126
, 543, 567 503, 509, 510, 544 515, 534, 556 To control an LD player Maker SONY PIONEER Code(s) 601, 602, 603 606 To control a video CD player Maker SONY Code(s) 605 To control a VCR Maker SONY AIWA* AKAI BLAUPUNKT EMERSON FISHER GENERAL ELECTRIC (GE) GOLDSTAR/LG GRUNDIG HITACHI ITT/NOKIA JVC - Sony STR-DA4400ES | Operating Instructions (Large File - 23.37 MB) - Page 127
871 868 867 873 872 875 869, 870 To control a cable box Maker SONY HAMLIN/REGAL JERROLD/G.I./ MOTOROLA JERROLD OAK PANASONIC PHILIPS PIONEER RCA SCIENTIFIC ATLANTA TOCOM/PHILIPS commands in a sequential order as a single command. The remote provides 2 macro lists (MACRO 1 and MACRO 2). You can - Sony STR-DA4400ES | Operating Instructions (Large File - 23.37 MB) - Page 128
Program the sequence of the operation RM SET UP Input buttons N, x, X, M, m, ., > MACRO 1 MACRO 2 1 Press MACRO 1 or MACRO 2 for more than 1 second while pressing RM SET UP. The RM SET UP button flashes and one of the input buttons lights up (as the initial setting, the VIDEO1 button lights). 2 - Sony STR-DA4400ES | Operating Instructions (Large File - 23.37 MB) - Page 129
codes that are not stored in the remote Even if a remote commander code is not one of the presets stored in the remote, it is possible for the remote to learn the code using the learning function. Note When setting up the receiver to learn the remote command modes, replace the batteries with new - Sony STR-DA4400ES | Operating Instructions (Large File - 23.37 MB) - Page 130
in step 2 lights up. (The RM SET UP button remains lit.) 4 Point the remote code receiver section of the remote toward the receiver/transmitter on the remote commander to be learned from. While the second remote is receiving the signal, the input button selected in step 2 turns off. About 5 cm - 10 - Sony STR-DA4400ES | Operating Instructions (Large File - 23.37 MB) - Page 131
Clearing all the contents of the remote's memory AV ?/1 ?/1 Using the Remote MASTER VOL 1 Press and hold MASTER VOL - first, then press ?/1, then press AV ?/1. The RM SET UP button flashes three times. 2 Release all buttons. All the contents of the remote's memory (e.g., all the programmed data) - Sony STR-DA4400ES | Operating Instructions (Large File - 23.37 MB) - Page 132
channels Sony Pictures Entertainment's dubbing studios. There are three modes, A/B/ C, available according to the studio type. x Component video A format for transmitting video HDMI jack. However, the number of colors which can be expressed by 1 pixel will be 36, etc., bits when the receiver modeling - Sony STR-DA4400ES | Operating Instructions (Large File - 23.37 MB) - Page 133
/24 A high sound quality digital signal format. It records audio at a sampling frequency and bit rate of 96 kHz/24 bit which is the highest possible for DVD-video. The number of playback channels varies depending on the software. x DTS Digital Surround Digital audio encoding/decoding technology for - Sony STR-DA4400ES | Operating Instructions (Large File - 23.37 MB) - Page 134
has a maximum transmission rate of 6 Mbps, with channels stereo recorded audio for 7 channels HDMI specification supports HDCP (High-bandwidth Digital Contents Protection), a copy protection technology that incorporates coding technology for digital video , all the odd-numbered lines are drawn, leaving - Sony STR-DA4400ES | Operating Instructions (Large File - 23.37 MB) - Page 135
at a qualified service shop. On heat buildup Although the receiver heats up during operation, this is not a malfunction. If you continuously use this receiver at a large any questions or problems concerning your receiver, please consult your nearest Sony dealer. Additional Information 135GB - Sony STR-DA4400ES | Operating Instructions (Large File - 23.37 MB) - Page 136
receiver, use this troubleshooting guide to help you remedy the problem. Should any problem persist, consult your nearest Sony receiver has been activated. Turn off the receiver, eliminate the short-circuit problem, and turn on the power again. There is no sound from a specific 2 channel sources. - Sony STR-DA4400ES | Operating Instructions (Large File - 23.37 MB) - Page 137
receiver's menu on the TV monitor. Press MENU to turn off the display. • Depending on the playback component, component may need to be set up. Refer to the operating instructions supplied with the each component. • Be sure to use a connecting cable for the HDMI or DTS multi-channel sound is not - Sony STR-DA4400ES | Operating Instructions (Large File - 23.37 MB) - Page 138
supports this receiver. Video There is no picture or an unclear picture appears on the TV screen or monitor. • Select the appropriate input on the receiver instructions supplied with the each component. • Be sure to use a connecting cable for the HDMI jack corresponding to high speed (an HDMI - Sony STR-DA4400ES | Operating Instructions (Large File - 23.37 MB) - Page 139
. The system cannot receive satellite channels at all. • The receiving condition is not good. Move the antenna to the place where the condition is good. • Check that you subscribed to the desired satellite radio service (see page 63). Control for HDMI The Control for HDMI function does not work - Sony STR-DA4400ES | Operating Instructions (Large File - 23.37 MB) - Page 140
and TV. Refer to the operation instructions supplied with each component and TV. - Change the input of the receiver to the HDMI input connected to the component. Remote commander The remote does not function. • Point the remote at the remote sensor on the receiver. • Remove any obstacles in the path - Sony STR-DA4400ES | Operating Instructions (Large File - 23.37 MB) - Page 141
SPECIFICATIONS POWER OUTPUT AND TOTAL HARMONIC DISTORTION: With 8 ohm loads, both channels driven, from 20 - 20,000 Hz; rated 120 watts per channel minimum RMS power, with no more than 0.09% total harmonic distortion from 250 milliwatts to rated , DVD, SA-CD/CD (Coaxial) VIDEO 1, TV, SAT, TAPE, MD ( - Sony STR-DA4400ES | Operating Instructions (Large File - 23.37 MB) - Page 142
Instructions (this manual) Quick Setup Guide (1) GUI Menu List (1) Optimizer microphone ECM-AC2 (1) FM wire antenna (aerial) (1) AM loop antenna (aerial) (1) AC power cord (mains lead) (1) Main remote commander (1) Sub remote commander (1) R6 (size-AA) batteries (4) Design and specifications - Sony STR-DA4400ES | Operating Instructions (Large File - 23.37 MB) - Page 143
2ch Stereo Mode 73 4 Ω 43 5.1 channel 19 7.1 channel 19 8 Ω 43 A A.F.D. (mode) 74 A/V Sync 54, 112, 120 AC power cord 40 AM EX (mode) 79 Clear memory 40 remote 131 Connections antennas 39 audio components 25 monitor 23 speakers 21 video components 30 Control for HDMI 115 Crossover Freq 107, 119 D - Sony STR-DA4400ES | Operating Instructions (Large File - 23.37 MB) - Page 144
(Picture in Picture) 17, 18 PLII 75 PLIIx 75 Position (Auto Calibration) 103, 118 Preset channels 68 Preset Mode 69 Preset stations 62 PROTECTOR 140 144GB Q Quick Setup 46 R Radio ID 66 Recording 97, 98 Remote 15-18, 41, 122-131 Repeat 57 Resetting 40 Resolution 113, 120 RS-232C Control 116 - Sony STR-DA4400ES | Operating Instructions (Large File - 23.37 MB) - Page 145
Video 113 VIDEO 2 IN/PORTABLE AV IN jacks 37 X XM 63 XM Radio 63 Z Zone 12V Trigger 111, 121 ZONE 2 105 145GB Additional Information - Sony STR-DA4400ES | Operating Instructions (Large File - 23.37 MB) - Page 146
• Les instructions de ce manuel couvrent le modèle STR-DA4400ES. Vérifiez le numéro de votre modèle en bas et à droite du panneau avant. • Dans ce manuel, le modèle américain/canadien est illustré ici sauf mention contraire. Toutes les différences de fonctionnement sont clairement indiquées dans le - Sony STR-DA4400ES | Operating Instructions (Large File - 23.37 MB) - Page 147
Inc. « SIRIUS » et le logo du chien SIRIUS sont des marques déposées de SIRIUS Satellite Radio Inc. Ce produit, utilisant Neural-THX® Surround, est breveté par Neural Audio Corporation et THX Ltd. Sony Corporation octroie ainsi à l'utilisateur un droit d'utilisation de ce produit non exclusif, non - Sony STR-DA4400ES | Operating Instructions (Large File - 23.37 MB) - Page 148
service aux réglages appropriés (Auto Calibration 47 Guide pour les opérations à l'écran 54 /visionnage d'images à partir des appareils raccordés au DIGITAL MEDIA PORT 59 Commande du TDM-iP1/ Sync 94 Passage entre son numérique et analogique 97 Écoute du son/visionnage d'images d'autres entrées - Sony STR-DA4400ES | Operating Instructions (Large File - 23.37 MB) - Page 149
tres EQ 115 Paramètres Multi Zone 116 Paramètres Audio 118 Paramètres Video 119 Paramètres HDMI 121 Paramètres System 122 Utilisation sans raccordement à un téléviseur 122 Utilisation complémentaires Glossaire 138 Précautions 141 Guide de dépannage 142 Spécifications 147 Index 150 5FR - Sony STR-DA4400ES | Operating Instructions (Large File - 23.37 MB) - Page 150
Description et emplacement des pièces Panneau avant Pour retirer le cache Appuyez sur PUSH. Après avoir retiré le cache, gardez-le hors de portée des enfants. État de la touche POWER Arrêt L'ampli-tuner est éteint (réglage par défaut). Appuyez sur POWER pour allumer l'ampli-tuner. Vous ne pouvez pas - Sony STR-DA4400ES | Operating Instructions (Large File - 23.37 MB) - Page 151
POWER, les signaux de sortie pour la zone sélectionnée sont activés ou désactivés (page 88). L HDMI IN Appuyez sur cette touche pour sélectionner le signal d'entrée de l'appareil raccordé aux prises HDMI IN (page 34). M MULTI IN Appuyez sur cette touche pour sélectionner l'appareil raccordé à la - Sony STR-DA4400ES | Operating Instructions (Large File - 23.37 MB) - Page 152
(page 47) sur OFF, A, B, A+B. P Prises VIDEO 2 Permet de raccorder un IN/PORTABLE appareil audio/vidéo AV IN portable tel qu'un caméscope ou une console de jeux vidéo. Q Témoin MULTI S'allume lors du CHANNEL décodage de - Sony STR-DA4400ES | Operating Instructions (Large File - 23.37 MB) - Page 153
Indicateurs sur l'affichage Désignation A SW Fonction S'allume quand le subwoofer est raccordé et que le signal audio est émis par la prise SUBWOOFER. Lorsque cet indicateur est allumé, l'ampli-tuner crée un signal de subwoofer d'après le signal L.F.E. qu'il reçoit du disque en cours de lecture ou - Sony STR-DA4400ES | Operating Instructions (Large File - 23.37 MB) - Page 154
canaux) Exemple : Format d'enregistrement (Avant/Surround) : 3/2.1 Canal de sortie : Enceintes surround réglées sur « NO ». Champ sonore : A.F.D. AUTO SW L C R SL SR Désignation C Indicateurs d'entrée INPUT HDMI DMPORT MULTI IN AUTO COAX OPT ANALOG D EQ E D.C.A.C. F ZONE 2/ ZONE 3 Fonction - Sony STR-DA4400ES | Operating Instructions (Large File - 23.37 MB) - Page 155
Désignation G SLEEP H L.F.E. I DSD Fonction S'allume lorsque la minuterie d'arrêt est activée. S'allume lorsque le disque en cours de lecture contient un canal L.F.E. (Low Frequency Effects) et que le signal du canal L.F.E. est en cours de restitution. Les barres sous les lettres s'allument pour - Sony STR-DA4400ES | Operating Instructions (Large File - 23.37 MB) - Page 156
un des indicateurs suivants. MSTR DTS-HD Master Audio LBR DTS-HD Low Bit Rate Audio HI RES P ;TrueHD Q L-PCM DTS-HD High Resolution Audio S'allume du signal d'entrée. DISCRETE DTS-ES Discrete 6.1 MATRIX DTS-ES Matrix 6.1 Remarque Avant la lecture d'un disque au format DTS, assurez-vous que - Sony STR-DA4400ES | Operating Instructions (Large File - 23.37 MB) - Page 157
Désignation Fonction T Neural-THX S'allume lorsque l'ampli- tuner applique le traitement Neural-THX aux signaux d'entrée. 13FR - Sony STR-DA4400ES | Operating Instructions (Large File - 23.37 MB) - Page 158
une meilleure qualité du son (pages 26, 29, 34, 37, 38). Prises HDMI IN/OUT* Permettent de raccorder un lecteur DVD, un lecteur Blu-ray Disc, un 34). B Prises de commande pour appareils Sony et autres appareils externes Prises IR Permet de raccorder REMOTE IN/ un répéteur OUT infrarouge (page - Sony STR-DA4400ES | Operating Instructions (Large File - 23.37 MB) - Page 159
Prises MULTI CHANNEL INPUT Permettent de VIDEO IN Permet de raccorder l'appareil pour visionner dans la fenêtre PIP (Picture in Picture). I Section SPEAKERS Permet de raccorder des enceintes (page 24). * Vous pouvez visionner l'image de l'entrée sélectionnée lorsque vous raccordez la prise HDMI - Sony STR-DA4400ES | Operating Instructions (Large File - 23.37 MB) - Page 160
l'ampli-tuner et les autres appareils Sony s'éteignent (SYSTEM STANDBY). Remarque La fonction de la touche AV ?/ 1 change automatiquement à chaque même temps sur ?/1 et AV ?/ 1 (1) (SYSTEM STANDBY). C ZONE D AMP Économiser de l'énergie en mode veille. Lorsque « Control for HDMI » (page 121) et « - Sony STR-DA4400ES | Operating Instructions (Large File - 23.37 MB) - Page 161
lectionner l'appareil que vous désirez commander. Lorsque vous appuyez sur une touche de source d'entrée, l'ampli-tuner s'allume. Les touches ont été programmées en usine pour commander des appareils Sony (page 57, 92). Vous pouvez reprogrammer la télécommande pour qu'elle commande des appareils non - Sony STR-DA4400ES | Operating Instructions (Large File - 23.37 MB) - Page 162
vous connectez l'ampli-tuner à des produits avec « BRAVIA » Sync. X TV Appuyez sur cette touche pour activer la commande du appuyez sur cette touche pour - mémoriser/rappeler des stations préréglées. - sélectionner les numéros de plage d'un lecteur CD, HDMI OUT ou COMPONENT VIDEO MONITOR OUT. 18FR - Sony STR-DA4400ES | Operating Instructions (Large File - 23.37 MB) - Page 163
être PIP provient de la prise EXT VIDEO IN. Vous pouvez échanger la position de l'écran Les signaux vidéo HDMI ne sont pas émis lorsque la fenêtre PIP est affichée. es DISPLAY Appuyez sur cette touche pour revenir au menu précédent ou pour quitter le menu lorsque le menu ou le guide à l'écran du - Sony STR-DA4400ES | Operating Instructions (Large File - 23.37 MB) - Page 164
couper temporairement le son. Appuyez de nouveau sur cette touche pour rétablir le son. K RETURN/ EXIT Appuyez sur cette touche pour revenir au menu précédent ou pour quitter le menu. L DISPLAY Appuyez sur cette touche pour sélectionner les informations apparaissant sur l'afficheur. Remarque - Sony STR-DA4400ES | Operating Instructions (Large File - 23.37 MB) - Page 165
ZONE 2 VIDEO t OFF. Vous pouvez échanger la position de l'écran principal et de la fenêtre PIP (échanger) en appuyant sur (4). Vous pouvez agrandir ou réduire la fenêtre à l'aide de V/ v (4). Vous pouvez aussi changer la position de la fenêtre à l'aide de B/b (4). Remarque Les signaux vidéo HDMI ne - Sony STR-DA4400ES | Operating Instructions (Large File - 23.37 MB) - Page 166
Mise en service 1: Installation des enceintes Cet ampli-tuner vous permet d'utiliser un système 7.1 canaux (7 enceintes et un subwoofer). Utilisation d'un système 5.1/7.1 canaux Pour tirer pleinement - Sony STR-DA4400ES | Operating Instructions (Large File - 23.37 MB) - Page 167
Mise en service Conseils • Les angles A doivent être identiques. • Dans le cas d'un système 6.1 canaux, placez l'enceinte surround arrière derrière la position du siège. • Vous pouvez placer le subwoofer où vous le désirez car il n'émet pas de signaux très directionnels. 23FR - Sony STR-DA4400ES | Operating Instructions (Large File - 23.37 MB) - Page 168
2: Raccordement des enceintes Avant de raccorder les cordons, débranchez le cordon d'alimentation secteur. H G F E B B FRONT SPEAKERS Bornes B a) A B B D C B A A Cordon audio mono (non fourni) B Cordons d'enceintes (non fournis) AEnceinte avant A (G) BEnceinte avant A (D) CEnceinte - Sony STR-DA4400ES | Operating Instructions (Large File - 23.37 MB) - Page 169
le signal d'entrée du subwoofer descend au-dessous d'un certain seuil et il n'y a alors plus de son. c) Si vous ne raccordez qu'une enceinte surround arrière, raccordez-la aux bornes SURROUND BACK SPEAKERS L. Remarques • Lorsque toutes les enceintes raccordées ont une impédance nominale égale ou - Sony STR-DA4400ES | Operating Instructions (Large File - 23.37 MB) - Page 170
3: Raccordement de l'écran Vous pouvez visionner l'image de l'entrée sélectionnée lorsque vous raccordez la prise HDMI OUT ou les prises MONITOR OUT à un téléviseur. Vous pouvez commander cet ampli-tuner à l'aide d'une interface utilisateur graphique GUI (Graphical User Interface). Il n'est - Sony STR-DA4400ES | Operating Instructions (Large File - 23.37 MB) - Page 171
service Remarques • Avant de raccorder les cordons, débranchez le cordon d'alimentation secteur. • Raccordez un écran tel qu'un écran de téléviseur ou un projecteur à la prise MONITOR VIDEO entendez le son du téléviseur par les enceintes connectées à l'ampli-tuner. Dans cette configuration, si la - Sony STR-DA4400ES | Operating Instructions (Large File - 23.37 MB) - Page 172
4a: Raccordement des appareils audio Comment raccorder vos appareils Cette section décrit comment raccorder vos appareils à cet ampli-tuner. Avant de commencer, consultez le tableau « Appareil à raccorder » pour connaître les pages à consulter pour le raccordement de chaque appareil. Après avoir - Sony STR-DA4400ES | Operating Instructions (Large File - 23.37 MB) - Page 173
en service Raccordement numériques, insérez les fiches en les tenant bien droites jusqu'au déclic. • Ne pliez pas et n'attachez pas des cordons optiques é le cordon si des cordons sont branchés sur la prise COMPONENT VIDEO. - Retirez l'adaptateur DIGITAL MEDIA PORT en appuyant sur les côtés - Sony STR-DA4400ES | Operating Instructions (Large File - 23.37 MB) - Page 174
un Super Audio CD, raccordez le lecteur aux prises MULTI CHANNEL INPUT ou SA-CD/CD IN. Consultez le mode HDMI. • Vous ne pouvez pas effectuer un enregistrement numérique d'un Super Audio CD. • Lors du raccordement de cordons optiques numériques, insérez les fiches en les tenant bien droites jusqu'au - Sony STR-DA4400ES | Operating Instructions (Large File - 23.37 MB) - Page 175
Mise en service Raccordement d'appareils dotés de prises de sortie multicanal Si votre lecteur DVD, lecteur Blu-ray Disc ou lecteur Super Audio CD comporte des prises de sortie multicanal, vous pouvez les raccorder aux prises MULTI CHANNEL INPUT de cet amplituner pour bénéficier du son multicanal. - Sony STR-DA4400ES | Operating Instructions (Large File - 23.37 MB) - Page 176
Raccordement d'appareils dotés de prises audio analogiques L'illustration suivante indique comment raccorder un appareil doté de prises analogiques tel qu'une platine-cassette, une platine tourne-disque, etc. Lecteur Super Audio CD, lecteur CD Platine-cassette A A A A Platine MD Platine tourne- - Sony STR-DA4400ES | Operating Instructions (Large File - 23.37 MB) - Page 177
Mise en service 4b: Raccordement des appareils vidéo Comment raccorder vos appareils Cette « 5: Raccordement des antennes » (page 42). Appareil à raccorder Écran de téléviseur Avec prise HDMI Lecteur DVD, lecteur Blu-ray Disc Tuner satellite, boîtier décodeur Enregistreur DVD, magnétoscope Cam - Sony STR-DA4400ES | Operating Instructions (Large File - 23.37 MB) - Page 178
riques comportant jusqu'à 8 canaux grâce à la prise HDMI IN. • Des signaux vidéo analogiques reçus à la prise VIDEO ou aux prises COMPONENT VIDEO peuvent être émis comme des signaux HDMI. Les signaux audio ne sont pas émis par une prise HDMI OUT lorsque l'image est convertie. • Cet ampli-tuner prend - Sony STR-DA4400ES | Operating Instructions (Large File - 23.37 MB) - Page 179
d'utiliser un câble Sony HDMI. B Cordon optique numérique (non fourni) C Cordon audio (non fourni) Pour profiter d'un son surround multicanal sur le téléviseur Vous pouvez écouter un son surround multicanal sur votre téléviseur à partir des enceintes raccordées à l'ampli-tuner. Raccordez - Sony STR-DA4400ES | Operating Instructions (Large File - 23.37 MB) - Page 180
un câble HDMI portant le logo HDMI (fabriqué par Sony) pour la prise HDMI correspondant à la haute vitesse (un câble HDMI version 1.3a, tre émis par les prises VIDEO OUT ou MONITOR VIDEO OUT. • Les signaux audio et vidéo de l'entrée HDMI ne sont pas émis de la prise HDMI OUT lorsque le menu de l' - Sony STR-DA4400ES | Operating Instructions (Large File - 23.37 MB) - Page 181
Mise en service Raccordement d'un lecteur DVD ou d'un lecteur Blu-ray Disc L'illustration suivante indique comment raccorder un lecteur DVD ou un lecteur Blu-ray Disc. Il n' - Sony STR-DA4400ES | Operating Instructions (Large File - 23.37 MB) - Page 182
Raccorder un tuner satellite, boîtier décodeur L'illustration suivante indique comment raccorder un tuner satellite ou un boîtier décodeur. Il n'est pas nécessaire de raccorder tous les câbles. Raccordez les cordons audio et vidéo correspondant aux prises de vos appareils. Signaux audio Tuner - Sony STR-DA4400ES | Operating Instructions (Large File - 23.37 MB) - Page 183
Mise en service Raccordement d'appareils dotés de prises vidéo et audio analogiques L'illustration suivante indique comment raccorder un appareil doté de prises analogiques tel qu'un enregistreur DVD - Sony STR-DA4400ES | Operating Instructions (Large File - 23.37 MB) - Page 184
Retirez le cache. Vers les prises VIDEO 2 IN/ PORTABLE AV IN C C Cordon audio/vidéo (non fourni) éo, voir « Paramètres Video » (page 119). Prise INPUT Prise OUTPUT HDMI IN 1/2/3/4/5/6 VIDEO IN COMPONENT VIDEO IN HDMI OUT a a a COMPONENT VIDEO MONITOR OUT - a a MONITOR VIDEO OUT - a a a - Sony STR-DA4400ES | Operating Instructions (Large File - 23.37 MB) - Page 185
mis de la prise HDMI OUT lorsque les deux sont connectés. • Placez « Resolution » sur « AUTO » ou « 480i/576i » dans le menu de paramétrage Video pour émettre les signaux vidéo depuis les prises MONITOR VIDEO OUT, COMPONENT VIDEO MONITOR OUT, lorsque les deux sont raccordées. Pour afficher les sous - Sony STR-DA4400ES | Operating Instructions (Large File - 23.37 MB) - Page 186
5: Raccordement des antennes Raccordez l'antenne cadre AM et l'antenne fil FM fournies. Antenne fil FM (fournie) Antenne cadre AM (fournie) * La forme du connecteur peut différer selon les zones. Remarques • Pour empêcher les parasites, placez l'antenne cadre AM à l'écart de l'ampli-tuner et des - Sony STR-DA4400ES | Operating Instructions (Large File - 23.37 MB) - Page 187
Mise en service 6: Préparation de l'amplituner et de la télécommande Branchement du cordon ampli-tuner. 2 Maintenez POWER enfoncé tout en appuyant sur TONE MODE et HDMI IN pour allumer l'amplituner. 3 Relâchez TONE MODE et HDMI IN après quelques secondes. Après que « MEMORY CLEARING... » est apparu - Sony STR-DA4400ES | Operating Instructions (Large File - 23.37 MB) - Page 188
• Ne laissez pas la télécommande dans un endroit très chaud ou très humide. • N'utilisez pas une pile neuve avec des piles usagées. • N'utilisez pas des piles au manganèse avec des piles d'un autre type. • N'exposez pas le capteur de télécommande (sur l'appareil) aux rayons directs du soleil ou - Sony STR-DA4400ES | Operating Instructions (Large File - 23.37 MB) - Page 189
Mise en service 3 Appuyez sur AMP. enceintes Sélectionnez l'impédance correspondant à celle des enceintes utilisées. AMP Le menu de l'ampli-tuner s'affiche sur l'écran messages dans le menu GUI sur l'écran du téléviseur. Les langues au choix sont anglais, espagnol, français et allemand. Pour plus - Sony STR-DA4400ES | Operating Instructions (Large File - 23.37 MB) - Page 190
l'impédance des enceintes, consultez le mode d'emploi des enceintes. (Cette information se trouve souvent au dos des enceintes.) • Lorsque toutes les enceintes raccordées ont une impédance nominale d'au moins 8 ohms, placez « Impedance » sur « 8 Ω ». Lorsque des enceintes d'autres types sont raccord - Sony STR-DA4400ES | Operating Instructions (Large File - 23.37 MB) - Page 191
Mise en service Sélection des enceintes avant Vous pouvez sélectionner les enceintes sélectionner sur A Les enceintes raccordées aux bornes FRONT SPEAKERS A. B Les enceintes raccordées aux bornes FRONT SPEAKERS B. A+B Les deux paires d'enceintes raccordées aux bornes FRONT SPEAKERS A et - Sony STR-DA4400ES | Operating Instructions (Large File - 23.37 MB) - Page 192
sactivez MUTING s'il est en marche. Microphone d'optimisation Réglage du subwoofer amplifié • Si un subwoofer est raccordé, allumez-le et augmentez le volume au préalable. Tournez le bouton du MASTER VOLUME jusque un peu avant le point central. • Si le subwoofer est doté d'une fonction de sélection - Sony STR-DA4400ES | Operating Instructions (Large File - 23.37 MB) - Page 193
Mise en service a) Lorsque l'entrée multicanal est sélectionnée, cet ampli-tuner ne remixe le son multicanal en son stéréo (downmix analogique) que pour les canaux de l'enceinte centrale - Sony STR-DA4400ES | Operating Instructions (Large File - 23.37 MB) - Page 194
cas, vous pouvez continuer à utiliser l'ampli-tuner. Conseils • Les opérations autres que la mise sous ou hors tension de l'ampli-tuner sont désactivées pendant la mesure. • Il se peut que les mesures ne s'effectuent pas correctement ou que le calibrage automatique ne soit pas possible dans les cas - Sony STR-DA4400ES | Operating Instructions (Large File - 23.37 MB) - Page 195
Mise en service Pour annuler la mesure La mesure est annulée si vous réglez le enceinte plane. Engineer Sélectionne des caractéristiques de fréquence correspondant aux normes d'un auditorium Sony. Front Reference Règle les caractéristiques de toutes les enceintes sur celles des enceintes avant. - Sony STR-DA4400ES | Operating Instructions (Large File - 23.37 MB) - Page 196
sur lorsque « Error occurred during calibration, press to investigate. » apparaît à l'écran. Confirmez les détails des résultats de mesure, puis procédez au remède approprié. 2 Appuyez sur B/b pour sélectionner « Retry », puis appuyez sur . 3 Répétez les étapes 6 à 8 de « Exécution du calibrage - Sony STR-DA4400ES | Operating Instructions (Large File - 23.37 MB) - Page 197
Mise en service Liste des messages après une mesure de calibrage automatique la position d'un subwoofer ne peuvent pas être détectées. Ou l'angle de la position d'une enceinte ne peut pas être détecté. Ceci peut être dû au bruit. Essayez d'effectuer la mesure dans un environnement silencieux. - Sony STR-DA4400ES | Operating Instructions (Large File - 23.37 MB) - Page 198
Guide pour les opérations à l'écran Vous pouvez afficher le menu de l'ampli-tuner sur l'écran du téléviseur et sélectionner la fonction que vous voulez utiliser - Sony STR-DA4400ES | Operating Instructions (Large File - 23.37 MB) - Page 199
Mise en service Pour quitter le « GUI MODE » Appuyez sur GUI MODE. « GUI MODE OFF pouvez régler les enceintes, l'effet surround, l'égaliseur, l'audio, la vidéo et d'autres entrées raccordées aux prises HDMI (page 107). 3 Appuyez plusieurs fois sur V/v pour sélectionner le menu que vous voulez, puis - Sony STR-DA4400ES | Operating Instructions (Large File - 23.37 MB) - Page 200
6 Appuyez plusieurs fois sur V/v pour sélectionner le paramètre voulu, puis appuyez sur . Pour quitter le menu Appuyez sur MENU. 56FR - Sony STR-DA4400ES | Operating Instructions (Large File - 23.37 MB) - Page 201
peuvent être utilisés Video1, Video2 Magnétoscope VIDEO 1, 2, etc., raccordé à la prise VIDEO 1 ou VIDEO 2. BD Lecteur Blu-ray Disc, etc., PHONO. MULTI IN Appareil raccordé à la prise MULTI CHANNEL INPUT. HDMI1, 2, 3, 4, 5, 6 Appareils HDMI raccordés à la prise HDMI1, HDMI2, HDMI3, HDMI4, - Sony STR-DA4400ES | Operating Instructions (Large File - 23.37 MB) - Page 202
avant d'éteindre l'ampli-tuner. Attribution d'un nom à l'entrée (Name Input) Vous pouvez saisir un nom de jusqu'à 8 caractères pour les entrées et l'afficher. Cette fonction est pratique pour attribuer aux prises le nom des appareils raccordés. 1 Appuyez plusieurs fois sur V/v sur l'écran « Input - Sony STR-DA4400ES | Operating Instructions (Large File - 23.37 MB) - Page 203
dans le menu « A/V Sync » pour l'entrée sont affichés dans une liste. Écoute du son/visionnage d'images à partir des appareils raccordés au DIGITAL MEDIA PORT Le de prises d'entrée/sortie audio numériques » (page 29). Sony propose les adaptateurs DIGITAL MEDIA PORT suivants : • TDM-BT1 Bluetooth - Sony STR-DA4400ES | Operating Instructions (Large File - 23.37 MB) - Page 204
AMP V/v/b, MENU MASTER VOL 1 Appuyez sur AMP. Vous pouvez commander l'ampli-tuner à l'aide de la télécommande. 2 Appuyez sur MENU. Le menu s'affiche sur l'écran du téléviseur. 3 Appuyez plusieurs fois sur V/v pour sélectionner « Music », puis appuyez sur ou b. 4 Appuyez plusieurs fois sur V/v pour - Sony STR-DA4400ES | Operating Instructions (Large File - 23.37 MB) - Page 205
Lecture Commande du TDM-iP1/ iP50/TDM-NC1 à l'aide du menu GUI de l'amplituner Assurez-vous que « System GUI » est sélectionné à l'étape 4 de « Changement de l'écran d'utilisation à l'aide du DIGITAL MEDIA PORT » (page 63). AMP V/v, OPTIONS MENU 1 Appuyez sur AMP. Vous pouvez commander l'ampli- - Sony STR-DA4400ES | Operating Instructions (Large File - 23.37 MB) - Page 206
aucun appareil connecté à l'adaptateur. Aucun fichier audio trouvé. Les données sont en cours de lecture. Il n'y a pas de serveur connecté. Aucune plage trouvée. Aucune option trouvée. Connexion au serveur. Le réseau est en cours de configuration. Vérifiez l'affichage de - Sony STR-DA4400ES | Operating Instructions (Large File - 23.37 MB) - Page 207
Lecture Changement de l'écran d'utilisation à l'aide du DIGITAL MEDIA PORT Vous pouvez modifier l'écran d'utilisation à l'aide du menu GUI. Le mode DMPORT Control est pris en charge par les adaptateurs DIGITAL MEDIA PORT comme TDM-iP1/ iP50, TDM-NC1. Ce mode n'est pas pris en charge par d'autres - Sony STR-DA4400ES | Operating Instructions (Large File - 23.37 MB) - Page 208
/AM Vous pouvez écouter des émissions FM et AM avec le tuner interne. Avant l'utilisation, assurez-vous que les antennes FM et AM ont été raccordées à l'ampli-tuner (page 42). Conseil L'intervalle d'accord pour l'accord direct est indiqué ci-dessous. • Gamme FM 100 kHz • Gamme AM 10 kHz L'intervalle - Sony STR-DA4400ES | Operating Instructions (Large File - 23.37 MB) - Page 209
d'accord sur 10 kHz (ou 9 kHz), répétez la procédure ci-dessus. Remarque Lorsque vous changez l'intervalle d'accord, ceci efface toutes les stations préréglées. 65FR - Sony STR-DA4400ES | Operating Instructions (Large File - 23.37 MB) - Page 210
(page 64). 2 Appuyez sur OPTIONS. Le menu d'options s'affiche. 3 Appuyez sur V/v pour sélectionner « Memory », puis appuyez sur . Sélection de stations préréglées 1 Appuyez sur AMP. Vous pouvez commander l'ampli-tuner à l'aide de la télécommande. 2 Appuyez sur MENU. Le menu s'affiche sur l'écran du - Sony STR-DA4400ES | Operating Instructions (Large File - 23.37 MB) - Page 211
de divertissement et d'émissions pour enfants d'une qualité numérique supérieure diffusées d'un océan à l'autre. Pour obtenir de plus amples renseignements ou pour le site www.xmradio.com ou communiquez avec le service à l'auditoire au 1 800 967-2346; si vous êtes un client canadien, consultez le site - Sony STR-DA4400ES | Operating Instructions (Large File - 23.37 MB) - Page 212
susceptibles d'être considérés comme offensants sont identifiées par les lettres XL. Composez le 1 800 967-2346 (aux États-Unis) ou le 1 877 438-9677 (au Canada) pour bloquer des chaînes sur votre récepteur radio XM. Le service XM est offert seulement au Canada et dans les 48 États contigus des - Sony STR-DA4400ES | Operating Instructions (Large File - 23.37 MB) - Page 213
de votre maison situés à proximité d'une fenêtre pour trouver la meilleure réception. La plupart des abonnés XM placent l'antenne au niveau d'une fenêtre orientée au sud, avec une vue dégagée sur le ciel. Pour raccorder à la prise SIRIUS Raccordez le tuner SiriusConnect. Lorsque vous utilisez le - Sony STR-DA4400ES | Operating Instructions (Large File - 23.37 MB) - Page 214
4 Appuyez sur V/v pour sélectionner « ALL », puis appuyez sur ou b. Lorsque l'écran Preset Mode s'affiche, passez en mode de sélection « Category Mode », puis sélectionnez « ALL ». Appuyez sur OPTIONS, puis plusieurs fois sur V/v pour sélectionner « Category Mode ». 5 Appuyez sur V/v pour sé - Sony STR-DA4400ES | Operating Instructions (Large File - 23.37 MB) - Page 215
Sélectionner un canal de la radio satellite AMP V/v/b, OPTIONS MENU Sélectionner un canal par catégorie (Category Mode) Vous pouvez sélectionner un canal à partir d'une catégorie ou de toutes les catégories. 1 Appuyez sur AMP. Vous pouvez commander l'ampli-tuner à l'aide de la télécommande. 2 - Sony STR-DA4400ES | Operating Instructions (Large File - 23.37 MB) - Page 216
4 Appuyez sur OPTIONS. Le menu d'options s'affiche. 5 Appuyez sur V/v pour sélectionner « Direct Tuning », puis appuyez sur . 6 Appuyez sur les touches numériques pour saisir le numéro de canal. 7 Appuyez sur . Le canal sélectionné est réglé. Prérégler les canaux de la radio satellite Vous pouvez - Sony STR-DA4400ES | Operating Instructions (Large File - 23.37 MB) - Page 217
Sélection des stations 3 Appuyez sur V/v pour sélectionner « Memory », puis appuyez sur . L'écran de sélection du numéro de préréglage s'affiche. 4 Appuyez plusieurs fois sur V/v pour sélectionner le numéro de préréglage que vous souhaitez utiliser comme canal préréglé, puis appuyez sur . Les - Sony STR-DA4400ES | Operating Instructions (Large File - 23.37 MB) - Page 218
« ON », puis appuyez sur . « Enter your 4-digit lock code. » s'affiche. 5 Saisissez votre code de verrouillage à 4 chiffres à l'aide des touches numériques. « The channel has been locked. » s'affiche et le Parental Lock est réglé. Pour effacer les numéros que vous avez saisis, revenez à l'étape 2 en - Sony STR-DA4400ES | Operating Instructions (Large File - 23.37 MB) - Page 219
aide de Category Mode (page 71) ou Direct Tuning (page 71). « The channel is locked. Enter your 4-digit lock code. » s'affiche. 2 Saisissez votre code réglez un canal préréglé sur le Parental Lock, les informations préréglées pour ce canal reprennent leur valeur par défaut. • Vous ne pouvez pas ré - Sony STR-DA4400ES | Operating Instructions (Large File - 23.37 MB) - Page 220
de l'antenne, voir les instructions fournies avec le tuner SiriusConnect. Call 888-539- Vous n'est pas abonné au canal - SIRI sélectionné. un changement effectué par le service de diffusion, ou les conditions ne réception ne sont pas bonnes. Locked Channel Le canal sélectionné est verrouill - Sony STR-DA4400ES | Operating Instructions (Large File - 23.37 MB) - Page 221
www.xmradio.com ou contactez la radio satellite XM au 1-800-967- 2346. No Signal Le minisyntoniseur XM (page 70). Voir les instructions fournies avec le minisyntoniseur XM Le canal sélectionné n'est pas Consultez le dernier guide des canaux sur disponible. Le canal a peut-être - Sony STR-DA4400ES | Operating Instructions (Large File - 23.37 MB) - Page 222
vous voulez. Mode 2CH 2ch Stereo 2ch Analog Direct Effet L'ampli-tuner émet le son seulement des enceintes avant gauche/droite. Il n'y a pas de son au subwoofer. Le son stéréo 2 canaux ordinaire n'est soumis à aucun traitement du champ sonore et le son surround multicanal est remixé en format st - Sony STR-DA4400ES | Operating Instructions (Large File - 23.37 MB) - Page 223
Écoute du son surround Lecture avec son surround multicanal Le mode Auto Format Direct (A.F.D.) vous permet d'obtenir une restitution plus fidèle du son et de sélectionner le mode de décodage pour l'écoute d'un son stéréo 2 canaux comme un son multicanal. AMP A.F.D. V/v/b, MENU Appuyez plusieurs - Sony STR-DA4400ES | Operating Instructions (Large File - 23.37 MB) - Page 224
Réglage d'un effet sonore surround multicanal 1 Commencez la lecture d'une source audio que vous souhaitez écouter (CD, DVD, etc.). 2 Appuyez sur AMP. Vous pouvez commander l'ampli-tuner à l'aide de la télécommande. 3 Appuyez sur MENU. Le menu s'affiche sur l'écran du téléviseur. 4 Appuyez plusieurs - Sony STR-DA4400ES | Operating Instructions (Large File - 23.37 MB) - Page 225
Écoute du son surround Remarques • Cette fonction est inopérante lorsque l'entrée multicanal est sélectionnée. • Cette fonction est inopérante lorsque des signaux DTS-HD dont la fréquence d'échantillonnage est supérieure à 48 kHz sont reçus. • Cette fonction est inopérante lorsque des signaux Dolby - Sony STR-DA4400ES | Operating Instructions (Large File - 23.37 MB) - Page 226
ce qui simule une scène sonore de grande taille produite par réverbération. Utilise la reproduction sonore 3D pour reproduire les caractéristiques sonores d'une salle de concert, ce qui simule une scène sonore de grande . Ce mode est idéal pour la musique MP3 ou d'autres musiques compressées. 82FR - Sony STR-DA4400ES | Operating Instructions (Large File - 23.37 MB) - Page 227
Les signaux analogiques avant sont émis par les prises MULTI CHANNEL INPUT. Pour désactiver l'effet surround pour MUSIC Appuyez sur est sélectionné, aucun son n'est émis du subwoofer si toutes les enceintes sont réglées sur « LARGE » dans le menu de paramétrage Speaker. Le son sera toutefois émis - Sony STR-DA4400ES | Operating Instructions (Large File - 23.37 MB) - Page 228
idéal pour les films de science-fiction ou d'action comportant de nombreux effets sonores. Restitue les caractéristiques sonores du plateau de sonorisation de Sony Pictures Entertainment. Ce mode convient idéalement aux comédies musicales ou films avec de la musique orchestrale sur la bande son. Cr - Sony STR-DA4400ES | Operating Instructions (Large File - 23.37 MB) - Page 229
Écoute du son surround Remarques • Les champs sonores pour les films sont inopérants lorsque l'entrée multicanal est sélectionnée. • Les champs sonores pour les films sont inopérants lorsque des signaux DTS-HD dont la fréquence d'échantillonnage est supérieure à 48 kHz sont reçus. • Les champs - Sony STR-DA4400ES | Operating Instructions (Large File - 23.37 MB) - Page 230
en charge les formats audio suivants. Format audio Nombre maximal de canaux Raccordement de l'appareil lecteur à l'ampli-tuner COAXIAL/OPTICAL HDMI Dolby Digital 5.1ch a a Dolby Digital EX 6.1ch a a Dolby Digital Plus a) 7.1ch × a Dolby TrueHD a) 7.1ch × a DTS 5.1ch a a DTS - Sony STR-DA4400ES | Operating Instructions (Large File - 23.37 MB) - Page 231
de canaux Raccordement de l'appareil lecteur à l'ampli-tuner COAXIAL/OPTICAL HDMI 5.1ch × a PCM linéaire multicanal a) 7.1ch × a a)Les signaux audio sont émis dans un autre format si l'appareil lecteur ne correspond pas au format. Pour plus de détails, consultez le mode d'emploi de - Sony STR-DA4400ES | Operating Instructions (Large File - 23.37 MB) - Page 232
(non fourni), vous pouvez commander un appareil de la zone principale et un ampli-tuner Sony de la zone 2 ou zone 3 depuis la zone 2 ou la zone 3. Pour vous raccordez un répéteur infrarouge (non fourni) à la prise IR REMOTE. Utilisez un répéteur infrarouge lorsque l'ampli-tuner est installé dans un - Sony STR-DA4400ES | Operating Instructions (Large File - 23.37 MB) - Page 233
-tuner et un autre amplificateur. Zone principale Zone 2 B Téléviseur B écran IR REMOTE IN STR-DA4400ES ZONE 2 VIDEO OUT* C A ZONE 2 AUDIO OUT RM-AAL016 A Répéteur infrarouge (non fourni) B Enceintes C Amplificateur/ampli-tuner Sony * Vous pouvez également le raccorder à la prise COMPONENT - Sony STR-DA4400ES | Operating Instructions (Large File - 23.37 MB) - Page 234
2 : Raccordements pour la zone 3 Pièce principale IR REMOTE IN STR-DA4400ES ZONE 3 AUDIO OUT A Répéteur infrarouge (non fourni) B Enceintes C Amplificateur/ampli-tuner Sony Zone 3 B B C A RM-AAL016 90FR - Sony STR-DA4400ES | Operating Instructions (Large File - 23.37 MB) - Page 235
de l'ampli-tuner (page 89), effectuez le réglage pour que le son sélectionné dans la zone 2 soit émis par les enceintes raccordées aux bornes SURROUND BACK SPEAKERS. AMP 4 Appuyez plusieurs fois sur V/v pour sélectionner « Speaker », puis appuyez sur ou b. 5 Appuyez sur V/v pour sélectionner - Sony STR-DA4400ES | Operating Instructions (Large File - 23.37 MB) - Page 236
Changer le réglage de la zone de la télécommande Les télécommandes sont réglées initialement pour être utilisées dans la zone 2. Si vous voulez les utiliser dans la zone 3, changez le réglage de la zone de la télécommande. RM SET UP SHIFT ?/1 ZONE 2, 3 - Sony STR-DA4400ES | Operating Instructions (Large File - 23.37 MB) - Page 237
Pour éteindre tous les ampli-tuner, appuyez en même temps sur ?/1 et AV ?/1 sur la télécommande principale (SYSTEM STANDBY). • Seuls les signaux d'appareils . • Lorsque SOURCE est sélectionné, les signaux entrés sur les prises MULTI CHANNEL INPUT ne sont pas émis sur les prises ZONE 2 OUT ou ZONE - Sony STR-DA4400ES | Operating Instructions (Large File - 23.37 MB) - Page 238
Sync Qu'est-ce que « BRAVIA » Sync ? « BRAVIA » Sync est compatible avec un téléviseur Sony, un lecteur Blu-ray Disc/DVD, un amplificateur AV, etc., qui est équipé de la fonction Commande pour HDMI. En raccordant des appareils Sony compatibles avec le « BRAVIA » Sync avec un câble HDMI raccordées à - Sony STR-DA4400ES | Operating Instructions (Large File - 23.37 MB) - Page 239
Commande pour HDMI - Réglage aisé » à partir d'un téléviseur, mettez le téléviseur, l'ampli-tuner et les appareils lecteurs sous tension au pré d'entrée HDMI GUI MODE V/v/b, MENU 1 Effectuez les étapes données dans « Lorsque votre téléviseur est compatible avec la fonction « Commande pour HDMI - Ré - Sony STR-DA4400ES | Operating Instructions (Large File - 23.37 MB) - Page 240
épétez les étapes 9 et 10 pour régler la fonction Commande pour HDMI et afficher l'image de tous les appareils lecteurs que vous voulez utiliser. comme suit. • Le son du téléviseur est émis depuis les enceintes raccordées à l'ampli-tuner lorsque vous mettez l'ampli-tuner sous tension et que le son - Sony STR-DA4400ES | Operating Instructions (Large File - 23.37 MB) - Page 241
une des prises ou passer d'une prise à l'autre selon le contenu à visionner. AMP Touches de source d'entrée Appuyez sur TV, puis sur AV ?/1. Le téléviseur, l'ampli-tuner et les appareils raccordés sont mis hors tension. Remarques • Activez la fonction de verrouillage de l'alimentation du téléviseur - Sony STR-DA4400ES | Operating Instructions (Large File - 23.37 MB) - Page 242
audio ne peuvent pas être spécifiés pour certaines entrées. • Lorsque l'entrée HDMI, tuner satellite ou adaptateur DIGITAL MEDIA PORT est sélectionnée éo composante du lecteur DVD à la prise COMPONENT VIDEO IN 1/COMPONENT VIDEO IN 2 ou COMPONENT VIDEO IN 3 de cet amplituner lorsque vous voulez entrer - Sony STR-DA4400ES | Operating Instructions (Large File - 23.37 MB) - Page 243
Utilisation des autres fonctionnalités 1 Appuyez sur AMP. Vous pouvez commander l'ampli-tuner à l'aide de la télécommande. 2 Appuyez sur MENU. Le menu s'affiche sur l'écran du téléviseur. 3 Appuyez plusieurs fois sur V/v pour sélectionner « Input », puis appuyez sur ou b. 4 Appuyez sur V/v pour sé - Sony STR-DA4400ES | Operating Instructions (Large File - 23.37 MB) - Page 244
signaux vidéo HDMI et ne sont pas émis par la prise HDMI OUT. Les signaux vidéo composantes ne sont émis que par la prise COMPONENT VIDEO MONITOR OUT. ne pouvez pas réaffecter plusieurs entrées HDMI à une même entrée. • Vous ne pouvez pas réaffecter plusieurs entrées audio numériques à une même - Sony STR-DA4400ES | Operating Instructions (Large File - 23.37 MB) - Page 245
Utilisation de la minuterie d'arrêt Vous pouvez programmer l'ampli-tuner pour qu'il s'éteigne automatiquement après la durée sélectionnée. Écoute du son surround à faible volume Cette fonction vous permet de recréer l'ambiance d'une salle de cinéma à faible volume. Elle peut être utilisée avec d' - Sony STR-DA4400ES | Operating Instructions (Large File - 23.37 MB) - Page 246
• Si la fonction NIGHT MODE est activée alors que l'ampli-tuner reçoit des signaux dont la fréquence d'échantillonnage est supérieure à 96 kHz, ces signaux seront toujours lus à 44,1 kHz ou à 48 kHz. Conseil Lorsque cette fonction est activée, les Bass, Treble et Effect Levels augmentent et « D. - Sony STR-DA4400ES | Operating Instructions (Large File - 23.37 MB) - Page 247
OUT. • Les signaux audio reçus aux prises MULTI CHANNEL INPUT ne sont pas émis. Pour enregistrer un son numé n'est pas possible d'enregistrer du son HDMI. Enregistrement sur un support d'enregistrement 1 Appuyez sur la touche ., dans l'appareil enregistreur (VIDEO 1) pour l'enregistrement. 4 - Sony STR-DA4400ES | Operating Instructions (Large File - 23.37 MB) - Page 248
la télécommande Vous pouvez changer le mode de commande (COMMAND MODE AV 1 ou COMMAND MODE AV 2) de l'ampli-tuner et de la télécommande. Changez le mode de commande du réglage initial au réglage approprié, si un autre appareil Sony est commandé accidentellement par la même télécommande, lorsque vous - Sony STR-DA4400ES | Operating Instructions (Large File - 23.37 MB) - Page 249
côté Hi (ou Lo) des enceintes avant aux bornes SURROUND BACK SPEAKERS. Assurezvous que les ferrures métalliques de Hi/Lo fixées aux enceintes ont été retirées des enceintes. Il pourrait autrement en résulter un dysfonctionnement de l'ampli-tuner. Utilisation des autres fonctionnalités suite 105FR - Sony STR-DA4400ES | Operating Instructions (Large File - 23.37 MB) - Page 250
Pour paramétrer les enceintes 1 Appuyez sur AMP. Vous pouvez commander l'ampli-tuner à l'aide de la télécommande. 2 Appuyez sur MENU. Le menu s'affiche sur l'écran du téléviseur. 3 Appuyez sur V/v pour sélectionner « Settings », puis appuyez sur ou b. 4 Appuyez sur V/v pour sélectionner « Speaker », - Sony STR-DA4400ES | Operating Instructions (Large File - 23.37 MB) - Page 251
Réglage des paramètres Utilisation du menu de paramétrage Vous pouvez régler les différents paramètres pour les enceintes, les effets surround, la multizone, etc. à l'aide du menu de paramétrage. Pour afficher le menu de l'ampli-tuner sur l'écran du téléviseur, assurez-vous que l'ampli-tuner est en - Sony STR-DA4400ES | Operating Instructions (Large File - 23.37 MB) - Page 252
Icône de menu Auto Calibration Speaker Surround EQ Multi Zone Audio Video HDMI System Description Permet de régler le niveau ou la distance des enceintes appareils raccordés aux prises HDMI (page 121). Permet de régler l'économiseur d'écran ou la langue de l'affichage du guide du menu (page 122). - Sony STR-DA4400ES | Operating Instructions (Large File - 23.37 MB) - Page 253
la mesure de fréquence de chaque enceinte plane. • Engineer Sélectionne les caractéristiques de fréquence correspondant aux normes d'un auditorium Sony. • Front Reference Règle les caractéristiques de toutes les enceintes sur celles des enceintes avant. • OFF Désactive l'EQ de calibrage automatique - Sony STR-DA4400ES | Operating Instructions (Large File - 23.37 MB) - Page 254
analogique fonctionne lorsque vous réglez « Center Mix » sur « ON ». Ce réglage est aussi efficace pour entrer des signaux via les prises MULTI CHANNEL INPUT. Sur Back Assign Vous pouvez effectuer des réglages pour la ou les enceintes surround arrière. x OFF Sélectionnez « OFF » si vous n'avez - Sony STR-DA4400ES | Operating Instructions (Large File - 23.37 MB) - Page 255
page 47) ou « Manual Setup » (page 111). Manual Setup Vous pouvez régler chaque enceinte manuellement sur l'écran Manual Setup. Vous pouvez aussi numérique contient des signaux L.F.E., ou si les enceintes avant ou surround sont réglées sur « SMALL », le champ sonore pour films est sélectionné ou si « - Sony STR-DA4400ES | Operating Instructions (Large File - 23.37 MB) - Page 256
ou non les signaux de graves sur ce canal. Lorsque les graves sont coupées sur un canal, le circuit de réacheminement des graves dirige les fréquences de régler la fréquence de recouvrement des graves des enceintes qui ont été placées sur « SMALL » dans le menu de paramétrage Speaker. La fréquence de - Sony STR-DA4400ES | Operating Instructions (Large File - 23.37 MB) - Page 257
SB/ SL, SL/L, L/SR Permet d'émettre le son d'une source 2 canaux avant (au lieu du signal de test) par des enceintes adjacentes dans l'ordre. Certaines options peuvent ne sélectionné. Assurez-vous que le raccordement des enceintes correspond au modèle de configuration des enceintes. D. Range Comp - Sony STR-DA4400ES | Operating Instructions (Large File - 23.37 MB) - Page 258
x MAX La plage dynamique est considérablement compressée. Conseils • La fonction de compression de plage dynamique vous permet de compresser la plage dynamique de la piste son en fonction des informations de plage dynamique contenues dans le signal Dolby Digital. • Le réglage standard « STD » n' - Sony STR-DA4400ES | Operating Instructions (Large File - 23.37 MB) - Page 259
Enhanced Sur Mode Vous pouvez sélectionner le mode de décodage pour le champ sonore. Pour plus d'informations sur les modes de décodage disponibles, voir « Réglage d'un effet sonore surround multicanal » (page 80). x PLII Effectue le décodage Dolby Pro Logic II. Une source enregistrée en format 2 - Sony STR-DA4400ES | Operating Instructions (Large File - 23.37 MB) - Page 260
Paramètres Multi Zone Vous pouvez effectuer des réglages pour la zone principale, la zone 2 ou la zone 3. Activation/Désactivation pour la zone 2/zone 3 Vous pouvez activer ou désactiver la commande de zone 2 ou zone 3. « Main » (cet ampli-tuner) est toujours sélectionné. Vous ne pouvez pas le dé - Sony STR-DA4400ES | Operating Instructions (Large File - 23.37 MB) - Page 261
des appareils qui ne sont raccordés qu'aux prises d'entrée numériques. • Lorsque SOURCE est sélectionné, les signaux entrés sur les prises MULTI CHANNEL INPUT ne sont pas émis sur les prises ZONE 2 OUT ou ZONE 3 OUT, même lorsque l'entrée multicanal est sélectionnée. Les signaux audio analogiques - Sony STR-DA4400ES | Operating Instructions (Large File - 23.37 MB) - Page 262
de vos préférences. A/V Sync (Synchronise la sortie audio et langue auxiliaire est émis. Decode Priority (Priorité au décodage d'une entrée audio numérique) Permet de spécifier cette option sur « AUTO ». Lorsque des signaux de la prise HDMI IN sont sélectionnés, seuls les signaux PCM sont émis du - Sony STR-DA4400ES | Operating Instructions (Large File - 23.37 MB) - Page 263
Paramètres Video Permet de régler la vidéo. Resolution (Conversion de signaux vidéo) Permet de convertir la résolution de signaux d'entrée vidéo analogiques. Pour plus d'informations sur la conversion des entrées/sorties vidéo classées selon le paramétrage du menu Resolution, voir la figure 1 page - Sony STR-DA4400ES | Operating Instructions (Large File - 23.37 MB) - Page 264
des droits d'auteur sont émis en 480p. Remarques • Les signaux vidéo ne sont pas émis des prises COMPONENT VIDEO MONITOR OUT ou MONITOR VIDEO OUT lorsque l'écran, etc., est connecté à la prise HDMI OUT. • Si vous sélectionnez une résolution que le téléviseur connecté ne prend pas en charge dans le - Sony STR-DA4400ES | Operating Instructions (Large File - 23.37 MB) - Page 265
) Permet de spécifier les signaux audio HDMI émis de l'appareil lecteur raccordé à l'amplituner via une connexion HDMI. x TV+AMP Le son est émis par les haut-parleurs du téléviseur et les enceintes raccordées à l'ampli-tuner. Remarques • La qualité du son de l'appareil lecteur dépend de la qualit - Sony STR-DA4400ES | Operating Instructions (Large File - 23.37 MB) - Page 266
Paramètres System Permet de personnaliser les paramètres de l'ampli-tuner. Screen Saver Permet d'activer la fonction économiseur d'écran pour le menu GUI du téléviseur raccordé à l'ampli-tuner. x OFF La fonction économiseur d'écran est désactivée. x ON Si aucune opération n'est effectuée pendant 15 - Sony STR-DA4400ES | Operating Instructions (Large File - 23.37 MB) - Page 267
3 Appuyez sur MENU. Le menu apparaît dans l'afficheur de l'ampli-tuner. Exemple : si vous sélectionnez « Level Settings » 4 Appuyez plusieurs fois sur V/v pour sélectionner le menu, puis appuyez sur ou b. 5 Appuyez plusieurs fois sur V/v pour sélectionner l'option de menu, puis appuyez sur . Le - Sony STR-DA4400ES | Operating Instructions (Large File - 23.37 MB) - Page 268
Liste des menus (dans l'afficheur) Les options suivantes sont disponibles dans chaque menu. « xx... » dans le tableau correspond au paramètre de chaque option. Menu Option Paramètre Réglage initial Auto Calibration AUTO CAL START? 5 4 3 2 1 MEASURING: TONE MEASURING: T.S.P. MEASURING: - Sony STR-DA4400ES | Operating Instructions (Large File - 23.37 MB) - Page 269
Menu Option Paramètre Speaker Settings SP PATTERN [xxxxx] 2/0 à 3/4,1 (16 configurations) FRONT SP [xxxxx] SMALL, LARGE CENTER SP [xxxxx] SMALL, LARGE SURROUND SP [xxxxx] SMALL, LARGE BI-AMP [xxx] OFF, ON ZONE2 SP [xxx] OFF, ON FRONT L [xxxxxxxxx] FRONT R [xxxxxxxxx] CENTER [ - Sony STR-DA4400ES | Operating Instructions (Large File - 23.37 MB) - Page 270
Menu Sur Settings EQ Settings Tuner Settings Audio Settings Video Settings Option Paramètre Réglage initial SOUND FIELD LOCK [xxx] YES, NO NO LOCK CODE EDIT ? 0000 SR ANTENNA AIMING SIRIUS ID DISPLAY A/V SYNC [xxxxxxxxx] 0 ms à 300 ms (pas de 10 ms) 0ms DUAL MONO [xxxxxxxx] MAIN/SUB - Sony STR-DA4400ES | Operating Instructions (Large File - 23.37 MB) - Page 271
Menu Option Paramètre HDMI Settings CTRL FOR HDMI [xxx] AUDIO OUT [xxxxxx] SW LEVEL [xxxdB] System Settings NAME IN ? [xxxxxxxx] 12V TRIG. MAIN [xxxxx] 12V TRIG. ZONE2 [xxxxx] 12V TRIG. ZONE3 [xxxxx] RS- - Sony STR-DA4400ES | Operating Instructions (Large File - 23.37 MB) - Page 272
appareils Sony que la télécommande est initialement incapable de commander (page 130). Commande des appareils raccordés à l'ampli-tuner 1 Appuyez sur la touche de source d'entrée qui correspond à l'appareil raccordé que vous voulez commander. 2 Appuyez sur les touches appropriées pour utiliser - Sony STR-DA4400ES | Operating Instructions (Large File - 23.37 MB) - Page 273
Tableau des touches utilisées pour commander chaque appareil Appareil Télé combo Disc vidéo, numérique terrestre A/B platine MEDIA DVD/ lecteur (UC) numérique MD PORT Touche VHS LD (EURO) AV ?/1 z z zz z zz z z z zz Touches numériques z z z z z zz z z z z zz z TV INPUT, WIDE z - Sony STR-DA4400ES | Operating Instructions (Large File - 23.37 MB) - Page 274
Sony qui est raccordé aux prises VIDEO 2 IN de l'ampli-tuner. RM SET UP SHIFT Touches numériques AV ?/1 Touches de source d'entrée ENT/ MEM 1 Appuyez sur AV numériques s'il en existe plusieurs) correspondant à l'appareil et au fabricant de l'appareil que vous désirez commander. La touche de - Sony STR-DA4400ES | Operating Instructions (Large File - 23.37 MB) - Page 275
sont pas disponibles lorsqu'elles sont utilisées avec certains appareils. Pour commander un lecteur CD Fabricant SONY DENON JVC KENWOOD MAGNAVOX MARANTZ ONKYO PANASONIC Pour commander un combo DVD/VIDEO (enregistreur) Fabricant SONY Code(s) 411 suite 131FR Utilisation de la télécommande - Sony STR-DA4400ES | Operating Instructions (Large File - 23.37 MB) - Page 276
, 509, 510, 544 515, 534, 556 Pour commander un lecteur LD Fabricant SONY PIONEER Code(s) 601, 602, 603 606 Pour commander un lecteur CD vidéo Fabricant SONY Code(s) 605 Pour commander un magnétoscope Fabricant SONY AIWA* AKAI BLAUPUNKT EMERSON FISHER GENERAL ELECTRIC(GE) GOLDSTAR/LG GRUNDIG - Sony STR-DA4400ES | Operating Instructions (Large File - 23.37 MB) - Page 277
, 857, 858, 859, 860, 864, 874 851, 853, 854, 864 866, 871 868 867 873 872 875 869, 870 Pour commander un décodeur câble Fabricant SONY HAMLIN/REGAL JERROLD/G.I./ MOTOROLA Code(s) 821, 822, 823 836, 837, 838, 839, 840 806, 807, 808, 809, 810, 811, 812, 813, 814, 819 Fabricant JERROLD - Sony STR-DA4400ES | Operating Instructions (Large File - 23.37 MB) - Page 278
Exécution automatique d'une séquence de plusieurs commandes (Exécution de macro-commandes) La fonction d'exécution de macro-commandes vous permet de programmer et exécuter une séquence de commandes comme une seule commande. La télécommande offre 2 listes de macrocommandes (MACRO 1 et MACRO 2). Vous - Sony STR-DA4400ES | Operating Instructions (Large File - 23.37 MB) - Page 279
d'opération(s) à effectuer. Appuyez sur Opérations à programmer N, x, X, M, m, ., > Exécute l'opération de la touche. La touche de Les entrées sont source d'entrée commutées. pendant plus de 1 seconde MACRO 1 ou MACRO 2 Un intervalle d'une seconde est créé. Pour créer un intervalle plus long - Sony STR-DA4400ES | Operating Instructions (Large File - 23.37 MB) - Page 280
Mémorisation de codes de télécommande n'ayant pas été préprogrammés dans la télécommande Lorsqu'un code de télécommande ne figure pas parmi ceux préprogrammés en usine dans la télécommande, vous pouvez le programmer par apprentissage dans la télécommande avec la fonction d'apprentissage. Remarque - Sony STR-DA4400ES | Operating Instructions (Large File - 23.37 MB) - Page 281
apprentissage. Effacement de tout le contenu de la mémoire de la télécommande AV ?/1 ?/1 Pour effacer le code appris 1 Appuyez sur THEATER tout en 1 D'abord, maintenez enfoncé MASTER VOL -, puis appuyez sur ?/1, puis sur AV ?/1. La touche RM SET UP clignote trois fois. 2 Relâchez toutes les - Sony STR-DA4400ES | Operating Instructions (Large File - 23.37 MB) - Page 282
ma les mieux équipées dans votre salon. Sony Pictures une prise HDMI a été intensifiée. ) sur la prise HDMI actuelle. Cependant, le au point par Sony en association avec Sony es actuelles mesurées. Les qualités tonales es sur le DSP (Digital Signal Processor) pour donner de la réverbération au au point - Sony STR-DA4400ES | Operating Instructions (Large File - 23.37 MB) - Page 283
de canaux de son surround captivant pour des supports vidéo à haute définition. Son efficacité mise au point par Dolby Laboratories, Inc. Les informations surround arrière sont matricées dans , soit avec les valeurs les plus élevées possibles pour les DVD VIDEO. Le nombre de canaux de lecture dépend - Sony STR-DA4400ES | Operating Instructions (Large File - 23.37 MB) - Page 284
es en remplissant les espaces. Le « i » de « 480i » représente « Interlace ». x Fréquence de recouvrement La fréquence à laquelle les fréquences des deux enceintes se recoupent. x HDMI (High-Definition Multimedia Interface) HDMI opposition au balayage entrelacé où toutes les lignes impaires puis - Sony STR-DA4400ES | Operating Instructions (Large File - 23.37 MB) - Page 285
que les images DVD VIDEO ou HDTV. Les trois prises sont identifiées par un codage couleur vert de fonctionnement est indiquée sur la plaque signalétique au dos de l'amplituner. • La chaîne n'est pas être remplacé que dans un centre de service après-vente qualifié. Accumulation de chaleur Cet ampli - Sony STR-DA4400ES | Operating Instructions (Large File - 23.37 MB) - Page 286
aéré pour éviter toute accumulation de chaleur et prolonger ainsi la durée de service. • Ne placez pas l'ampli-tuner près d'une source de chaleur ou benzine. Pour toute question au sujet de l'ampli-tuner ou tout problème, adressez-vous au revendeur Sony le plus proche. Guide de dépannage Si vous - Sony STR-DA4400ES | Operating Instructions (Large File - 23.37 MB) - Page 287
(page 98). Le son de la source raccordée à la prise HDMI IN n'est pas émis par un amplificateur ou le haut-parleur du transformateur ou d'un moteur électrique et qu'ils sont à au moins 3 mètres (10 pieds) d'un téléviseur ou prises sont sales. Essuyez-les avec un chiffon légèrement humect - Sony STR-DA4400ES | Operating Instructions (Large File - 23.37 MB) - Page 288
enceintes sont réglées sur « LARGE » et que l'option « Neo:6 Cinema » ou « Neo:6 Music » est sélectionnée, il n'y a pas de son au subwoofer. L'effet page 28). • Sélectionnez l'appareil source (page 57). Le témoin MULTI CHANNEL DECODING ne s'allume pas en bleu. • Assurez-vous que l'appareil lecteur - Sony STR-DA4400ES | Operating Instructions (Large File - 23.37 MB) - Page 289
mis, utilisez la prise COMPONENT VIDEO OUT et placez « Resolution » sur « DIRECT ». Les images de la source avec une connexion HDMI ne sont pas émises sur • Aucune station n'a été préréglée ou les stations préréglées ont été effacées de la mémoire (lors d'une sélection des stations avec la fonction - Sony STR-DA4400ES | Operating Instructions (Large File - 23.37 MB) - Page 290
sont meilleures. • Vérifiez que vous êtes bien abonné au service de radio satellite souhaité (voir page 67). Commande pour HDMI La fonction Commande pour HDMI est inopérante. • Vérifiez la connexion HDMI (page 34). • Assurez-vous que « Control for HDMI » est réglé sur « ON » dans le menu de - Sony STR-DA4400ES | Operating Instructions (Large File - 23.37 MB) - Page 291
la télécommande. • Si vous avez programmé un appareil non Sony, il se peut que la télécommande ne fonctionne pas correctement ème, consultez le tableau ci-dessous. Si le problème persiste, adressez-vous au revendeur Sony le plus proche. PROTECTOR Un courant irrégulier est émis vers les enceintes ou - Sony STR-DA4400ES | Operating Instructions (Large File - 23.37 MB) - Page 292
±0,5 dB 10 Hz - 100 kHz ± 3 dB Entrées (Analogiques) PHONO MULTI CHANNEL INPUT, SA-CD/CD, TAPE, MD, TV, VIDEO 1/2, BD, DVD, SAT Sensibilité : 2,5 mV Impé 0,7 Vc-c, 75 ohms Conversion directe du signal HD 80 MHz HDMI Video Entrée/Sortie (bloc répéteur HDMI) 640 × 480p@60 Hz 720 × 480p@59,94/60 - Sony STR-DA4400ES | Operating Instructions (Large File - 23.37 MB) - Page 293
kg (35 livres 5 onces) Accessoires fournis Mode d'emploi (ce manuel) Guide d'installation rapide (1) Liste des menus de la GUI (1) Microphone d'optimisation ECM format-AA) (4) La conception et les spécifications peuvent être modifiées sans préavis. • Consommation électrique en veille 0,9 W. • Les - Sony STR-DA4400ES | Operating Instructions (Large File - 23.37 MB) - Page 294
4 Ω 46 5.1 canaux 22 7.1 canaux 22 8 Ω 46 A A.F.D. (mode) 79 A/V Sync 59, 118, 126 Affichage 9 AM 64 Antenna Aiming 70 Audio 118 AUDIO OUT 127 Audio Out 115 F FM 64 FM Mode 64, 126 G GUI (Graphical User Interface) 26, 44 H HDMI 121 I ID radio 70 Input 57 Input Assign 59, 98 INPUT MODE 98 iPod 61, 63 - Sony STR-DA4400ES | Operating Instructions (Large File - 23.37 MB) - Page 295
(Auto Calibration) 108, 124 Preset Mode 73 Prises HDMI 14, 34 Prises VIDEO 2 IN/PORTABLE AV IN 40 PROTECTOR 147 Q Quick Setup 49 R Raccordement 125 Speaker Pattern 110, 125 SPEAKERS (OFF/A/B/A+B) 8, 47 Stations préréglées 66 Sur Settings 126 Surround 80, 114 System 122 T Télécommande 16-21, 44 - Sony STR-DA4400ES | Operating Instructions (Large File - 23.37 MB) - Page 296
X XM 67 Z Zone 12V Trigger 116, 127 ZONE 2 110 152FR - Sony STR-DA4400ES | Operating Instructions (Large File - 23.37 MB) - Page 297
Informations complémentaires 153FR - Sony STR-DA4400ES | Operating Instructions (Large File - 23.37 MB) - Page 298
154FR
-
 1
1 -
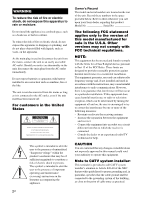 2
2 -
 3
3 -
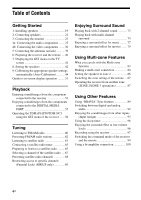 4
4 -
 5
5 -
 6
6 -
 7
7 -
8
-
9
-
10
-
11
-
12
-
13
-
14
-
15
-
16
-
17
-
18
-
19
-
20
-
21
-
22
-
23
-
24
-
25
-
26
-
27
-
28
-
29
-
30
-
31
-
32
-
33
-
34
-
35
-
36
-
37
-
38
-
39
-
40
-
41
-
42
-
43
-
44
-
45
-
46
-
47
-
48
-
49
-
50
-
51
-
52
-
53
-
54
-
55
-
56
-
57
-
58
-
59
-
60
-
61
-
62
-
63
-
64
-
65
-
66
-
67
-
68
-
69
-
70
-
71
-
72
-
73
-
74
-
75
-
76
-
77
-
78
-
79
-
80
-
81
-
82
-
83
-
84
-
85
-
86
-
87
-
88
-
89
-
90
-
91
-
92
-
93
-
94
-
95
-
96
-
97
-
98
-
99
-
100
-
101
-
102
-
103
-
104
-
105
-
106
-
107
-
108
-
109
-
110
-
111
-
112
-
113
-
114
-
115
-
116
-
117
-
118
-
119
-
120
-
121
-
122
-
123
-
124
-
125
-
126
-
127
-
128
-
129
-
130
-
131
-
132
-
133
-
134
-
135
-
136
-
137
-
138
-
139
-
140
-
141
-
142
-
143
-
144
-
145
-
146
-
147
-
148
-
149
-
150
-
151
-
152
-
153
-
154
-
155
-
156
-
157
-
158
-
159
-
160
-
161
-
162
-
163
-
164
-
165
-
166
-
167
-
168
-
169
-
170
-
171
-
172
-
173
-
174
-
175
-
176
-
177
-
178
-
179
-
180
-
181
-
182
-
183
-
184
-
185
-
186
-
187
-
188
-
189
-
190
-
191
-
192
-
193
-
194
-
195
-
196
-
197
-
198
-
199
-
200
-
201
-
202
-
203
-
204
-
205
-
206
-
207
-
208
-
209
-
210
-
211
-
212
-
213
-
214
-
215
-
216
-
217
-
218
-
219
-
220
-
221
-
222
-
223
-
224
-
225
-
226
-
227
-
228
-
229
-
230
-
231
-
232
-
233
-
234
-
235
-
236
-
237
-
238
-
239
-
240
-
241
-
242
-
243
-
244
-
245
-
246
-
247
-
248
-
249
-
250
-
251
-
252
-
253
-
254
-
255
-
256
-
257
-
258
-
259
-
260
-
261
-
262
-
263
-
264
-
265
-
266
-
267
-
268
-
269
-
270
-
271
-
272
-
273
-
274
-
275
-
276
-
277
-
278
-
279
-
280
-
281
-
282
-
283
-
284
-
285
-
286
-
287
-
288
-
289
-
290
-
291
-
292
-
293
-
294
-
295
-
296
-
297
-
298
 |
 |

Printed in Malaysia
©2008 Sony Corporation
STR-DA4400ES
3-875-807-
13
(1)
Operating Instructions
GB
Mode d’emploi
FR
Multi Channel
AV Receiver