Sony STR-DA90ESG Operating Instructions - Page 25
Playback/Recording
 |
View all Sony STR-DA90ESG manuals
Add to My Manuals
Save this manual to your list of manuals |
Page 25 highlights
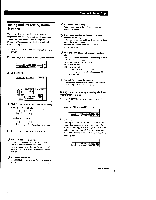
Playback/Recording To turn off all components Press SYSTEM OFF (for USA and Canadian models) or ALL OFF (for Australia) on the remote control. To mute the sound Click . The icon changes to XI . The MUTING indicator on the front panel lights up. To turn the sound back on, click on the icon again. • For USA and Canada : You can also mute the sound by pressing MUTING on the remote control. The MUTING indicator on the front panel lights up. Press again to restore the sound. Q To listen to digital program sources Click SETUP in the main menu, then click INPUT MODE. INPUT MODE SETTING • Notes • Components of the same type (e.g., Sony LD player) will be controlled simultaneously by the on-screen controls. . • If a component does not respond, it may be because IR codes from the IR emitter are not fully reaching the component. In this case, connect the extra IR repeater (supplied) and position it facing the component (see "Infrared (IR) Repeater Hookups" on page 6). If the IR repeater is already connected, change the position of the IR repeater or program source. ti RETURN I 1). EXIT Click the buttons next to each program source to select the audio signals you desire: • AUTO : gives priority to digital signals when there are both digital and analog connections. If there ar6 no digital signals, analog is selected. • ANALOG : selects the analog audio signals input to the AUDIO IN (L and R) jacks. • DIGITAL (OPTICAL) : selects the digital audio signals input to the DIGITAL OPTICAL IN jack. • DIGITAL (COAXIAL) : selects the digital audio signals input to the DIGITAL COAXIAL IN jack (LD/ DVD only). • DIGITAL (AC-3 RF) : selects the digital RF audio signals input to-the DIGITAL AC-3 RF IN jack (LD/ DVD only). t You can play video and audio components at the same time Play a video component you want, then play audio component. Make sure the AUTO PLAY function is set to off (see page 40). 25
-
 1
1 -
2
-
3
-
4
-
5
-
6
-
7
-
8
-
9
-
10
-
11
-
12
-
13
-
14
-
15
-
16
-
17
-
18
-
19
-
 20
20 -
 21
21 -
 22
22 -
 23
23 -
 24
24 -
 25
25 -
 26
26 -
 27
27 -
 28
28 -
 29
29 -
 30
30 -
31
-
32
-
33
-
34
-
35
-
36
-
37
-
38
-
39
-
40
-
41
-
42
-
43
-
44
-
45
-
46
-
47
-
48
-
49
-
50
-
51
-
52
-
53
-
54
-
55
-
56
-
57
-
58
-
59
-
60
-
61
-
62
 |
 |
