Stihl MSE 210 C-BQ Instruction Manual - Page 28
Mounting the Bar and Chain, quick chain tensioner
 |
View all Stihl MSE 210 C-BQ manuals
Add to My Manuals
Save this manual to your list of manuals |
Page 28 highlights
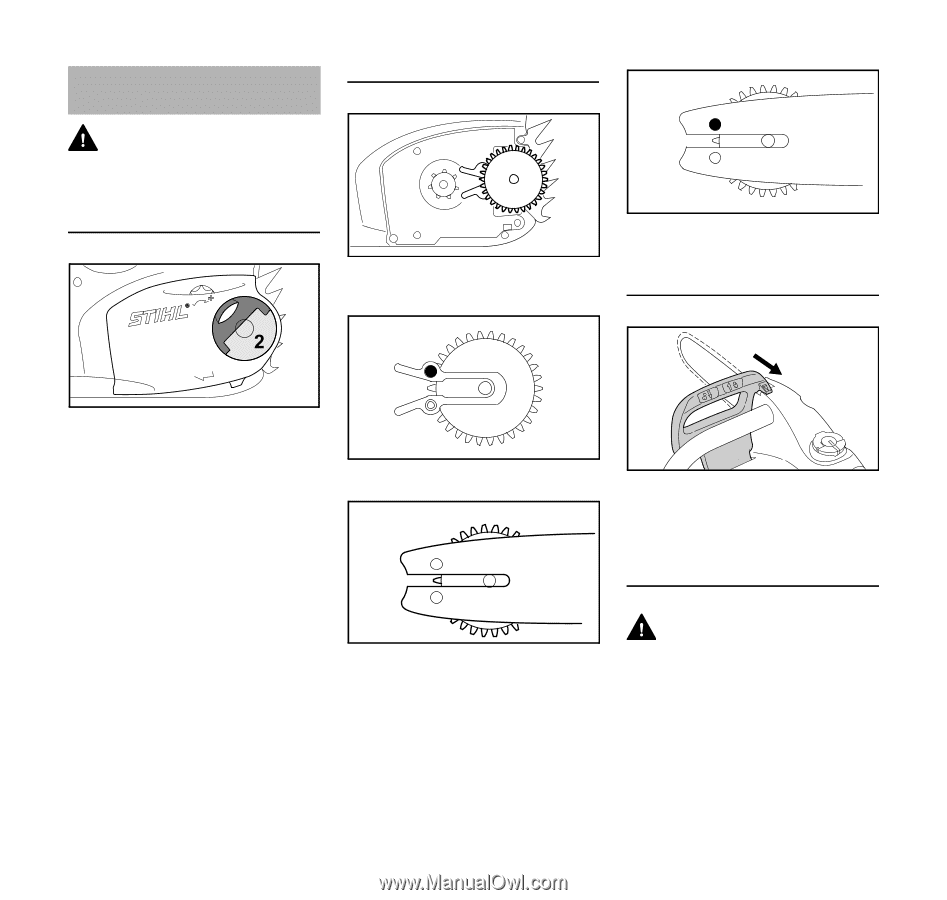
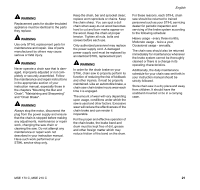
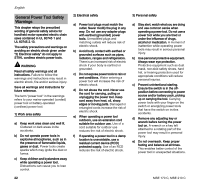
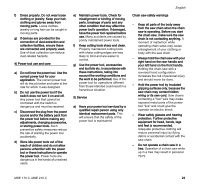
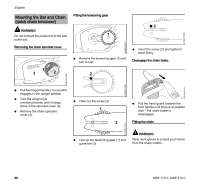
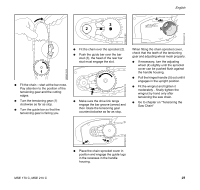
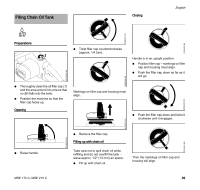
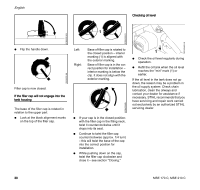
2310BA017 KN English Mounting the Bar and Chain (quick chain tensioner) WARNING Do not connect the power tool to the wall outlet yet. Removing the chain sprocket cover 1 3 Fitting the tensioning gear 1 N Remove the tensioning gear (1) and turn it over. 2 9931BA025 KN 2 N Insert the screw (2) and tighten it down firmly. Disengage the chain brake. 9931BA019 KN 2310BA015 KN N Pull the hinged handle (1) out until it engages in the upright position. N Turn the wingnut (2) counterclockwise until it hangs loose in the sprocket cover (3). N Remove the chain sprocket cover (3). N Take out the screw (2). 1 3 N Pull the hand guard towards the front handle until there is an audible click - the chain brake is disengaged. Fitting the chain 2310BA016 KN N Line up the tensioning gear (1) and guide bar (3). WARNING Wear work gloves to protect your hands from the sharp cutters. 9931BA015 KN 26 MSE 170 C, MSE 210 C
-
 1
1 -
2
-
3
-
4
-
5
-
6
-
7
-
8
-
9
-
10
-
11
-
12
-
13
-
14
-
15
-
16
-
17
-
18
-
19
-
20
-
21
-
22
-
 23
23 -
 24
24 -
 25
25 -
 26
26 -
 27
27 -
 28
28 -
 29
29 -
 30
30 -
 31
31 -
 32
32 -
 33
33 -
34
-
35
-
36
-
37
-
38
-
39
-
40
-
41
-
42
-
43
-
44
-
45
-
46
-
47
-
48
-
49
-
50
-
51
-
52
-
53
-
54
-
55
-
56
-
57
-
58
-
59
-
60
-
61
-
62
-
63
-
64
-
65
-
66
-
67
-
68
-
69
-
70
-
71
-
72
-
73
-
74
-
75
-
76
-
77
-
78
-
79
-
80
-
81
-
82
-
83
-
84
-
85
-
86
-
87
-
88
-
89
-
90
-
91
-
92
-
93
-
94
-
95
-
96
-
97
-
98
-
99
-
100
-
101
-
102
-
103
-
104
 |
 |