Synology SA3200D Synology High Availability SHA User Guide for DSM 7.0 - Page 45
Expand the storage capacity by replacing the drives with larger ones, Choose a RAID Type
 |
View all Synology SA3200D manuals
Add to My Manuals
Save this manual to your list of manuals |
Page 45 highlights
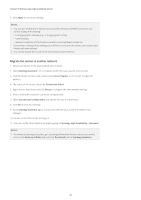
Chapter 5: Maintain your High-availability Cluster Expand the storage capacity by replacing the drives with larger ones Before you start 1. Make sure that your implemented RAID type allows drives to be replaced without causing data corruption. Refer to the Choose a RAID Type help articles for DSM 7.0 and DSM 6.2 for more information. 2. Check the items for Before you start in the Expand the storage capacity by adding new drives section above. Replace drives to expand storage capacity on the active server Start with the active server. Do not remove the drives from both the active and the passive servers at the same time. This will cause both servers' storage spaces to become degraded. If you plan to replace multiple drives, make sure to replace them one-by-one. After replacing one drive, you must repair the storage pool before replacing the next one.2 3 1. Go to Storage Manager > Storage > Storage Pool to see which of the existing drives is the smallest. 2. Remove a drive from the active server and replace it with one of a larger size. To avoid injury or damaging your Synology NAS, make sure to follow the drive installation instructions found in the Hardware Installation Guide for your Synology device.1 3. Go to Storage Manager > HDD/SSD to make sure the newly added drive has been recognized. 4. Go to Storage Pool and select the storage pool. At this point, its status should be Degraded. 5. Repair the degraded storage pool. • DSM 7.0 and above: Click and select Repair. • DSM 6.2 and earlier: Click Action > Repair. 6. Select the replacement drive to add to the storage pool. Follow the instructions in the wizard to complete this step. 7. Repeat the process above one-by-one on the active server until all desired drives have been replaced with larger ones. Replace drives to expand storage capacity on the passive server When replacing drives to expand the storage capacity of the passive server, make sure to follow the same order and configurations performed on the active server. 1. Remove a corresponding drive from the passive server and replace it with one of a larger size. 2. Go to Synology High Availability > Storage > HDD/SSD to make sure the newly added drive has been recognized. 3. Go to the Volume tab. At this point, the status should be Degraded. 4. Select the degraded volume and then click the Repair button. 5. Repeat the process above until the drive configurations of the passive server and active server are the same. 43
-
 1
1 -
2
-
3
-
4
-
5
-
6
-
7
-
8
-
9
-
10
-
11
-
12
-
13
-
14
-
15
-
16
-
17
-
18
-
19
-
20
-
21
-
22
-
23
-
24
-
25
-
26
-
27
-
28
-
29
-
30
-
31
-
32
-
33
-
34
-
35
-
36
-
37
-
38
-
39
-
 40
40 -
 41
41 -
 42
42 -
 43
43 -
 44
44 -
 45
45 -
 46
46 -
 47
47 -
 48
48 -
 49
49 -
 50
50 -
51
-
52
-
53
-
54
 |
 |
