TP-Link TL-PS110U User Guide - Page 5
LED Indicators, Before you start, you should prepare the following items: - usb
 |
UPC - 845973031008
View all TP-Link TL-PS110U manuals
Add to My Manuals
Save this manual to your list of manuals |
Page 5 highlights
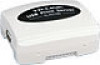
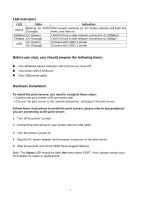
LED Indicators LED State Indication Status Blinking for POST When power switched on, the Status indicator will flash five (Orange) times, and then on. 100Mbps On (Green) 10Mbps On (Orange) LAN Port has a valid network connection at 100Mbps. LAN Port has a valid network connection at 10Mbps. USB On (Green) On (Orange) Connect with USB2.0 printer Connect with USB1.1 printer Before you start, you should prepare the following items: „ One Windows-based computer with print server setup CD „ One printer with a USB port „ One USB printer cable Hardware Installation To install the print servers, you need to complete these steps: ․Confirm that your printer USB port works well. ․Connect the print server to the network and printer, and plug in the print server. Follow these instructions to install the print servers, please refer to any peripheral you are connecting to the print server: 1. Turn off the printer's power. 2. Connect the print server to your printer with the USB cable. 3. Turn the printer's power on. 4. Plug the AC power adapter into the power connector on the print server. 5. Wait 10 seconds until all the LEDs have stopped flashing. Note: The Status LED should be flash five times when POST. If not, please contact your local dealer for repair or replacement. 5
-
 1
1 -
 2
2 -
 3
3 -
 4
4 -
 5
5 -
 6
6 -
 7
7 -
 8
8 -
 9
9 -
 10
10 -
 11
11 -
12
-
13
-
14
-
15
-
16
-
17
-
18
-
19
-
20
-
21
-
22
-
23
-
24
-
25
-
26
-
27
-
28
-
29
-
30
-
31
-
32
-
33
-
34
-
35
-
36
-
37
-
38
-
39
-
40
-
41
-
42
-
43
-
44
-
45
-
46
-
47
-
48
-
49
-
50
-
51
-
52
-
53
-
54
-
55
-
56
-
57
-
58
-
59
-
60
-
61
-
62
-
63
-
64
-
65
-
66
-
67
-
68
-
69
-
70
-
71
-
72
-
73
-
74
-
75
-
76
-
77
-
78
-
79
 |
 |