TP-Link TL-PS110U User Guide - Page 54
LPR Port, Close, Shared, Share Name, Recommended, Finish, Name or address of server, providing lpd - compatible printers
 |
UPC - 845973031008
View all TP-Link TL-PS110U manuals
Add to My Manuals
Save this manual to your list of manuals |
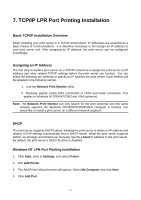
Page 54 highlights
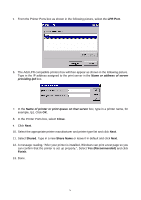
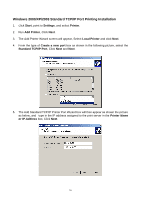
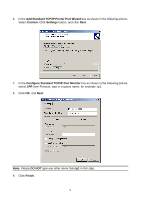
5. From the Printer Ports box as shown in the following picture, select the LPR Port. 6. The Add LPR compatible printers box will then appear as shown in the following picture. Type in the IP address assigned to the print server in the Name or address of server providing lpd box. 7. In the Name of printer or print queue on that server box, type in a printer name, for example, lp1. Click OK. 8. In the Printer Ports box, select Close. 9. Click Next. 10. Select the appropriate printer manufacturer and printer type list and click Next. 11. Select Shared. Type in a new Share Name or leave it in default and click Next. 12. A message reading, "After your printer is installed, Windows can print a test page so you can confirm that the printer is set up properly.", Select Yes (Recommended) and click Finish. 13. Done. 54
-
 1
1 -
2
-
3
-
4
-
5
-
6
-
7
-
8
-
9
-
10
-
11
-
12
-
13
-
14
-
15
-
16
-
17
-
18
-
19
-
20
-
21
-
22
-
23
-
24
-
25
-
26
-
27
-
28
-
29
-
30
-
31
-
32
-
33
-
34
-
35
-
36
-
37
-
38
-
39
-
40
-
41
-
42
-
43
-
44
-
45
-
46
-
47
-
48
-
 49
49 -
 50
50 -
 51
51 -
 52
52 -
 53
53 -
 54
54 -
 55
55 -
 56
56 -
 57
57 -
 58
58 -
 59
59 -
60
-
61
-
62
-
63
-
64
-
65
-
66
-
67
-
68
-
69
-
70
-
71
-
72
-
73
-
74
-
75
-
76
-
77
-
78
-
79
 |
 |
