TP-Link TL-R402M User Guide - Page 45
Destination IP Address, Subnet Mask
 |
UPC - 696726402015
View all TP-Link TL-R402M manuals
Add to My Manuals
Save this manual to your list of manuals |
Page 45 highlights
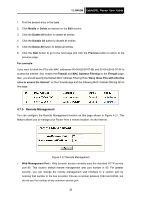
TL-R402M Cable/DSL Router User Guide Figure 4-29 Static Routing To add static routing entries: 1. Enter the following data: ¾ Destination IP Address - The Destination IP Address is the address of the network or host that you want to assign to a static route ¾ Subnet Mask - The Subnet Mask determines which portion of an IP address is the network portion, and which portion is the host portion ¾ Gateway - This is the IP address of the gateway device that allows for contact between the router and the network or host 2. Click the Enable checkbox. 3. Repeat steps 1-2 until you are finished. 4. If you are finished. Click the Save button to save it. To modify an existing entry: 1. Modify the entry's Destination IP Address, Subnet Mask and Gateway. 2. Click the Save button. To delete an existing entry: 1. Select the entry as you desire and make all of its fields blank. 2. Click the Save button. To delete all the entries: 1. Click the Clear All button. 2. Click the Save button. 38
-
 1
1 -
2
-
3
-
4
-
5
-
6
-
7
-
8
-
9
-
10
-
11
-
12
-
13
-
14
-
15
-
16
-
17
-
18
-
19
-
20
-
21
-
22
-
23
-
24
-
25
-
26
-
27
-
28
-
29
-
30
-
31
-
32
-
33
-
34
-
35
-
36
-
37
-
38
-
39
-
 40
40 -
 41
41 -
 42
42 -
 43
43 -
 44
44 -
 45
45 -
 46
46 -
 47
47 -
 48
48 -
 49
49 -
 50
50 -
51
-
52
-
53
-
54
-
55
-
56
-
57
-
58
-
59
-
60
-
61
 |
 |
