TP-Link TL-R600VPN TL-R600VPN V1 User Guide - Page 48
IPsec VPN
 |
View all TP-Link TL-R600VPN manuals
Add to My Manuals
Save this manual to your list of manuals |
Page 48 highlights
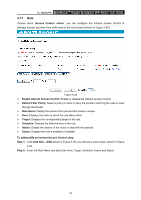
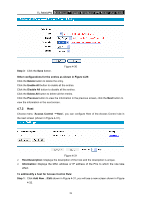
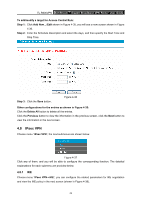
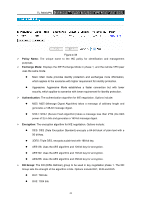
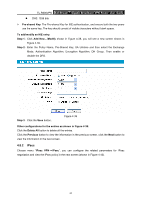
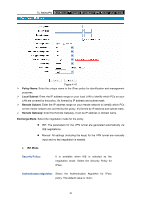
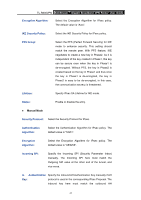
TL-R600VPN SafeStreamTM Gigabit Broadband VPN Router User Guide To add/modify a target for Access Control Rule: Step 1: Click Add New.../Edit shown in Figure 4-35, you will see a new screen shown in Figure 4-36. Step 2: Enter the Schedule Description and select the days, and then specify the Start Time and Stop Time. Step 3: Click the Save button. Figure 4-36 Other configurations for the entries as shown in Figure 4-35: Click the Delete All button to delete all the entries. Click the Previous button to view the information in the previous screen, click the Next button to view the information in the next screen. 4.8 IPsec VPN Choose menu "IPsec VPN", the next submenus are shown below. Figure 4-37 Click any of them, and you will be able to configure the corresponding function. The detailed explanations for each submenu are provided below. 4.8.1 IKE Choose menu "IPsec VPN→IKE", you can configure the related parameters for IKE negotiation and view the IKE policy in the next screen (shown in Figure 4-38). 42
-
 1
1 -
2
-
3
-
4
-
5
-
6
-
7
-
8
-
9
-
10
-
11
-
12
-
13
-
14
-
15
-
16
-
17
-
18
-
19
-
20
-
21
-
22
-
23
-
24
-
25
-
26
-
27
-
28
-
29
-
30
-
31
-
32
-
33
-
34
-
35
-
36
-
37
-
38
-
39
-
40
-
41
-
42
-
 43
43 -
 44
44 -
 45
45 -
 46
46 -
 47
47 -
 48
48 -
 49
49 -
 50
50 -
 51
51 -
 52
52 -
 53
53 -
54
-
55
-
56
-
57
-
58
-
59
-
60
-
61
-
62
-
63
-
64
-
65
-
66
-
67
-
68
-
69
-
70
-
71
-
72
-
73
-
74
-
75
-
76
-
77
-
78
-
79
-
80
-
81
-
82
 |
 |