TP-Link TL-R600VPN TL-R600VPN V1 User Guide - Page 62
ARP List
 |
View all TP-Link TL-R600VPN manuals
Add to My Manuals
Save this manual to your list of manuals |
Page 62 highlights
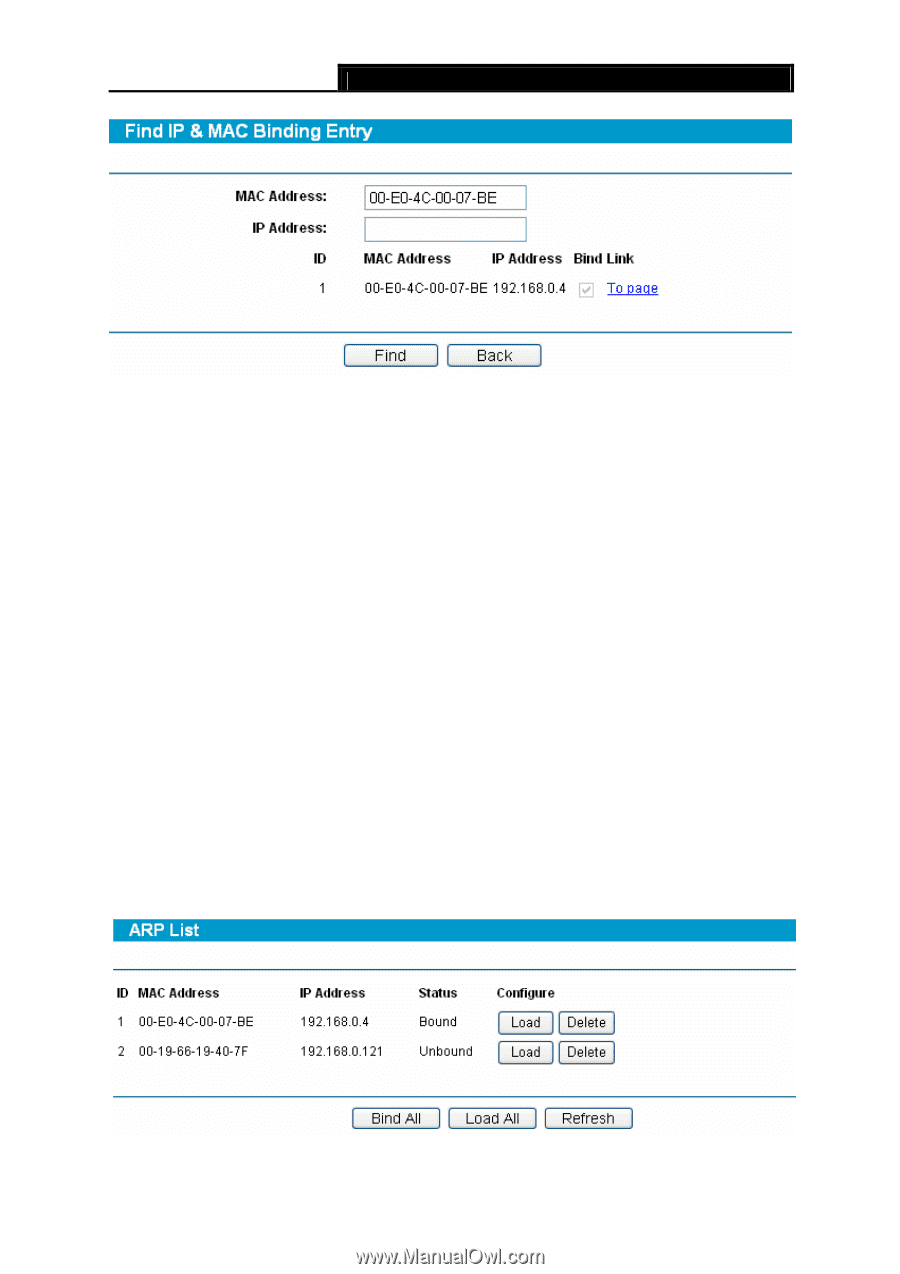
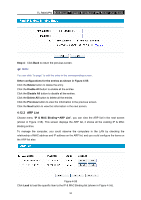
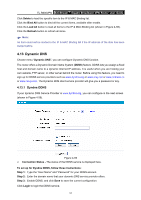
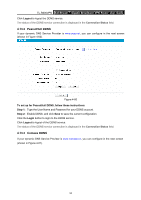
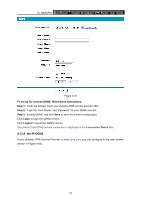
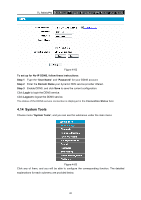
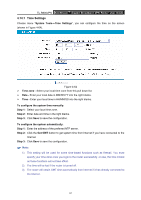
TL-R600VPN SafeStreamTM Gigabit Broadband VPN Router User Guide Step 4: Click Back to return the previous screen. ) Note: You can click "to page" to edit the entry in the corresponding screen. Other configurations for the entries as shown in Figure 4-55: Click the Delete button to delete the entry. Click the Enable All button to enable all the entries. Click the Disable All button to disable all the entries. Click the Delete All button to delete all the entries. Click the Previous button to view the information in the previous screen. Click the Next button to view the information in the next screen. 4.12.2 ARP List Choose menu "IP & MAC Binding→ARP List", you can view the ARP list in the next screen (shown in Figure 4-58). This screen displays the ARP list, it shows all the existing IP & MAC Binding entries. To manage the computer, you could observe the computers in the LAN by checking the relationship of MAC address and IP address on the ARP list, and you could configure the items on the ARP list also. Figure 4-58 Click Load to load the specific item to the IP & MAC Binding list (shown in Figure 4-55). 56
-
 1
1 -
2
-
3
-
4
-
5
-
6
-
7
-
8
-
9
-
10
-
11
-
12
-
13
-
14
-
15
-
16
-
17
-
18
-
19
-
20
-
21
-
22
-
23
-
24
-
25
-
26
-
27
-
28
-
29
-
30
-
31
-
32
-
33
-
34
-
35
-
36
-
37
-
38
-
39
-
40
-
41
-
42
-
43
-
44
-
45
-
46
-
47
-
48
-
49
-
50
-
51
-
52
-
53
-
54
-
55
-
56
-
 57
57 -
 58
58 -
 59
59 -
 60
60 -
 61
61 -
 62
62 -
 63
63 -
 64
64 -
 65
65 -
 66
66 -
 67
67 -
68
-
69
-
70
-
71
-
72
-
73
-
74
-
75
-
76
-
77
-
78
-
79
-
80
-
81
-
82
 |
 |