TP-Link TL-WDR3500 TL-WDR3500 V1 User Guide 1910010836 - Page 28
TL-WDR3500, Channel Width, Channel, Wireless Security, Disable Security - default password
 |
View all TP-Link TL-WDR3500 manuals
Add to My Manuals
Save this manual to your list of manuals |
Page 28 highlights
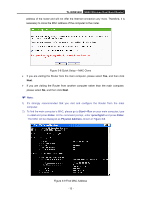
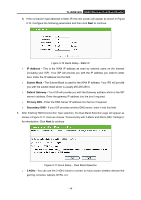
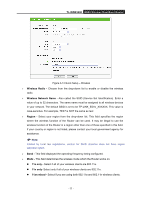
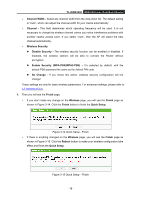
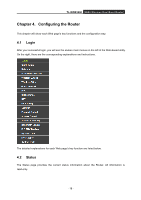
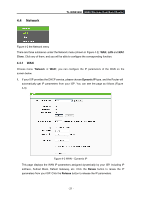
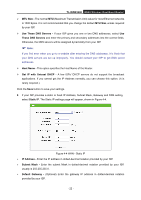
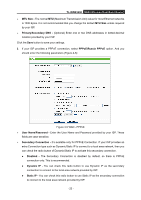
TL-WDR3500 N600 Wireless Dual Band Router Channel Width - Select any channel width from the drop-down list. The default setting is "Auto", which can adjust the channel width for your clients automatically. Channel - This field determines which operating frequency will be used. It is not necessary to change the wireless channel unless you notice interference problems with another nearby access point. If you select "Auto", then the AP will select the best channel automatically. Wireless Security Disable Security - The wireless security function can be enabled or disabled. If disabled, the wireless stations will be able to connect the Router without encryption. Enable Security (WPA-PSK/WPA2-PSK) - It's selected by default, with the default PSK password the same as the default PIN code. No Change - If you chose this option, wireless security configuration will not change! These settings are only for basic wireless parameters. For advanced settings, please refer to 4.7 Wireless 5GHz. 8. Then you will see the Finish page. If you don't make any change on the Wireless page, you will see the Finish page as shown in Figure 3-14. Click the Finish button to finish the Quick Setup. Figure 3-14 Quick Setup - Finish If there is anything changed on the Wireless page, you will see the Finish page as shown in Figure 3-15. Click the Reboot button to make your wireless configuration take effect and finish the Quick Setup. Figure 3-15 Quick Setup - Finish - 18 -
-
 1
1 -
2
-
3
-
4
-
5
-
6
-
7
-
8
-
9
-
10
-
11
-
12
-
13
-
14
-
15
-
16
-
17
-
18
-
19
-
20
-
21
-
22
-
 23
23 -
 24
24 -
 25
25 -
 26
26 -
 27
27 -
 28
28 -
 29
29 -
 30
30 -
 31
31 -
 32
32 -
 33
33 -
34
-
35
-
36
-
37
-
38
-
39
-
40
-
41
-
42
-
43
-
44
-
45
-
46
-
47
-
48
-
49
-
50
-
51
-
52
-
53
-
54
-
55
-
56
-
57
-
58
-
59
-
60
-
61
-
62
-
63
-
64
-
65
-
66
-
67
-
68
-
69
-
70
-
71
-
72
-
73
-
74
-
75
-
76
-
77
-
78
-
79
-
80
-
81
-
82
-
83
-
84
-
85
-
86
-
87
-
88
-
89
-
90
-
91
-
92
-
93
-
94
-
95
-
96
-
97
-
98
-
99
-
100
-
101
-
102
-
103
-
104
-
105
-
106
-
107
-
108
-
109
-
110
-
111
-
112
-
113
-
114
-
115
-
116
-
117
-
118
-
119
-
120
-
121
-
122
-
123
-
124
-
125
-
126
-
127
-
128
-
129
-
130
-
131
-
132
-
133
-
134
-
135
-
136
-
137
-
138
-
139
-
140
-
141
-
142
-
143
 |
 |