Toshiba Tecra R940-Landis-PT439U-05C058G1 User Guide 2 - Page 125
HDD Protection, Display, Dynamically Switchable, AC Power, Battery Power, Always High, Always Low
 |
View all Toshiba Tecra R940-Landis-PT439U-05C058G1 manuals
Add to My Manuals
Save this manual to your list of manuals |
Page 125 highlights
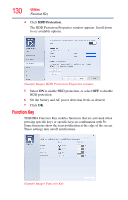
Utilities System Settings 125 changes to the Function keys settings (Notifications). See "Function Key" on page 130 and "TOSHIBA Function Keys" on page 170 ❖ HDD Protection-Allows you to enable or disable HDD Protection, which uses the acceleration sensor to detect vibrations, shocks, and other similar issues with the computer. When an issue is detected, HDD Protection automatically moves the HDD head to a safe position to reduce the risk of damage that may be caused by head-to-disk contact. ❖ Display-Allows you to select the internal LCD and/or external monitor to be used when the computer boots up. NOTE When the computer restarts, it remembers the last configuration. If data does not appear on the display you are using after starting in Sleep mode, press the ( ) + P keys to toggle the display. For more information, see "Directing the display output when you turn on the computer" on page 70. ❖ CPU-Allows you to set conditions for the CPU: Dynamically Switchable-This mode is the default setting for your computer, and automatically changes the processing frequency and decreases voltage depending on the power source: ❖ AC Power-If your computer is connected to the AC adaptor, the CPU frequency mode is set to high for faster processing ❖ Battery Power-If your computer is running on battery power, the CPU frequency mode is set to low for slower processing. Switching the CPU to low allows you to conserve power and extend the operating time of your battery. Always High-Sets the CPU speed to high when using either the battery or the AC adaptor Always Low-Sets the CPU speed to low when using either the battery or the AC adaptor ❖ Boot-Allows you to modify the boot settings ❖ Boot Priority Options-Allows you to configure the boot priority for your computer ❖ Panel open/Power on-Enable this option to boot up the computer automatically when the display lid is opened
-
 1
1 -
2
-
3
-
4
-
5
-
6
-
7
-
8
-
9
-
10
-
11
-
12
-
13
-
14
-
15
-
16
-
17
-
18
-
19
-
20
-
21
-
22
-
23
-
24
-
25
-
26
-
27
-
28
-
29
-
30
-
31
-
32
-
33
-
34
-
35
-
36
-
37
-
38
-
39
-
40
-
41
-
42
-
43
-
44
-
45
-
46
-
47
-
48
-
49
-
50
-
51
-
52
-
53
-
54
-
55
-
56
-
57
-
58
-
59
-
60
-
61
-
62
-
63
-
64
-
65
-
66
-
67
-
68
-
69
-
70
-
71
-
72
-
73
-
74
-
75
-
76
-
77
-
78
-
79
-
80
-
81
-
82
-
83
-
84
-
85
-
86
-
87
-
88
-
89
-
90
-
91
-
92
-
93
-
94
-
95
-
96
-
97
-
98
-
99
-
100
-
101
-
102
-
103
-
104
-
105
-
106
-
107
-
108
-
109
-
110
-
111
-
112
-
113
-
114
-
115
-
116
-
117
-
118
-
119
-
 120
120 -
 121
121 -
 122
122 -
 123
123 -
 124
124 -
 125
125 -
 126
126 -
 127
127 -
 128
128 -
 129
129 -
 130
130 -
131
-
132
-
133
-
134
-
135
-
136
-
137
-
138
-
139
-
140
-
141
-
142
-
143
-
144
-
145
-
146
-
147
-
148
-
149
-
150
-
151
-
152
-
153
-
154
-
155
-
156
-
157
-
158
-
159
-
160
-
161
-
162
-
163
-
164
-
165
-
166
-
167
-
168
-
169
-
170
-
171
-
172
-
173
-
174
-
175
-
176
-
177
-
178
-
179
-
180
-
181
-
182
-
183
-
184
-
185
-
186
-
187
-
188
-
189
-
190
-
191
-
192
-
193
-
194
-
195
-
196
-
197
-
198
-
199
 |
 |