Xerox XDM6325D-WU User Manual - Page 111
Replacing the ADF Pad Assembly
 |
View all Xerox XDM6325D-WU manuals
Add to My Manuals
Save this manual to your list of manuals |
Page 111 highlights
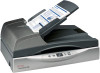
Maintenance Replacing the ADF Pad Assembly The ADF pad may wear out and is designed to be a userreplaceable part. Problems with documents feeding into the ADF is an indication that the pad is wearing out. See the "Xerox DocuMate 632 Scanner Parts List" on page 118 for ordering information. To replace the ADF Pad assembly: 1. Press the ADF cover release on the top of the scanner body to open the Automatic Document Feeder cover. The pad is located in the middle of the ADF. 2. Squeeze the plastic clamps that hold the pad assembly in place and lift the pad up and out 3. Reverse the procedure to replace the new pad into its slots. 106 DocuMate 632 Scanner User's Guide
-
 1
1 -
2
-
3
-
4
-
5
-
6
-
7
-
8
-
9
-
10
-
11
-
12
-
13
-
14
-
15
-
16
-
17
-
18
-
19
-
20
-
21
-
22
-
23
-
24
-
25
-
26
-
27
-
28
-
29
-
30
-
31
-
32
-
33
-
34
-
35
-
36
-
37
-
38
-
39
-
40
-
41
-
42
-
43
-
44
-
45
-
46
-
47
-
48
-
49
-
50
-
51
-
52
-
53
-
54
-
55
-
56
-
57
-
58
-
59
-
60
-
61
-
62
-
63
-
64
-
65
-
66
-
67
-
68
-
69
-
70
-
71
-
72
-
73
-
74
-
75
-
76
-
77
-
78
-
79
-
80
-
81
-
82
-
83
-
84
-
85
-
86
-
87
-
88
-
89
-
90
-
91
-
92
-
93
-
94
-
95
-
96
-
97
-
98
-
99
-
100
-
101
-
102
-
103
-
104
-
105
-
 106
106 -
 107
107 -
 108
108 -
 109
109 -
 110
110 -
 111
111 -
 112
112 -
 113
113 -
 114
114 -
 115
115 -
 116
116 -
117
-
118
-
119
-
120
-
121
-
122
-
123
-
124
-
125
-
126
-
127
-
128
-
129
-
130
-
131
-
132
-
133
 |
 |

Maintenance
106
DocuMate 632 Scanner User’s Guide
Replacing the ADF Pad Assembly
The ADF pad may wear out and is designed to be a user-
replaceable part. Problems with documents feeding into the ADF is
an indication that the pad is wearing out.
See the “Xerox DocuMate 632 Scanner Parts List” on page 118 for
ordering information.
To replace the ADF Pad assembly:
1.
Press the ADF cover release on the top of the scanner body to
open the Automatic Document Feeder cover. The pad is
located in the middle of the ADF.
2.
Squeeze the plastic clamps that hold the pad assembly in place
and lift the pad up and out
3.
Reverse the procedure to replace the new pad into its slots.