Yamaha AW16G Owner's Manual
Yamaha AW16G Manual
 |
View all Yamaha AW16G manuals
Add to My Manuals
Save this manual to your list of manuals |
Yamaha AW16G manual content summary:
- Yamaha AW16G | Owner's Manual - Page 1
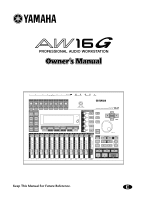
Owner's Manual Keep This Manual For Future Reference. E - Yamaha AW16G | Owner's Manual - Page 2
approved by Yamaha may void your authority, granted by the FCC, to use the product. 2. IMPORTANT: When connecting this product to accessories and/or another product use only high quality shielded cables. Cable/s supplied with this product MUST be used. Follow all installation instructions. Failure - Yamaha AW16G | Owner's Manual - Page 3
Installation • Connect this unit's power cord only to an AC outlet of the type stated in this Owner's Manual or as marked power cord covered by a carpet. • Do not install a CD-RW drive into this device while the power cable is plugged into an AC outlet. Doing so is an electrical shock hazard. • Use - Yamaha AW16G | Owner's Manual - Page 4
not be using this product for an extended period of time, be sure to unplug the AC adaptor from the AC outlet. Handling the CD-R/RW media Please observe the following points when handling the disc. Failure to do so may cause problems such as the recorded data being lost, the drive to malfunction - Yamaha AW16G | Owner's Manual - Page 5
programs and contents in which Yamaha owns copyrights or with respect to which it has license to use others' copyrights. Such copyrighted materials include, without limitation, all computer software, styles files, MIDI files, WAVE data and sound recordings. Any unauthorized use of such programs and - Yamaha AW16G | Owner's Manual - Page 6
the CD-RW drive 10 Removing the CD-RW drive 11 Using the CD-RW drive 11 Connecting the AC adaptor 12 Turning the power on/off 12 2 Introducing the AW16G 13 Features of the AW16G 13 AW16G terminology 15 Recorder section 15 Mixer section 15 Quick Loop Sampler section 16 Overall 16 Parts of - Yamaha AW16G | Owner's Manual - Page 7
for the CD-RW drive 99 Writing audio data (Track At Once 100 Writing audio data (Disc At Once 102 Finalizing CD-R/RW media 104 Erasing CD-RW media 105 Playing an audio CD 106 11 Quick loop sampler 107 About the quick loop sampler 107 Using sample libraries 109 Recording/playing a pad - Yamaha AW16G | Owner's Manual - Page 8
Contents 8 - Yamaha AW16G | Owner's Manual - Page 9
300) • Owner's manual (this book) • CD-ROM ■ Copyright This product incorporates and bundles computer programs and contents in which Yamaha owns copyrights or with respect to which it has license to use other's copyrights. Such copyrighted materials include, without limitation, all computer software - Yamaha AW16G | Owner's Manual - Page 10
Before you start About the CD-RW drive A CD-RW drive is a device that lets you create or play audio CDs, backup and restore data from the internal hard disk, and read data from a CD-ROM. An optional CDRW16G can be installed in the AW16G. Please be aware that other CD-RW drives cannot be installed - Yamaha AW16G | Owner's Manual - Page 11
you start Removing the CD-RW drive 1 4 3,5 CD-RW drive cover 1 Turn off the power of the AW16G. As described in "Turning the power off (shut down)" (→ p. 12), turn off the power of the AW16G. For safety's sake, also unplug the AC adaptor and the AW16G from the electrical outlet. 2 Turn the AW16G - Yamaha AW16G | Owner's Manual - Page 12
, and damaging or drastically shortening the lifespan of the hard disk itself and the internal CD-RW drive. Please use caution. Tip! A small amount of electrical current is flowing even when the power is in STANDBY mode. If you will not be using the AW16G for an extended period of time, be sure to - Yamaha AW16G | Owner's Manual - Page 13
know when using the AW16G. Features of the AW16G The AW16G is an audio workstation that combines a digital mixer, multi-effect processor, hard disk recorder, sampler, and CD-RW drive. The following diagram shows the signal flow within the AW16G. INPUT jacks 1-8 DIGITAL STEREO IN jack Mixer ×8 Input - Yamaha AW16G | Owner's Manual - Page 14
entire Quick Loop Sampler. ■ CD-RW drive A dedicated CD-RW drive (the CDRW16G, option) can be installed in the AW16G. If this is installed, you can produce an audio CD from the stereo tracks of the songs recorded on the hard disk. Markers assigned within a song can also be used as the track numbers - Yamaha AW16G | Owner's Manual - Page 15
a "track." The AW16G's recorder section uses the following types of track. ● Audio tracks The physical tracks used to record and play back audio data are called "audio tracks," or simply "tracks." The AW16G has sixteen audio tracks. You can record eight tracks simultaneously, and play back 16 tracks - Yamaha AW16G | Owner's Manual - Page 16
The smallest unit by which the AW16G manages a composition is called a "song." When you save a song on the hard disk, all data necessary for reproducing that song will be saved; i.e., not just the audio data, but also mixer settings and the samples used by the quick loop sampler. You can return to - Yamaha AW16G | Owner's Manual - Page 17
on the AW16G's top panel, rear panel, and front panel. 2 Top panel Work Navigate section (P. 18) Input/output section (P. 18) Selected Channel section (P. 19) Data entry/control section (P. 20) Display (P. 18) Quick Navigate section (P. 18) Quick Loop Sampler section (P. 18) Mixer section - Yamaha AW16G | Owner's Manual - Page 18
faders and [TRACK SEL] keys to control an external MIDI device or sequencer software on your computer. F [UTILITY] key This key accesses the UTILITY screen, where you can make MIDI, oscillator, and digital input settings, and format the hard disk. ■ Quick Navigate section 1 2 1 [RECORD] key This - Yamaha AW16G | Owner's Manual - Page 19
the AW16G 4 1 [TRACK SEL] keys 1-8 B [TRACK SEL] keys 9/10-15/16 C [STEREO SEL] key Use these keys to select the mixer track channels or recorder tracks that you want to control. 5 6 D Faders 1-8 E Faders 9/10-15/16 Normally, these faders adjust the playback level of each recorder track. By - Yamaha AW16G | Owner's Manual - Page 20
AW16G ■ Data entry/control section 1 4 2 3 5 6 1 [UNDO/REDO] key This key cancels the results of a recording or track editing operation (Undo), or re-executes a cancelled operation (Redo). Tip point A) and end (point B). These keys can also be used as locate keys to move directly to point A or point - Yamaha AW16G | Owner's Manual - Page 21
Used in conjunction with the [SET] key, this registers the current location as the relative zero time. Tip! Broadly speaking, the times displayed in the AW16G press this key during recording, recording will stop and playback will connection to your monitor setup, such as a stereo system or powered - Yamaha AW16G | Owner's Manual - Page 22
power is turned on, power will be supplied to both the INPUT (XLR) 1/2 jacks. H FOOT SW jack A separately sold foot switch (Yamaha FC5) can be connected here to control transport operations such as start/stop, or to perform punch-in/out. Note The appropriate operation may not occur if you use - Yamaha AW16G | Owner's Manual - Page 23
Navigate section • All keys in the Quick Navigate section • The [VIEW] key of the Selected Channel section • All knobs of the Selected Channel section • The [SAMPLE EDIT] key of the Quick Loop Sampler section Tip! When you switch screens, the page that was last used in that screen will be displayed - Yamaha AW16G | Owner's Manual - Page 24
AW16G 2 To switch pages within a screen, you can either repeatedly press the same key as in step 1, or hold down the same key as in step 1 and use for the track channels, since not all of the parameters can be shown in a single screen. In this case, use the [INPUT SEL] keys, pads 1-4, or [TRACK SEL] - Yamaha AW16G | Owner's Manual - Page 25
Introducing the AW16G Using the Selected Channel section You can use the knobs and keys of the Selected Channel section to directly operate the mix parameters (EQ, dynamics, pan, etc.) of the currently selected channel. 1 Use the [TRACK SEL] keys, [INPUT SEL] keys, [STEREO SEL] keys, or pads 1-4 to - Yamaha AW16G | Owner's Manual - Page 26
Introducing the AW16G 26 - Yamaha AW16G | Owner's Manual - Page 27
C The monitor system connected to the output jacks of the AW16G When you turn on the power of the AW16G, the lastused song will be loaded automatically. When you turn on the power of the AW16G with the factory settings, a blank song will be loaded, so you can start recording immediately. 27 - Yamaha AW16G | Owner's Manual - Page 28
demo song Loading the demo song Here's how to load the demo song from the hard disk. 1 In the work navigate section, press the [SONG] key. The SONG screen will appear, where you can save or load songs. 2 Either press the [SONG] key repeatedly or hold down the [SONG] key and use the AW16G. (This - Yamaha AW16G | Owner's Manual - Page 29
page. 4 To adjust the monitor level appropriately, use the AW16G's [MONITOR PHONES] knob and the volume control of your monitor system. Tip! The demo song uses the Scene function to switch the settings of the mixer. This means that playback will occur using the pre-specified balance - you do not - Yamaha AW16G | Owner's Manual - Page 30
Listening to the demo song Mixing the demo song When you play back a song, tracks 1-16 of the recorder are directly connected to track channels 1-8 and 9/10- 15/16 of the mixer. The signals that pass through track channels 1-8 and 9/10-15/16 are sent to the stereo bus, routed through the stereo - Yamaha AW16G | Owner's Manual - Page 31
, press the same [TRACK SEL] key you pressed in step 5, demo song, the level or the on/off status of a channel you adjusted manually may return to its previous setting. This is because the Scene function has switched the state of the mixer settings, and is not a malfunction (→ p. 142). You can use - Yamaha AW16G | Owner's Manual - Page 32
Listening to the demo song 32 - Yamaha AW16G | Owner's Manual - Page 33
has a Sound Clip function that lets you record and play back independently of the recorder section. You can use a sound clip to quickly record and play back your performances on an audio source connected to the AW16G or on the pads. This is an ideal way to capture ideas for a song or arrangement - Yamaha AW16G | Owner's Manual - Page 34
to the EXIT button and press the [ENTER] key. You will return to the previous screen. Tip! The level settings described above are the basic settings for any type of recording --- not just for a sound clip. By using the [GAIN] knob to raise the level as far as possible without allowing distortion to - Yamaha AW16G | Owner's Manual - Page 35
be applied to the playback of a sound clip.) ● Signal flow when using a sound clip 4 MIC/LINE INPUT jacks Input channels REC SONG SCENE MUSIC PRODUCTION SYNTHESIZER Integrated Sampling Sequencer Real-time External Control Sur face Modular Synthesis Plug-in System Stereo bus Metronome Sound - Yamaha AW16G | Owner's Manual - Page 36
to an instrument connected to the MIC/ LINE INPUT jacks, your performance on the quick loop sampler pads can also be recorded. • The knobs start point and end point. Tip! • With the default settings of the AW16G, a maximum of 30 seconds can be recorded in a sound clip. If you continue recording - Yamaha AW16G | Owner's Manual - Page 37
button, END button, and CLIP button are disabled while the sound clip is playing. Tip! The region of data between the specified Start point and End point can be copied to an audio track of the Recorder section by using the EDIT screen COPY command (→ p. 128). 5 To execute the CLIP screen, press the - Yamaha AW16G | Owner's Manual - Page 38
Recording to a sound clip 38 - Yamaha AW16G | Owner's Manual - Page 39
audio signal from an instrument or mic connected to the AW16G onto the first track of your song. Creating a new song In order to begin recording on the AW16G, you must first create a new song. Tip! When you start up the AW16G for the first time, an empty song will be loaded automatically. If you use - Yamaha AW16G | Owner's Manual - Page 40
/mics connected to the AW16G can be assigned to tracks in one of the following two ways. ■ Direct recording With this method, input channels are assigned to tracks in a one-to-one correspondence. This method requires the same number of tracks as the number of input channels you use. However - Yamaha AW16G | Owner's Manual - Page 41
Synthesizer/ rhythm machine MIC/LINE INPUT jacks Input channels Recorder section Track 1 Track 2 Track 3 Track 4 Track 5 Track 6 Track 7 Track 8 L/R bus Note The way in which you assign the input signals to tracks will depend on the method you choose. 5 Stereo output channel Mixer section 41 - Yamaha AW16G | Owner's Manual - Page 42
Assigning input signals to tracks (Direct recording) 1 Lower the [STEREO] fader to the -∞ position. 2 Connect instruments/mics to MIC/LINE INPUT jacks 1-8. 3 In the Quick Navigate section, either press the [RECORD] key repeatedly or hold down the [RECORD] key and use the CURSOR [ ]/[ ] keys to - Yamaha AW16G | Owner's Manual - Page 43
the selected [INPUT SEL] key and [TRACK SEL] key will be blinking red. The blinking [TRACK SEL] key indicates that the corresponding track is in record-ready mode. In the screen, a line will be drawn to indicate the connection. Tip! • You can also select a track by moving the cursor to the symbol - Yamaha AW16G | Owner's Manual - Page 44
signal, press the [TRACK SEL] key for the corresponding track channel, and turn the [PAN/BAL] knob of the Selected Channel section. Note The pan setting of an input channel will have no effect if that input channel is assigned to a track by direct recording. Stereo output channel Mixer section 44 - Yamaha AW16G | Owner's Manual - Page 45
tracks (Bus recording) 1 Lower the [STEREO] fader to the -∞ position. 2 Connect instruments/mics to MIC/LINE INPUT jacks 1-8. 3 In the Quick Navigate section, either press the [RECORD] key repeatedly or hold down the [RECORD] key and use that this channel is connected to the bus. 5 Tip! • You can - Yamaha AW16G | Owner's Manual - Page 46
/16, odd-numbered tracks will be connected to bus L, and even-numbered tracks will be connected to bus R. The screen will display lines to indicate how the signals are connected to the track(s). Tip! • EQ and dynamics settings will be flat for a track channel whose track has been selected as a record - Yamaha AW16G | Owner's Manual - Page 47
counter, the internal metronome, and the MIDI clock messages generated by the AW16G. 5 Move the cursor to the use the Quick Loop Sampler as a rhythm machine, instead of the metronome. For details, refer to "Using sample libraries" (→ p. 109). 5 1 1 Tempo map events These are the events recorded - Yamaha AW16G | Owner's Manual - Page 48
want to operate in the screen. You can select 1-16 (audio track 1-16), ST (stereo track), or PAD 1-4 (pad track 1-4). Note Changing the track here will not change the track to be recorded. C V.TR field If you selected 1-16 or ST in the TRACK field, this area will indicate the number of the currently - Yamaha AW16G | Owner's Manual - Page 49
to occur on the other channel as well. This is convenient when you are recording a stereo audio source, or when you want to play back two bus-recorded tracks as a single stereo track. 1 Hold down the [INPUT SEL] key (or [TRACK SEL] key) of one channel that you want to pair, and then press the - Yamaha AW16G | Owner's Manual - Page 50
Track recording Using the input library The input library is a library of settings used to apply internal effects, EQ, or dynamics settings to the input signal when you want to record /return of the mixer, and patched to a specific input channel. For this reason, you can use the internal effects - Yamaha AW16G | Owner's Manual - Page 51
Track recording MIC/LINE INPUT jack Internal effect Speaker simulator EQ Input channel Note If the input channel is paired, the same settings will be applied to both channels. 7 If you want to adjust the effect, use balance using the INPUT LEVEL knob in the INPUT SETTING popup window. Tip! If - Yamaha AW16G | Owner's Manual - Page 52
Track recording Using the EQ library The EQ library contains EQ settings appropriate for a variety of instruments. Use these when you want to apply EQ to an input channel while you record, or when you want to modify the EQ settings after recalling an input library. 1 Press and hold the [INPUT SEL] - Yamaha AW16G | Owner's Manual - Page 53
Track recording Using the dynamics library The dynamics library contains dynamics settings suitable for a variety of instruments. As for the EQ library, you can use this to apply dynamics processing to an input channel while you record multiple dynamics parameters to control the dynamics effect. ( - Yamaha AW16G | Owner's Manual - Page 54
Track recording 54 - Yamaha AW16G | Owner's Manual - Page 55
and output from the STEREO/AUX OUT jacks and the MONITOR OUT jacks / PHONES jack. ● Signal flow when overdubbing Recorder section Track 1 Track 2 Track 3 Track 4 Track 5 Track 6 Track 7 Track 8 MIC/LINE input jacks Input channels Track channels Stereo bus Stereo output channel Mixer section 55 - Yamaha AW16G | Owner's Manual - Page 56
to which your instrument/mic is connected to a new track, and adjust the level. For details on this step, refer to "Track recording" (→ p. 39). The diagram below shows an example of when input channel 1 is assigned to track 5. Tip! In this example we will use "direct recording," in which one input - Yamaha AW16G | Owner's Manual - Page 57
. Tip! The position of the track channel faders will not affect the recording level. However if you set the faders to 0 dB, the playback volume will be the same as when you recorded the tracks. 4 Press the [TRACK SEL] key for the recordingdestination track channel, and use the [PAN/ BAL] knob - Yamaha AW16G | Owner's Manual - Page 58
Overdubbing Overdubbing Now you can overdub onto the track that you selected as the recording-destination. 1 In the Work Navigate section, repeatedly press the [TRACK] key or hold down the [TRACK] key and use the CURSOR [ ]/[ ] keys to access the VIEW page. 2 Move the cursor to the metronome button, - Yamaha AW16G | Owner's Manual - Page 59
If you want to perform punch-in/out using a foot switch, connect a separately sold foot switch (Yamaha FC5 or equivalent) to the rear panel FOOT SW jack. 2 Access the DIRECT page of the RECORD screen, and make sure that your instrument/ mic is assigned to the track on which you want to punch-in. At - Yamaha AW16G | Owner's Manual - Page 60
Tip! • If you want to set the In and Out points more precisely, you can use use the WAVE DISPLAY popup window (→ p. 72) which lets you view the contents of the track as a waveform. • The In point and Out point will be updated each time you record. The location at which you last started recording AW16G - Yamaha AW16G | Owner's Manual - Page 61
the Undo List By using the AW16G's Undo function, you can not only cancel the most recent recording or editing operation, but operations were performed, the content of the operation, and the track/ virtual track that was affected by the recording or editing operation. The current song is now in the - Yamaha AW16G | Owner's Manual - Page 62
access the V.TR page. In the V.TR page you can switch the virtual track (1- 8) that will be used for recording/playback by each audio track 1-16. 1 5 Move the cursor to the TRACK field, and turn the [DATA/JOG] dial to select a track number. 6 Move the cursor to the NAME button and press the [ENTER - Yamaha AW16G | Owner's Manual - Page 63
hard disk. If you accidentally turn off the power of the AW16G without saving the song, all recordings use the CURSOR [ ]/[ ] keys to access the LIST page. In this page you can select a song on the hard you have edited the mixer settings and need to for a song → p. 139) Tip! • If necessary, you can - Yamaha AW16G | Owner's Manual - Page 64
Overdubbing Loading an existing song Here's how to load an existing song from the hard disk. 1 In the Work Navigate section, repeatedly press the [SONG] key or hold down the [SONG] key and use the CURSOR [ ]/[ ] keys to access the LIST page. 2 Turn the [DATA/JOG] dial to select a song. 3 Move the - Yamaha AW16G | Owner's Manual - Page 65
change as follows, depending on the counter display format. Tip! When you create an audio CD, the Start and End points can be used to specify the region of the stereo track that will be written to the audio CD (→ p. 98). Start point = 00:00:00:00.00 Counter display format ABS 00:00:00:00.00 00:00 - Yamaha AW16G | Owner's Manual - Page 66
the TRACK screen Start point or End point, use the SONG screen POINT page. These points cannot be set by key operations. • The In point and Out point will be updated automatically when you perform a recording operation. Locator icon Tip! • Locate point settings are stored on the hard disk as part - Yamaha AW16G | Owner's Manual - Page 67
you can move quickly to a desired point. You can assign up to 99 markers in each song. Use the [ ]/[ key. Markers are automatically numbered 1-99 starting at the beginning of the song. TRACK screen VIEW page or PAD page as shown below. 7 Tip! • Marker settings are stored on the hard disk as part - Yamaha AW16G | Owner's Manual - Page 68
change the value. Note Changing the Start point will mean that locations already recorded in a track will move relative to the measure lines defined by the tempo map. Please be aware of this if you are using measure display for the metronome or for the quick loop sampler. 4 To adjust the location - Yamaha AW16G | Owner's Manual - Page 69
can erase a previously-registered locate point (except for the Relative Zero, Start, and End points) or marker. Note A locate point that you can erase a marker in one of two ways; using key operations, or in the screen. To erase a marker using key operations, locate to the marker that you want - Yamaha AW16G | Owner's Manual - Page 70
AW16G provides an "A-B Repeat" function that repeatedly plays the region between the A point and B point. This is useful to start and end. For details on how to set the A point and B point, refer to "Using markers" (→ p. 67). Tip! from that point. Tip! If you perform a recording operation while the - Yamaha AW16G | Owner's Manual - Page 71
format, you can move the current location forward or backward in millisecond units. If time code display is selected, you can move in sub-frame units. Song track Current location Nudge time Tip! Even while using the Nudge function, you can use of the nudge time, starting at the current location ( - Yamaha AW16G | Owner's Manual - Page 72
the audio data recorded in the current track of the track (1-16) you selected in step 3. 12 3 564 1 TRACK Indicates the currently selected track window, and check the location by listening. Tip! • You can also change the pointer position by using the locate points or markers that are registered - Yamaha AW16G | Owner's Manual - Page 73
used to store your own settings. ● Sample library Sets of samples can be loaded from this library into the Quick Loop Sampler. ● Channel library Major mix parameters can be loaded from this library into a channel. About scene memories On the AW16G the hard disk as part of the song. The - Yamaha AW16G | Owner's Manual - Page 74
Using the library or scene selected in the list. Tip! For some libraries or scene memories, buttons operation. • Scene number 00 is read-only data used to initialize the current scene. Scene numbers 01-96 are 24) The library or scene will be stored. Tip! You have the option of making settings so that - Yamaha AW16G | Owner's Manual - Page 75
the [ENTER] key. The library or scene will be recalled. Tip! You have the option of making settings so that the confirmation perform the Recall operation. For details, refer to "Overall settings for the AW16G" (→ p. 162). 2 Turn the [DATA/JOG] dial to scroll Using libraries and scene memories 75 - Yamaha AW16G | Owner's Manual - Page 76
Using libraries and scene memories Naming library or scene data Here's how you can assign a new name to existing library or scene data. Note The input - Yamaha AW16G | Owner's Manual - Page 77
Use this when you want to apply EQ, dynamics, and internal effects to the input signal that you are recording written. ■ Recalling EQ library data 8 1 Use the [INPUT SEL] keys, [TRACK SEL] keys, [STEREO SEL] key, or press the [ENTER] key. Using libraries and scene memories Tip! If an effect has - Yamaha AW16G | Owner's Manual - Page 78
1 Use the [INPUT SEL] keys, [TRACK SEL] that stereo input is supported. If an effect RECORD] key or hold down the [RECORD] key and use the CURSOR [ ]/[ ] keys to access the MIXDOWN page of the RECORD use with the Quick Loop Sampler. Sets of drum loop or sound-effect samples are saved on the hard - Yamaha AW16G | Owner's Manual - Page 79
Quick Loop Sampler section [SAMPLE EDIT] key or hold down the [SAMPLE EDIT] key and use the selected library data from the hard disk. D PROTECT button When you levels to effect buses 1/2 Tip! • Data for parameters control section, repeatedly press the [SCENE] key or hold down the [SCENE] key and use - Yamaha AW16G | Owner's Manual - Page 80
MIDI device. This function is called "Recall Safe." For example, this is convenient if you are performing a mixdown while switching scenes, but want to control specific channels manually. 1 In the data entry/control section, repeatedly press the [SCENE] key or hold down the [SCENE] key and use - Yamaha AW16G | Owner's Manual - Page 81
" is the process by which the signals recorded on the recorder tracks are mixed to stereo, and recorded on the internal stereo track to complete the song. The contents of the stereo track can be used without further processing as material to create an audio CD. The diagram below shows the signal flow - Yamaha AW16G | Owner's Manual - Page 82
the virtual tracks for tracks 1-8, and use these tracks to record other instrumental performances. ● Signal flow during bouncing Recorder section Track 1 Track 2 Track 3 Track 4 Track 5 Track 6 Track 7 Track 8 Track 9 Track 10 Track channels Stereo bus Stereo output channel Mixer section 82 - Yamaha AW16G | Owner's Manual - Page 83
adjust the balance and tone of each track. 1 Lower the [STEREO] fader to the -∞ position. 2 In the Quick Navigate section, repeatedly press the [RECORD] key or hold down the [RECORD] key and use the CURSOR [ ]/[ ] keys to access the MIXDOWN page of the RECORD screen. The MIXDOWN page is where you - Yamaha AW16G | Owner's Manual - Page 84
use internal effect 1 in this way. ■ Internally connecting an internal effect via send/return The "Track recording" chapter explained how to insert an internal effect into an input channel by using will appear. 1 Tip! If the page now you are free to use this effect in the mixer section via send/ - Yamaha AW16G | Owner's Manual - Page 85
the effect library that you want to use, and load it into internal effect 1. In this example, we will select a reverb-type library. 3 Press the [EFF1] knob once to access the SEND page of the EFF1 screen. If insert effect 1 is connected via the mixer section send/return, the following items will - Yamaha AW16G | Owner's Manual - Page 86
and press the PLAY [ ] key. The song will begin playing, and the playback will be recorded on the stereo track. Tip! The data that is recorded here on the stereo track will be the data that is used to create an audio CD. If you want to precisely specify the beginning or end of the song, it is - Yamaha AW16G | Owner's Manual - Page 87
to the -∞ position. 2 In the Quick Navigate section, repeatedly press the [RECORD] key or hold down the [RECORD] key and use the CURSOR [ ]/[ ] keys to access the BOUNCE page of the RECORD screen. In the BOUNCE page you can select the bouncesource tracks, and record them via the L/R bus onto one - Yamaha AW16G | Owner's Manual - Page 88
the [ENTER] key to cancel the recording settings. 11 Access the ON/OFF page of the MONITOR screen (→ p. 31), turn off all track channels other than the bounce-destination, and press the PLAY [ ] key. Tip! • If you attempt to change the screen or page without using the SAFE button, a popup window - Yamaha AW16G | Owner's Manual - Page 89
to the AW16G song, or add sound effects that have been assigned to the pads. To do this, perform the following steps after you have completed "Preparing for mixdown" (→ p. 83). 1 In the Quick Navigate section, repeatedly press the [RECORD] key or hold down the [RECORD] key and use the CURSOR - Yamaha AW16G | Owner's Manual - Page 90
upper left of the screen). Use the [INPUT SEL] keys, pads 1-4, [TRACK SEL] keys, and [STEREO and this indicator will be held. To reset the indicator, temporarily turn off the PEAK button Note Pairing cannot be switched off for track channels 9/10- 15/16, pad channels 1-4, and the stereo channel. - Yamaha AW16G | Owner's Manual - Page 91
lets you start mixdown or bounce operations with the track channels "zeroed," and provides an easy way to reset the levels back to the nominal setting if you can no longer hear any sound. 1 In the Quick Navigate section, repeatedly press the [MONITOR] key or hold down the [MONITOR] key and use the - Yamaha AW16G | Owner's Manual - Page 92
"Track recording" and "Overdubbing" explained how to load an EQ library and use to this button and press the [ENTER] key to reset the boost/cut amount of all bands to 0 dB. (except when the cursor is located at the FLAT button). Tip! • If the meter display clips because you boosted a certain - Yamaha AW16G | Owner's Manual - Page 93
Gate COMPAND-H Compander (hard) COMPAND-S Compander signal (key-in signal) that will control dynamics processing. SELF The post-EQ pad channel 1, track channel 1, or the stereo output channel. Tip! Dynamics settings the parameter that you want to edit, and use the [DATA/JOG] dial to edit the value - Yamaha AW16G | Owner's Manual - Page 94
stereo or monaural. A stereo-input effect is indicated by , and a monaural-input effect is indicated by . D USED AS Indicates how this effect is being used. If the effect is internally connected to the mixer section via send/return, this will indicate "EFF1" or "EFF2." If the effect is inserted into - Yamaha AW16G | Owner's Manual - Page 95
the parameters will depend on the currently-used effect type. If the effect is internally connected to the mixer section via send/return, this area will the parameter pages for the STEREO DELAY effect type. MIX BAL. parameter Tip! The parameter pages show the parameters that are specific to that - Yamaha AW16G | Owner's Manual - Page 96
channel The chapter "Track recording" explained how to insert an internal effect into an input channel. In the same way, you can also insert an effect into a track channel or pad channel. As an example, here's how to insert internal effect 1 into a track channel for use during mixdown or bouncing - Yamaha AW16G | Owner's Manual - Page 97
how you can use the CD-RW drive to create an audio CD, and how to play back an audio CD. Creating an audio CD On the AW16G, you can select one or more songs on the hard disk, and write the audio data from the stereo track of each song to a CD-R/RW disc in CD-DA format. The CD-R/RW media to - Yamaha AW16G | Owner's Manual - Page 98
Audio CD Track 1 Track 2 no gap When using Disc At Once to write a CD, you can use the start point, end point and markers that were assigned within the AW16G song to divide a single continuous song into multiple tracks for writing. For example, this is convenient when you have recorded a live - Yamaha AW16G | Owner's Manual - Page 99
audio playback) or x4 (four times as fast as audio playback). Normally you should use x8, and drop down to x4 if errors occur during writing. 3 Use 4 If desired, set the UNDERRUN PROTECT button to ENABLE. The CD-RW drive of the AW16G has a function to prevent "buffer underrun" errors which can occur - Yamaha AW16G | Owner's Manual - Page 100
two buttons will appear in the display. 12 1 TRACK AT ONCE button Creates an audio CD using the Track At Once method. B DISC AT ONCE button Creates an audio CD using the Disc At Once method. 3 Insert CD-R/RW media in the drive, move the cursor to the TRACK AT ONCE button, and press the [ENTER] key - Yamaha AW16G | Owner's Manual - Page 101
track 2 and following. Tip! • When you move the cursor to the NEW button and press the [ENTER] key, a new song will be added at the end of the existing songs. • By using for the CD-RW drive" (→ p. 99), a writing test will be performed before the data is actually written. If a problem occurs during - Yamaha AW16G | Owner's Manual - Page 102
Creating an audio CD Writing audio data (Disc At Once) Here's how to use the Disc At Once method to write stereo tracks from songs saved on the hard disk to CD-R/RW media. Use this method if you do not want to create silence between each track of the CD, or if you want to write a single song - Yamaha AW16G | Owner's Manual - Page 103
track 2 and following. Tip! • When you move the cursor to the NEW button and press the [ENTER] key, a new song will be added at the end of the existing songs. • By using for the CD-RW drive" (→ p. 99), a writing test will be performed before the data is actually written. If a problem occurs during - Yamaha AW16G | Owner's Manual - Page 104
audio CD Finalizing CD-R/RW media Here's how to finalize CD-R/RW media that you wrote using Track At Once, so that the disc can be played by a CD-RW drive or a CD player. Tip! CD-R/RW media written by the AW16G using Track At Once (and not yet finalized) cannot be played by another CD-RW drive or a CD - Yamaha AW16G | Owner's Manual - Page 105
to perform this operation on a disc that has been used to store computer data etc. if you want to use that disc on the AW16G. Tip! Since data is erased as necessary when you back up AW16G data to CD-RW media or when you write audio data to CD-RW media, you do not need to perform the - Yamaha AW16G | Owner's Manual - Page 106
an audio CD Playing an audio CD You can use the CD-RW drive to play back a conventional audio CD or CD-R/RW media to which audio data has been written. This is referred to as the CD Play function. Tip! The CD Play function can also play audio data from a mixed-mode CD-ROM (only track 2 and - Yamaha AW16G | Owner's Manual - Page 107
channel Stereo bus Mixer section You can load samples into the pads from the sample library (a library for the Quick Loop Sampler), load a portion of an audio track or audio CD, or load a WAV file. You can also directly sample a signal from an instrument or mic connected to the AW16G's input jacks - Yamaha AW16G | Owner's Manual - Page 108
without affecting its pitch. For example, a sampled drum pattern can be played back at the tempo specified by the song's tempo map. (For details on using the Slice function → p. 120) Tip! The settings of the Quick Loop Sampler and the sample data assigned to each pad are saved as part of the song. - Yamaha AW16G | Owner's Manual - Page 109
used by the Quick Loop Sampler. When the AW16G is shipped from the factory, sets of samples such as drum loops and sounds effects are stored on the hard window will automatically close. Tip! When the popup window , and that your monitor system is connected correctly and that its volume is set - Yamaha AW16G | Owner's Manual - Page 110
also be moved to an audio track (→ p. 128). Recording/playing a pad performance Here's how you can record your pad performance (pad events) onto the pad tracks. 1 In the Quick Navigation section, repeatedly press the [RECORD] key or hold down the [RECORD] key and use the CURSOR [ ]/[ ] keys to - Yamaha AW16G | Owner's Manual - Page 111
] key once again. Tip! If a pad track is muted and the pad is set to LOOP/TRIGGER, the pad will play if you simply press the [PLAY] key to play back the recorder. This means that you can use this feature as a rhythm machine even without recording on a pad track. 11 Quick loop sampler 1 One Shot - Yamaha AW16G | Owner's Manual - Page 112
Quick loop sampler Importing from an audio CD/WAV file to a pad Here's how you can import CD audio data (CD-DA) or a WAV file from a CD-ROM/CD-R into a sample bank for pads 1-4. 1 Switch the internal settings of the AW16G to enable digital recording. For details on digital recording settings, refer - Yamaha AW16G | Owner's Manual - Page 113
audio CD/CD-Extra. Tip! • If a mixed mode format CD-ROM is inserted in the CDRW drive, a popup window will appear, allowing you to select AUDIO (CD audio CD or CD-Extra, use the From Start/From End fields to specify the region that you want to import. 7 Use rm the operation. Quick loop sampler 9 To - Yamaha AW16G | Owner's Manual - Page 114
Quick loop sampler Importing from an audio track/stereo track to a pad Here's how a region of an already-recorded track of the current song can be imported into a sample bank for pads 1-4. 1 Play back the song, and find the track and region that you want to import. 2 In the Quick Loop Sampler - Yamaha AW16G | Owner's Manual - Page 115
this; "manual record" in which you start and stop recording manually, and "auto record" in which recording will begin automatically when the signal reaches a specified level. ■ Prepare for sampling 1 Connect the instrument/mic that you want to sample to a MIC/LINE INPUT jack. 2 In the Quick Navigate - Yamaha AW16G | Owner's Manual - Page 116
Quick loop sampler ■ Manual record 1 Make sure that the MANU REC/AUTO REC button indicates MANU REC. If the button indicates AUTO REC, move the cursor to the button and press the [ENTER] key. When MANU REC is selected, the START/STANDBY button will function as the START button to start or stop - Yamaha AW16G | Owner's Manual - Page 117
edit the sample name that is assigned when you import from an audio CD or WAV file, or when you sample an external signal. 1 In the Quick Loop Sampler section, repeatedly press the [SAMPLE EDIT] key or hold down the [SAMPLE EDIT] key and use CURSOR [ ]/[ ] keys to access the SETUP page of the SAMPLE - Yamaha AW16G | Owner's Manual - Page 118
Quick loop sampler Trimming the playback region Here's how you can view the waveform of the sample assigned to a sample bank, and adjust the playback start and end points. 1 In the Quick Sampler Section, repeatedly press the [SAMPLE EDIT] key or hold down the [SAMPLE EDIT] key and use the CURSOR [ - Yamaha AW16G | Owner's Manual - Page 119
Loop modes, and between Trigger and Gate modes. 1 In the Quick Loop Sampler section, repeatedly press the [SAMPLE EDIT] key or hold down the [SAMPLE EDIT] key and use sample will play forward (start point → end point). REVERSE The sample will play in reverse (end point → start point). 3 Move the - Yamaha AW16G | Owner's Manual - Page 120
Tip! The Slice function always handles the playback region of the sample as one measure. Before using the Slice function, you must trim the playback region of the sample so that it is one measure long. 1 In the Quick Loop you play the sample while the recorder is stopped. ORIGINAL The original tempo - Yamaha AW16G | Owner's Manual - Page 121
the tempo of the current song. 6 Repeatedly press the [TRACK] key or hold down the [TRACK] key and use the CURSOR [ ]/[ ] keys to access the VIEW page of the TRACK screen. 7 Play back the song, and press the pad the change. (For details on tempo map settings → p. 142.) 11 Quick loop sampler 121 - Yamaha AW16G | Owner's Manual - Page 122
you can delete unused data (before the start point and after the end point) from a specific sample, or completely erase an individual sample. 1 In the Quick Loop Sampler section, repeatedly press the [SAMPLE EDIT] key or hold down the [SAMPLE EDIT] key and use the CURSOR [ ]/[ ] keys to access the - Yamaha AW16G | Owner's Manual - Page 123
explains how you can edit the audio data recorded in an audio track, and how to edit the pad events recorded in a pad track. What you can do using editing commands The AW16G provides various editing commands for editing the recorded audio tracks and pad tracks. Editing commands are functions that - Yamaha AW16G | Owner's Manual - Page 124
EDIT] key or hold down the [EDIT] key and use the CURSOR [ ]/[ ] keys to select the desired 16 An audio track 1/2-15/16 A pair of adjacent odd-numbered/ even-numbered audio tracks STEREO The stereo track PAD A pad track ALL Audio tracks 1-16 and pad tracks 1-4 SMPL All samples of the quick loop - Yamaha AW16G | Owner's Manual - Page 125
(end of the region to be edited) You can set the Start/End parameters in terms of the counter display format (the value at the left) or in units of measures/beats (the value at the right). Move the cursor to the digit that you want to change, and turn the [DATA/JOG - Yamaha AW16G | Owner's Manual - Page 126
and End) of the specified track(s). 1 23 4 5 ● For an audio track Start End 1 2 3 4 5 6 7 8 ERASE 1 2 3 4 5 6 7 8 ● For a pad track (loop) Start End ■ Parameter list Parameter Range Explanation 1-16 A single audio track 1 TRACK 7/2-15/16 STEREO A pair of adjacent odd-numbered/even - Yamaha AW16G | Owner's Manual - Page 127
list The parameters are the same as for the ERASE command. 5 ● For an audio track Start 1 2 3 4 5 INSERT 1 2 3 4 5 6 4 5 Size ● For a pad track (loop) Start INSERT Size ● For a pad track (one shot) Start INSERT 12 Track editing Size ■ Parameter list The parameters are the same as for the ERASE - Yamaha AW16G | Owner's Manual - Page 128
Start COPY To PAD ■ Parameter list Parameter Range Explanation CLIP Content recorded in a sound clip (the region specified by CLIP) 1-16 A single audio track 1 From TRACK 1/2-15/16 STEREO PAD A pair of adjacent odd-numbered/even-numbered audio tracks The stereo track A single pad track - Yamaha AW16G | Owner's Manual - Page 129
15/16 (a pair of adjacent audio tracks). If 1 From TRACK is PAD, you will be able to select only PAD. If 1 From TRACK is ALL (OVER) or ALL (INS), you cannot select TO TRACK. *5. Grid function (M GRID) When this function is on, the To Start location cannot be specified in counter-display format; it - Yamaha AW16G | Owner's Manual - Page 130
audio track 1-16, you can select only a single audio track 1-16. If 1 From TRACK is STEREO or 1/2-15/16 (a pair of adja- cent audio tracks), you can select only 1/2-15/16 (a pair of adjacent audio tracks). Note The track names will not be exchanged. 130 5 6 ● If you set Ratio = 50% From Start - Yamaha AW16G | Owner's Manual - Page 131
you want to transfer audio data to your computer so that you can edit the data using a waveform editing program. 56 From Start From End PITCH CHANGE From Start From End PITCH CHANGE ■ Parameter list Parameter Range 1 From TRACK 1-16 1/2-15/16 2 From V.TR 3 From Start 4 From End STEREO - Yamaha AW16G | Owner's Manual - Page 132
into an AW16G audio track. Exporting WAV files Any audio track of the AW16G or all sample data from memory can be written as one or more WAV files onto CD-R/RW media inserted in the CD-RW drive. This is convenient when you want to send audio data to your computer, or use waveform editing software to - Yamaha AW16G | Owner's Manual - Page 133
from an audio CD, repeatedly press the Work Navigate section [UTILITY] key or hold down the [UTILITY] key and use the CURSOR [ ]/[ ] keys to access the D.IN • HDD page of the UTILITY screen. Immediately after the AW16G is powered-on, it will be set to prohibit digital recording from an external - Yamaha AW16G | Owner's Manual - Page 134
uppercase alphanumeric characters and the "_" (underscore) character. If you use the AW16G to export WAV files onto CD-R/RW media, the data will be in ISO9660 Level 1 format, but please be aware of this restriction if you use a computer to create WAV files. 5 In the Work Navigate section, repeatedly - Yamaha AW16G | Owner's Manual - Page 135
CD-RW drive, a popup window will appear, allowing you to select AUDIO (CD-DA) or WAVE (WAV files) to import. Move the cursor to the button for the data that you want to import, and press the [ENTER] key. • You can import only monaural or stereo WAV files that are in 16-bit/44.1 kHz format - Yamaha AW16G | Owner's Manual - Page 136
Track editing 136 - Yamaha AW16G | Owner's Manual - Page 137
copying, deleting, backing up, and restoring songs. About songs On the AW16G, your recorded compositions are managed in units called "songs." When you save a song on the hard disk, the audio data, the sample data used by the quick loop sampler, scene memories, and the data for each library are all - Yamaha AW16G | Owner's Manual - Page 138
the Work Navigate section, press the [SONG] key. The SONG screen will appear. 2 Repeatedly press the [SONG] key or hold down the [SONG] key and use the CURSOR [ ]/[ ] keys to access the SETUP page. 3 To edit the song name, move the cursor to the NAME button and press the [ENTER] key - Yamaha AW16G | Owner's Manual - Page 139
be possible to perform additional recording or editing, or to erase the song. Tip! • We recommend that you turn protect on for important songs. • Even if protect is on, you can still copy the song (→ p. 140) and adjust the mixer settings. 4 To change the counter display format, move the cursor to - Yamaha AW16G | Owner's Manual - Page 140
a song in the hard disk. Note • You cannot copy or delete a song while the AW16G is running. • A deleted song will be lost forever. Use great caution when deleting ] key. A popup window will ask you to confirm the copy operation. Tip! If you have selected the current song as the song to be copied, a - Yamaha AW16G | Owner's Manual - Page 141
recording and editing a song, you can execute the Optimize operation on that song to increase the amount of free space on the hard disk. Note The deleted undo/redo audio data will be lost forever. Use will ask you to confirm the optimize operation. Tip! You may select the current song to be optimized. - Yamaha AW16G | Owner's Manual - Page 142
on this tempo map. The AW16G's tempo map can also record data to switch scenes (→ p. 73) or Pad sample banks (→ p. 107). You can use this to switch scenes as the song progresses, or to switch the sounds that are played by the Quick Loop Sampler. Tip! • The Start point of the song corresponds to - Yamaha AW16G | Owner's Manual - Page 143
to the NEW button, and press the [ENTER] key. A blank tempo map event will be created after the last step that is currently input. Tip! If you use the INSERT button instead of the NEW button, a blank tempo map event will be inserted before the currently selected step. However, you cannot insert - Yamaha AW16G | Owner's Manual - Page 144
data such as scenes, libraries, or individual tracks of audio data from a song saved on the hard disk can be imported into the current song appear. 2 Repeatedly press the [SONG] key or hold down the [SONG] key and use the CURSOR [ ]/[ ] keys to access the IMPORT page. 12 ■ Importing library/scene/ - Yamaha AW16G | Owner's Manual - Page 145
hard disk to CD-R/RW media. 1 Insert CD-R/RW media into the CD-RW drive. 2 In the Work Navigate section, press the [CD] key. The CD screen will appear. 3 Repeatedly press the [CD] key or hold down the [CD] key and use button Backs up the audio tracks within a song in the format of an AW2816 backup - Yamaha AW16G | Owner's Manual - Page 146
-recorded CD-R media is inserted in the CD-RW drive, a popup window with a message of "Change Media, Please" will appear, and the media will be ejected. Remove the media, and replace it with writable media. 6 Move the cursor to the OK button and press the [ENTER] key. Writing to the CD-R/RW - Yamaha AW16G | Owner's Manual - Page 147
backed up to CD-R/RW media can be restored to the hard disk of the AW16G. 1 Insert the CD-R/RW media containing the backup data into the CD-RW drive. If the the sample libraries that were backed up on the CD-R/RW media. C ALL button You can use this button to select all the data that appears in - Yamaha AW16G | Owner's Manual - Page 148
or sample libraries," earlier in this manual. Note • Backup in the AW2816 backup file format is limited to one song at a time. • When you perform a backup in the AW2816 backup file format, data other than the audio tracks will not be backed up. All virtual tracks of tracks 1-16 will be backed up. For - Yamaha AW16G | Owner's Manual - Page 149
Example of recording/playing bulk data on a MIDI sequencer (computer) Bulk data MIDI OUT/THRU MIDI IN connector Bulk data AW16G MIDI IN connector MIDI OUT External MIDI device (e.g., computer) ● MIDI Remote "MIDI Remote" is a function that lets you use the AW16G as a physical controller for - Yamaha AW16G | Owner's Manual - Page 150
commands that it receives at the MIDI IN connector. Use this setting when you want to remotely control the transport of the AW16G from an external MIDI device. Tip! If you want to use the AW16G as the MMC master, make sure that the MIDI button is turned on in the MIDI OUT area. C DEV (device number - Yamaha AW16G | Owner's Manual - Page 151
.) 3 This is the same as 2 in that control changes of only one MIDI channel are received and transmitted, but the parameter mapping differs from 2. (A single MIDI channel will correspond to AW16G track channels 1-16.) 14 MIDI and utility functions Tip! • For details on the mix parameters that - Yamaha AW16G | Owner's Manual - Page 152
= 1 MIDI CH CC 16 91 93 PARAMETER TRACK CHANNEL 1 TRACK CHANNEL 2 TRACK CHANNEL 3 TRACK CHANNEL 4 TRACK CHANNEL 5 TRACK CHANNEL 6 TRACK CHANNEL 7 TRACK CHANNEL 8 TRACK CHANNEL 9 TRACK CHANNEL 10 TRACK CHANNEL 11 TRACK CHANNEL 12 TRACK CHANNEL 13 TRACK CHANNEL 14 TRACK CHANNEL 15 TRACK CHANNEL 16 - Yamaha AW16G | Owner's Manual - Page 153
OUT TRACK 1 TRACK 2 TRACK 3 TRACK 4 TRACK 5 TRACK 6 TRACK 7 TRACK 8 TRACK 9 TRACK 10 TRACK 11 TRACK 12 TRACK 13 TRACK 14 TRACK 15 TRACK 16 STEREO OUT TRACK 1 TRACK 2 TRACK 3 TRACK 4 TRACK 5 TRACK 6 TRACK 7 TRACK 8 TRACK 9 TRACK 10 TRACK 11 TRACK 12 TRACK 13 TRACK 14 TRACK 15 TRACK 16 14 MIDI and - Yamaha AW16G | Owner's Manual - Page 154
selected in items 1-7. When two AW16G units are connected, you can use this to copy data such as scene memories or libraries from the other AW16G. ● Bulk dump request message transmission AW16G MIDI OUT/THRU Bulk data MIDI IN MIDI IN Request message MIDI OUT/THRU AW16G K TRANSMIT button Move the - Yamaha AW16G | Owner's Manual - Page 155
to transmit the desired MIDI messages. By using the MIDI Remote function, you can use the AW16G as a physical controller for a computer program or MIDI tone generator. MIDI messages can be assigned to the following controls. ● Mixer section • Faders 1-8, 9/10-15/16 • [TRACK SEL] keys 1-8, 9/10-15 - Yamaha AW16G | Owner's Manual - Page 156
"Appendix" section "About the CD-ROM included with the AW16G" (→ p. 200). ● 06 XG 1-16 ● 07 XG 17-32 ● 08 XG 33-48 ● 09 XG 49-64 These presets let you use the AW16G as a volume controller for an XG tone generator. Each preset will control the XG-compatible tone generator's parts 1- 16, 17-32, 33-48 - Yamaha AW16G | Owner's Manual - Page 157
The transport keys will not operate the recorder, but will only transmit the MIDI messages that have been preset for each key. Tip! These settings will also apply if you use a foot switch to operate the song transport. Using the user-defined Remote function The USER page of the REMOTE screen lets - Yamaha AW16G | Owner's Manual - Page 158
I LEARN button When this button is on, the MIDI message received from the MIDI IN connector will be assigned to the currently selected fader or [TRACK SEL] key. This is a convenient way to assign MIDI messages quickly. Tip! • If two or more MIDI messages are received while the LEARN button is on - Yamaha AW16G | Owner's Manual - Page 159
AW16G's built-in test oscillator (the test tone oscillator) to the desired bus. To access this page, repeatedly press the Work Navigate section [UTILITY] key or hold down the [UTILITY] key and use specified bus. Use the 3-6 buttons to specify the bus to which the signal will be sent. Tip! If the LEVEL - Yamaha AW16G | Owner's Manual - Page 160
) or disables (OFF) digital recording from the DIGITAL IN jack, and importing of digital audio data from an audio CD or WAV file inserted in the CD-RW drive. When you switch this setting ON, the following message will be displayed. OBSERVE Copyright Notice Written in Owner's Manual? [Cancel] [OK] If - Yamaha AW16G | Owner's Manual - Page 161
internal hard disk, and the data cannot be recovered. Use this operation with caution. • You cannot abort the Format operation once it has been started. • Never turn off or disconnect the power during formatting, since this may damage the hard disk and cause malfunctions. 14 161 MIDI and utility - Yamaha AW16G | Owner's Manual - Page 162
● When copy protect is enabled AW16G D.OUT COPYRIGHT= ON DIGITAL STEREO OUT jack Digital recording possible DAT or MD, etc. Digital recording not possible D PARAM DISP TIME Adjusts the duration for which the value will be displayed in the upper right of the screen when you use the knobs of the - Yamaha AW16G | Owner's Manual - Page 163
MTC to your workstation synth, and the sequencer will run in synchronization with it. Tip! You can synchronize using MIDI Clock and Start/Stop/ Continue messages instead of using MTC and MMC. For details on the settings in this case, refer to the section that follows, "Recording/playing AW16G mix - Yamaha AW16G | Owner's Manual - Page 164
MIDI channel that will be used to transmit and receive the control changes. 4 Make settings on your workstation synth so that its built-in sequencer will follow external MIDI Clock messages. Also set the sequencer to record-ready mode. For details on how to make these settings, refer to the manual - Yamaha AW16G | Owner's Manual - Page 165
Here's how you can transmit program changes from the built-in sequencer of your workstation to switch scenes on the AW16G. ■ Assign scenes to program changes 1 In the Control section, use the [SCENE] key to access the PC TABLE page of the SCENE screen. This page lets you assign a scene number to - Yamaha AW16G | Owner's Manual - Page 166
to select the preset that you want to use. For example if you select preset 06 (XG 1-16), the AW16G's faders will control the volume of parts 1- 16 of your XG tone generator, and [TRACK SEL] keys 1-16 will control the on/off status of parts 1- 16. 4 If necessary, use the buttons in the CH area to - Yamaha AW16G | Owner's Manual - Page 167
jack to the internal effect. 7 Use the Quick Navigate section [RECORD] key to access the MIXDOWN page of the RECORD screen, and make the settings shown below. 15 Using the AW16G with external devices With these settings, the unprocessed sound of track channels 1-16 and the effect sound returned to - Yamaha AW16G | Owner's Manual - Page 168
Using the AW16G with external devices ● Signal flow when using an external effect processor Effect processor Recorder section Track 1 Track 2 Track 3 Track 4 Track 5 Track 6 Track 7 Track 8 Input channels Track these levels, the signal will loop, creating oscillation. Mixer section 9 Raise the [ - Yamaha AW16G | Owner's Manual - Page 169
] fader to the -∞ position. 2 As shown in the diagram below, use an optical cable to connect the AW16G to your MD recorder. MD recorder DIGITAL STEREO OUT DIGITAL STEREO IN DIGITAL STEREO IN DIGITAL STEREO OUT 3 Use the Quick Navigation section [RECORD] key to access the MIXDOWN page of the - Yamaha AW16G | Owner's Manual - Page 170
to the 0 dB position, and play back your MD recorder. Recording audio data from an MD recorder Here's how the signal from an MD recorder connected to the DIGITAL STEREO IN jack can be recorded on an AW16G track while still in the digital domain. 1 Lower the [STEREO] fader to the -∞ position. 2 As - Yamaha AW16G | Owner's Manual - Page 171
Multi Drive 02 Light Crunch 03 Studio Lead 04 Clean Lead 05 Hard Blues 06 Melody Drive 16 Fuzzy Drive 17 Jazzy Night 18 Retro Phase 19 Mistic Chord 20 Drive Amp 21 Smooth Lead 22 Crunch Box 23 Double Drive 24 Comp Driver blues guitar sound Rockabilly sound using a short delay, warped by - Yamaha AW16G | Owner's Manual - Page 172
LO-FI DARK/SOFT DARK/HARD BRIGHT LO BOOST HARD LIMIT LIMITER NARROW DIST Description Initialize to a state in which EQ and DYN are not applied Standard mastering effect that enhances the overall loudness, creating a mix with extended low and high ranges. Use on the two-track mix for any type of - Yamaha AW16G | Owner's Manual - Page 173
range of the piano sound when it is recorded in stereo. Use with program 037. Fine-EQ Cass Use for recording to or from cassette tape to make the sound clearer. Narrator Use for recording a voice reading a text. [ No Data! ] 041-128 are the user area. Tip! The EQ programs were programmed for - Yamaha AW16G | Owner's Manual - Page 174
Appendix Dynamics Parameters Dynamics processors are generally used to correct or control signal levels. However, you can also use them creatively to shape the volume envelope of a sound. The AW16G features comprehensive dynamics processors for all the input channels, tape returns, and the bus and - Yamaha AW16G | Owner's Manual - Page 175
the recorded material. using the KEY IN parameter. Ratio controls the amount of companding-the change in output signal level relative to change in input signal level. With a 2:1 ratio, for example, a 10 dB change in input level (above the threshold) results in a 5 dB change in output level. The hard - Yamaha AW16G | Owner's Manual - Page 176
Level A gate, or noise gate is an audio switch used to mute signals below a set threshold level. It can be used to suppress background noise and hiss from valve (tube signal is determined using the KEY IN parameter. Range controls the level to which the gate closes. It can be used to reduce the - Yamaha AW16G | Owner's Manual - Page 177
effective to apply these programs to sampled sounds (such as from a CD-ROM) that are used among acoustic instruments, so that they will not seem to lack power and clarity. Four variations are provided; for Perc, BD, SN, and for looped materials (Hip Comp). 027 Solo Vocal1 "CMP 028 Solo Vocal2 "CMP - Yamaha AW16G | Owner's Manual - Page 178
reverb unit, producing a feeling of hard-edged reverberation. An effect which isolates only Yamaha proprietary effect that produces a richer and more complex modulation than chorus. Stereo phaser with 2-16 AW16G, even the modulation frequency can be controlled by modulation. An effect which uses - Yamaha AW16G | Owner's Manual - Page 179
controlled filter. Responds to MIDI Note On velocity when SOURCE set to MIDI. Dynamically controlled flanger. Responds to MIDI Note On velocity when SOURCE set to MIDI. Dynamically controlled phase shifter. Responds to MIDI 41 Multi.Filter Type MULTI.FILTER Description Three-band parallel filter (24 dB - Yamaha AW16G | Owner's Manual - Page 180
HI.RATIO 0.1-1.0 HPF Thru, 21.2 Hz-8.0 kHz LPF 50 Hz-16.0 kHz, Thru MIX BAL. 0-100 [%] Description Type of early reflection simulation Reflection spacing Early reflections decay characteristics (0 = dead, 10 = live) Initial delay before reverb begins Reverb diffusion (left-right reverb spread - Yamaha AW16G | Owner's Manual - Page 181
-99 to +99% HI.RATIO FREQ. DEPTH WAVE HPF LPF MIX BAL. 0.1-1.0 0.05-40.00 Hz 0-100% Sine, Tri Thru, 21.2 Hz-8.0 kHz 50 Hz-16.0 kHz, Thru 0-100 [%] ■ DELAY LCR Three-tap delay (left, center, right). Parameter Range DELAY L DELAY C DELAY R LEVEL L LEVEL C LEVEL R FB.DLY FB.GAIN 0.0-2730.0 ms - Yamaha AW16G | Owner's Manual - Page 182
Appendix ■ ECHO Stereo delay with crossed feedback loop. Parameter Range Description DELAY L 0.0-1350.0 k [Hz] -12 to +12 [dB] 100-8.00 k [Hz] -12 to +12 [dB] 10-0.10 50.0-16.0 k [Hz] -12 to +12 [dB] 0-100 [%] Description Modulation speed Modulation depth Modulation delay time Feedback gain ( - Yamaha AW16G | Owner's Manual - Page 183
-40.00 Hz 0-100% *1 Sine, Tri, Square 21.2-8.00 k [Hz] -12 to +12 [dB] 100-8.00 k [Hz] -12 to +12 [dB] 10-0.10 50.0-16.0 k [Hz] -12 to +12 [dB] 0-100 [%] Modulation speed Modulation depth Panning direction Modulation waveform Low-shelving filter frequency Low-shelving filter gain Parametric equalizer - Yamaha AW16G | Owner's Manual - Page 184
1000.0 ms -99 to +99% LEVEL 1 PITCH 2 FINE 2 PAN 2 DELAY 2 FB.G 2 -100 to +100% -24 to +24 semitones -50 to +50 cents L16-1, C, R1-16 0.0-1000.0 ms -99 to +99% LEVEL 2 MODE MIX BAL. -100 to +100% 1-10 0-100 [%] Description Channel 1 pitch shift Channel 1 pitch shift fine Channel 1 panpot Channel - Yamaha AW16G | Owner's Manual - Page 185
DISTORTION Distortion effect. Parameter Range DST TYPE DST1, DST2, OVD1, OVD2, CRUNCH DRIVE 0-100 MASTER 0-100 TONE -10 to +10 N.GATE 0-20 MIX BAL. 0-100 [%] Description Rotation stop, start Rotation speed (see SLOW and FAST parameters) Overdrive level Accelation at speed changes Low - Yamaha AW16G | Owner's Manual - Page 186
drive Master volume Speaker cabinet simulation depth Bass tone control Middle tone control High tone control [Hz] -12 to +12 [dB] 10-0.10 50.0-16.0 k [Hz] -12 to +12 [dB] 0-100 [%] Description Control source: input signal or MIDI note on velocity Sensitivity Feedback gain (plus values for normal- - Yamaha AW16G | Owner's Manual - Page 187
DIR. DECAY LSH F LSH G HSH F HSH G MIX BAL. 0-100 2, 4, 6, 8, 10, 12, 14, 16 UP, DOWN 6.0 ms-46.0 s 21.2-8.00 k [Hz] -12 to +12 [dB] 50.0-16.0 k [Hz] -12 to +12 [dB] 0-100 [%] Description Control source: input signal or MIDI note on velocity Sensitivity Feedback gain (plus values for normal-phase - Yamaha AW16G | Owner's Manual - Page 188
0.1-1.0 DIFF. 0-10 DENSITY 0-100% HPF Thru, 21.2 Hz-8.0 kHz LPF 50 Hz-16.0 kHz, Thru FREQ. 0.05-40.00 Hz DEPTH 0-100% MOD.DLY 0.0-500.0 0.1-1.0 DIFF. 0-10 DENSITY 0-100% HPF Thru, 21.2 Hz-8.0 kHz LPF 50 Hz-16.0 kHz, Thru FREQ. 0.05-40.00 Hz DEPTH 0-100% MOD.DLY 0.0-500.0 - Yamaha AW16G | Owner's Manual - Page 189
= dead, 10 = live) INI.DLY DIFF. 0.0-500.0 ms 0-10 Initial delay before reverb begins Reverb diffusion (left-right reverb spreed) DENSITY ER NUM. 0-100% 1-19 Reverb density Number of early reflections HPF Thru, 21.2 Hz-8.0 kHz High-pass filter cutoff frequency LPF 50 Hz-16.0 kHz, Thru Low - Yamaha AW16G | Owner's Manual - Page 190
= dead, 10 = live) INI.DLY 0.0-500.0 ms Initial delay before reverb begins DIFF. 0-10 Reverb diffusion (left-right reverb spreed) DENSITY 0-100% Reverb density ER NUM. 1-19 Number of early reflections HPF Thru, 21.2 Hz-8.0 kHz High-pass filter cutoff frequency LPF 50 Hz-16.0 kHz, Thru - Yamaha AW16G | Owner's Manual - Page 191
0-10 0-100% Thru, 21.2 Hz-8.0 kHz 50 Hz-16.0 kHz, Thru 0-100% 0-100 [%] Description Left channel delay distortion, OVD = overdrive) Distortion drive Master volume Tone control Noise reduction Delay time Feedback gain of the effects and dry sounds ■ MULTI FILTER Three-band parallel filter (24 - Yamaha AW16G | Owner's Manual - Page 192
sample libraries that are installed on the internal hard disk when the AW16G is shipped from the factory. The list is printed here in the order as sorted by the OLD button. Name PAD1 PAD2 PAD3 PAD4 A B CDA B CDA B CDA B CD Normal8_120 L L - - L L - - L L - - OO - - Normal8_60 - Yamaha AW16G | Owner's Manual - Page 193
Birds Dog&Cat Stock_Farm For_Demo PAD1 PAD2 PAD3 PAD4 A B CDA B CDA B CDA B CD L L - - L L - - L L - - OO - - OO OO - - OO - - OO - - OO - - OO - - OO - - OO - - L L - - L L - - L L - - OO - - L: LOOP O: ONESHOT -: No assigns Appendix 193 - Yamaha AW16G | Owner's Manual - Page 194
the recording-source and recording-destina- tion in the QUICK NAVIGATE page RECORD screen? • DIGITAL REC may have been turned OFF in the UTILITY screen PREFER page. • Please read and understand the copyright warning (→ p. 5) before using digital input signals. ■ Can't record on the STEREO track • It - Yamaha AW16G | Owner's Manual - Page 195
obtain more free space. ■ The display indicates DISK BUSY during playback • It is possible that the recorded data has become frag- mented, so that it cannot be read fast enough. You can try measures such as re-recording, deleting tracks, or backing up the data and then formatting the hard disk. 195 - Yamaha AW16G | Owner's Manual - Page 196
use recorder editing operations to erase a track or other data, that sound file will remain on the disk. Execute the Optimize command in the SONG screen LIST page. CD operations ■ CD-RW drive is not recognized • Is the CD-RW drive connected correctly? ■ Can't create an audio CD • Is the CD-RW drive - Yamaha AW16G | Owner's Manual - Page 197
players • In order for audio data recorded on CD-RW media to be played back, the player must support CD-RW. Contact the manufacturer of the player regarding CDRW support. ■ The sound skips while playing an audio CD that you created • Depending on the CD-R media you use, there may be differences in - Yamaha AW16G | Owner's Manual - Page 198
Since the AW16G is in CD Play mode, this operation is not possible. CH. PARAMETER INITIALIZED The mixer parameters of the channel have been initialized. DIFFERENT TC FRAME TYPE MTC of a different frame type than the internal setting is being received. DIGITAL-ST-IN REC PROHIBIT. Recording is - Yamaha AW16G | Owner's Manual - Page 199
! Data exceeding the recordable length of the CD cannot be added. CD Track Over! The maximum number of tracks has been reached, and further addition is not possible. CD-RW Drive Error! A problem occurred with the CD-RW drive. CD-RW Drive Not Found! No CD-RW drive is installed. CD Write Error - Yamaha AW16G | Owner's Manual - Page 200
of their respective corporate owners. Contents of the CD-ROM The included CD-ROM contains a backup file that you can use to restore the AW16G to its factory-set condition, and setting files that let you use the AW16G's MIDI Remote function with various software sequencers. Folder name Remote - Yamaha AW16G | Owner's Manual - Page 201
the owner's manual for the MIDI device(s) you are using. 4 The Generic Remote window will appear. Click the [EDIT] button. 5 The Generic Remote Setup window will appear. Click the [Import] button. 6 A dialog box like the following will appear. Select the Cubase remote setup file (Yamaha AW16G Remote - Yamaha AW16G | Owner's Manual - Page 202
If this occurs, set the value back to the correct track. Pro Tools software You can remotely control the Pro Tools software from the AW16G. No special setting file is required. The setting procedure is the same as for the Mac version. Refer to "Macintosh users" → "Pro Tools software" (→ p. 203). 202 - Yamaha AW16G | Owner's Manual - Page 203
16 using) using) This completes preparations for using the AW16G's MIDI Remote function to control the Pro Tools software. Please note that all the previously-specified key commands will be initialized. If you do not want to change your existing user key command settings, you can manually make - Yamaha AW16G | Owner's Manual - Page 204
can be used for control. These settings are made for the parameters of each effect. 1.4. MIDI Clock transmission If you set MIDI OUT to MIDI CLOCK, MIDI clock messages can be transmitted during playback or recording. In MIDI Clock transmission mode, Song Position Pointer and Start/ Stop/Continue - Yamaha AW16G | Owner's Manual - Page 205
you to freely specify the correspondence between Program Change No. and Scene No. This table is used for conversion for both transmission and reception. 4. MIDI format list 4.1. CHANNEL MESSAGE Command 8n NOTE OFF 9n NOTE ON Bn CONTROL CHANGE Cn PROGRAM CHANGE Rx/Tx Rx Rx Rx/Tx Rx/Tx function - Yamaha AW16G | Owner's Manual - Page 206
Appendix 5. MIDI format details 5.1. NOTE OFF (8n) < Reception > Received when [Rx CH] matches. Used to control effects. Refer NOTE ON for details. STATUS DATA 1000nnnn 8n Note Off Message 0nnnnnnn nn Note No. 0vvvvvvv vv Velocity ( ignored) 5.2. NOTE ON (9n) < Reception > - Yamaha AW16G | Owner's Manual - Page 207
to enter Review mode. < Reception > If the AW16G is operating as Control Command(mcc) sub-id 00000111 07 Record Exit 11110111 F7 End Of Exclusive 5.13.1.8. MMC RESET AW16G is operating as an MMC Slave and the device number matches or is 7F. MMC-related internal settings will be reset to the power - Yamaha AW16G | Owner's Manual - Page 208
header is used to distinguish whether the data belongs to the AW16G. The check sum is calculated by adding the bytes starting after BYTE Format STATUS 11110000 F0 System Exclusive Message ID No. 01000011 43 Manufacturer's ID No.(YAMAHA) SUB STATUS 0000nnnn 0n n=0-15(MIDI Channel No.1-16) FORMAT - Yamaha AW16G | Owner's Manual - Page 209
11110111 F7 End Of Exclusive 5.13.2.11. Effect Library Bulk Dump Format STATUS 11110000 F0 System Exclusive Message ID No. 01000011 43 Manufacturer's ID No.(YAMAHA) SUB STATUS 0000nnnn 0n n=0-15(MIDI Channel No.1-16) FORMAT No. 01111110 7E Universal Bulk Dump BYTE COUNT 00000001 01 142(132 - Yamaha AW16G | Owner's Manual - Page 210
.0-64) End Of Exclusive 5.13.2.15. Program Change Table Bulk Dump Format STATUS 11110000 F0 System Exclusive Message ID No. 01000011 43 Manufacturer's ID No.(YAMAHA) SUB STATUS 0000nnnn 0n n=0-15(MIDI Channel No.1-16) FORMAT No. 01111110 7E Universal Bulk Dump BYTE COUNT 00000001 01 138(128 - Yamaha AW16G | Owner's Manual - Page 211
YAMAHA [PROFESSIONAL AUDIO WORKSTATION] Date: Jan 30, 2002 Model: AW16G 16 1-16 X X X X X X X X 1-16 1-16 OMNI off/OMNI on X X 0-127 X X X X X X Memorized Memorized Memorized Control :All Notes OFF X X Messages :Active Sense X O :Reset X O Notes Mode 1: OMNI ON, POLY Mode 3: OMNI - Yamaha AW16G | Owner's Manual - Page 212
compressed) Maximum tracks of recording/playback simultaneously 8 tracks, Recording & 16 tracks, playback Number of tracks 144 tracks (16 tracks + stereo tracks) × 8 virtual Fader 13 × 45 mm MIDI MTC (Master/Slave), MIDI Clock (Master), MMC (Master/Slave), Program Change, Control Change, Bulk - Yamaha AW16G | Owner's Manual - Page 213
SCENE/VIEW/[PAN/BAL]/EFF1/ EFF2 EQ EQ/DYN/HIGH/HI-MID/LO-MID/ LOW FADER TRACK 1-8/TRACK [9/10]-[15/16]/ STEREO SAMPLER SECTION QUICK LOOP SAMPLER SELECT/PAD 1-4/EDIT RECORDER SECTION LOCATE / /IN/OUT/A/B/RTZ/MARK/ SET/CANCEL/AUTO PUNCH/ REPEAT TRANSPORT REW/FF/STOP/PLAY/REC COMMON - Yamaha AW16G | Owner's Manual - Page 214
Appendix Dimensions 98.8 425 88.8 5 313 321.5 8.5 Specifications and external appearance subject to change without notice. For European Model Purchaser/User Information specified in EN55103-1 and EN55103-2. Inrush Current: 70A Conformed Environment: E1, E2, E3 and E4 Unit: mm 214 - Yamaha AW16G | Owner's Manual - Page 215
166 workstation synth 163 external effects 167 F Fader 19 FADER FLIP 162 FADER RECALL SAFE 80 Features 13 CD-RW drive 14 Mixer section 13 Quick Loop Sampler section 14 Recorder section 14 FF key 21 Finalizing 98, 104 FOOT SW jack 22, 59 foot switch 59 FORMAT button 161 free space on the hard disk - Yamaha AW16G | Owner's Manual - Page 216
recording 81, 87 PLAY key 21 playback 65 A-B Repeat 70 popup window INPUT LIBRARY popup window 77 INPUT SETTING popup window 77 POSITION 68 POSTROLL TIME 162 POWER switch 22 PRECAUTIONS 3 PREROLL TIME 162 program change 151 PROTECT button 139 Punch-in/out 59 Q Quick loop sampler 14, 107 an audio CD - Yamaha AW16G | Owner's Manual - Page 217
18 Locate section 20 Mixer section 19 Quick Loop Sampler section 18 Selected Channel sec- tion 19 Transport section 21 Work Navigate section 18 Track At Once 98 Writing 100 Track editing 123 Basic procedure 124 TRACK field 48 TRACK key 18 Track recording 39 Bus recording 41 Creating a new song - Yamaha AW16G | Owner's Manual - Page 218
Appendix Block diagram 218 - Yamaha AW16G | Owner's Manual - Page 219
V905320 XXXIPXXX.X-XXC0 220 Printed in Taiwan M.D.G., Pro Audio & Digital Musical Instrument Division, Yamaha Corporation © 2002 Yamaha Corporation
-
 1
1 -
 2
2 -
 3
3 -
 4
4 -
 5
5 -
 6
6 -
 7
7 -
8
-
9
-
10
-
11
-
12
-
13
-
14
-
15
-
16
-
17
-
18
-
19
-
20
-
21
-
22
-
23
-
24
-
25
-
26
-
27
-
28
-
29
-
30
-
31
-
32
-
33
-
34
-
35
-
36
-
37
-
38
-
39
-
40
-
41
-
42
-
43
-
44
-
45
-
46
-
47
-
48
-
49
-
50
-
51
-
52
-
53
-
54
-
55
-
56
-
57
-
58
-
59
-
60
-
61
-
62
-
63
-
64
-
65
-
66
-
67
-
68
-
69
-
70
-
71
-
72
-
73
-
74
-
75
-
76
-
77
-
78
-
79
-
80
-
81
-
82
-
83
-
84
-
85
-
86
-
87
-
88
-
89
-
90
-
91
-
92
-
93
-
94
-
95
-
96
-
97
-
98
-
99
-
100
-
101
-
102
-
103
-
104
-
105
-
106
-
107
-
108
-
109
-
110
-
111
-
112
-
113
-
114
-
115
-
116
-
117
-
118
-
119
-
120
-
121
-
122
-
123
-
124
-
125
-
126
-
127
-
128
-
129
-
130
-
131
-
132
-
133
-
134
-
135
-
136
-
137
-
138
-
139
-
140
-
141
-
142
-
143
-
144
-
145
-
146
-
147
-
148
-
149
-
150
-
151
-
152
-
153
-
154
-
155
-
156
-
157
-
158
-
159
-
160
-
161
-
162
-
163
-
164
-
165
-
166
-
167
-
168
-
169
-
170
-
171
-
172
-
173
-
174
-
175
-
176
-
177
-
178
-
179
-
180
-
181
-
182
-
183
-
184
-
185
-
186
-
187
-
188
-
189
-
190
-
191
-
192
-
193
-
194
-
195
-
196
-
197
-
198
-
199
-
200
-
201
-
202
-
203
-
204
-
205
-
206
-
207
-
208
-
209
-
210
-
211
-
212
-
213
-
214
-
215
-
216
-
217
-
218
-
219
 |
 |

E
Owner’s Manual
Owner’s Manual
Owner’s Manual
Keep This Manual For Future Reference.