Yamaha DTX450K Owner's Manual - Page 48
Snare Pad Type, 4. Pedal Types, SONG] - dtx400k electronic drum set
 |
View all Yamaha DTX450K manuals
Add to My Manuals
Save this manual to your list of manuals |
Page 48 highlights
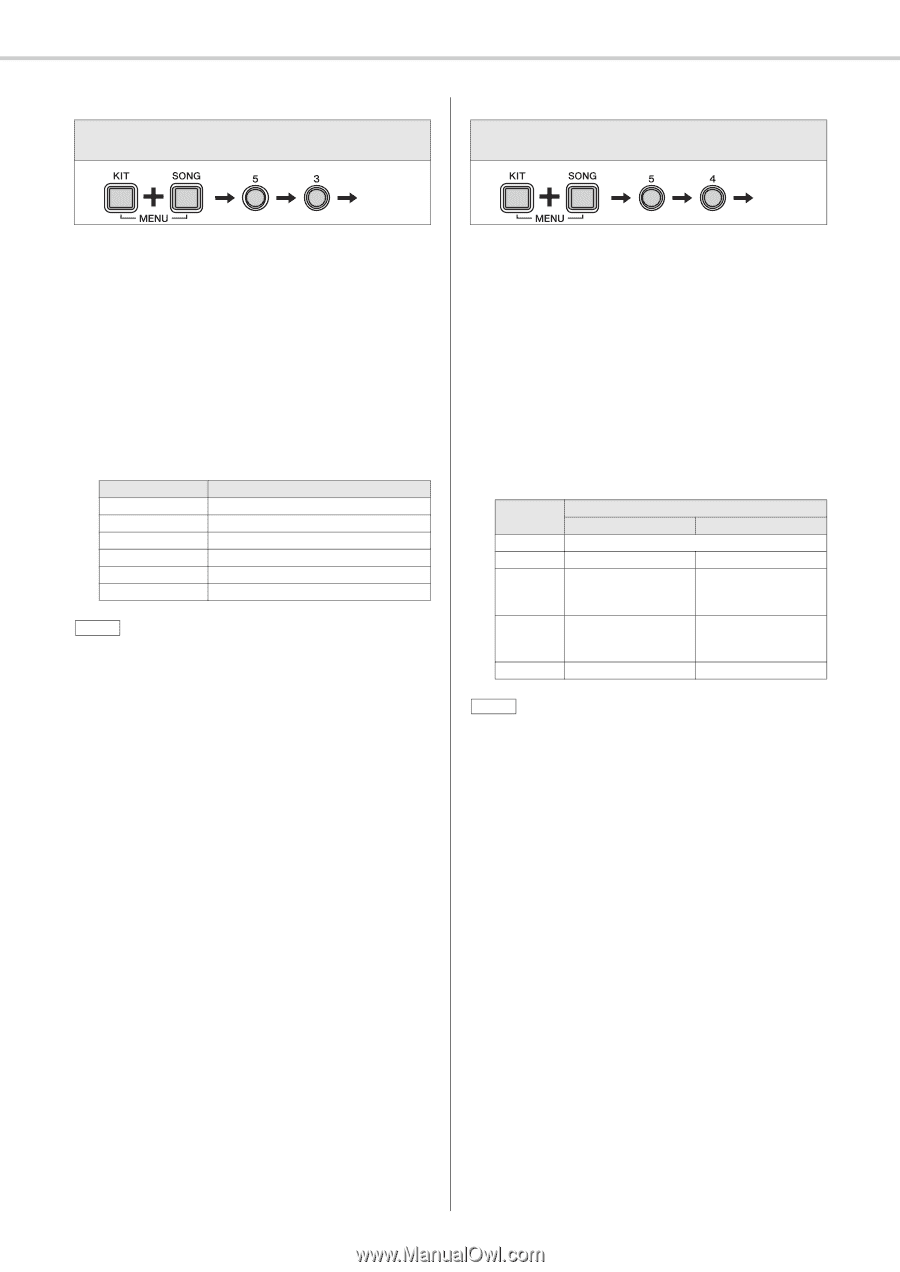
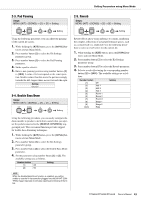
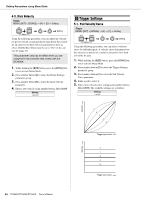
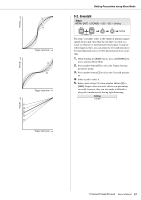
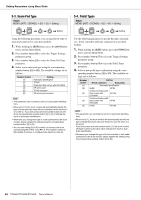
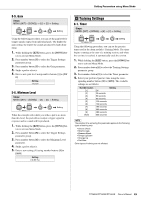
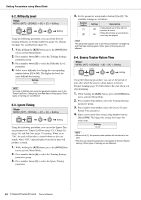
Setting Parameters using Menu Mode 5-3. Snare Pad Type Steps: MENU ([KIT] + [SONG]) [5] [3] Setting 5-4. Pedal Types Steps: MENU ([KIT] + [SONG]) [5] [4] Setting Setting Setting Using the following procedure, you can specify the type of snare pad connected to your drum module. 1. While holding the [KIT] button, press the [SONG] but- ton to activate Menu Mode. 2. Press number button [5] to select the Trigger Settings parameter group. 3. Press number button [3] to select the Snare Pad Type parameter. 4. Select a new snare pad type using the corresponding number button ([1] to [6]). The available settings are as follows. Number button [1] [2] [3] [4] [5] [6] Setting Automatic identification TP70S Snare pad that comes with DTX400K XP-series pad TP70S reversed XP-series pad reversed NOTE • This parameter can normally be set to [1] (automatic identification). • When set to [1], the drum module will automatically identify the type of snare pad that came with your electronic drum kit when it is turned on. If you then press and hold number button [1], the drum module will flash number button [2] or [3] to indicate the result of automatic identification. • Whenever you change the type of snare connected to the drum module, please update this setting using the corresponding number button ([2] to [6]). • You can use setting [5] or [6] to switch (or reverse) the drum sounds assigned to Rim 1 and Rim 2. This makes it easier for left-handed drummers to configure their electronic drum kit. Use the following parameter to specify the types of pedals (i.e., hi-hat controller and kick) connected to your drum module. 1. While holding the [KIT] button, press the [SONG] but- ton to activate Menu Mode. 2. Press number button [5] to select the Trigger Settings parameter group. 3. Press number button [4] to select the Pedal Types parameter. 4. Select a new pedal type combination using the corre- sponding number button ([1] to [5]). The available settings are as follows. Number button [1] [2] [3] [4] [5] Setting Hi-hat controller Kick pedal Automatic identification HH65 KP65 Hi-hat controller pedal that comes with KU100 DTX400K Hi-hat controller pedal that comes with KP65 DTX400K HH65 KU100 NOTE • This parameter can normally be set to [1] (automatic identification). • When set to [1], the drum module will automatically identify the type of pedal that came with your electronic drum kit when it is turned on. If you then press and hold number button [1], the drum module will flash number button [2] or [3] to indicate the result of automatic identification. • Whenever you change the type of hi-hat controller or kick pedal connected to the drum module, please update this setting using the corresponding number button ([2] to [5]). 48 DTX400K/DTX430K/DTX450K Owner's Manual
-
 1
1 -
2
-
3
-
4
-
5
-
6
-
7
-
8
-
9
-
10
-
11
-
12
-
13
-
14
-
15
-
16
-
17
-
18
-
19
-
20
-
21
-
22
-
23
-
24
-
25
-
26
-
27
-
28
-
29
-
30
-
31
-
32
-
33
-
34
-
35
-
36
-
37
-
38
-
39
-
40
-
41
-
42
-
 43
43 -
 44
44 -
 45
45 -
 46
46 -
 47
47 -
 48
48 -
 49
49 -
 50
50 -
 51
51 -
 52
52 -
 53
53 -
54
-
55
-
56
-
57
-
58
-
59
-
60
-
61
-
62
-
63
-
64
-
65
-
66
-
67
-
68
 |
 |