Yamaha DTX450K Owner's Manual - Page 49
Training Settings, 5. Gain, 6. Minimum Level, 1. Timer
 |
View all Yamaha DTX450K manuals
Add to My Manuals
Save this manual to your list of manuals |
Page 49 highlights
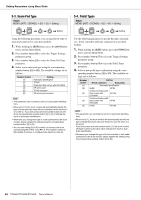
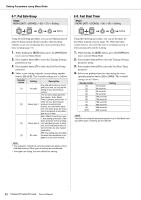
Setting Parameters using Menu Mode 5-5. Gain Steps: MENU ([KIT] + [SONG]) [5] [5] Setting Setting n Training Settings 6-1. Timer Steps: MENU ([KIT] + [SONG]) [6] [1] Setting Using the following procedure, you can set the gain level for trigger signals output from individual pads. The higher the gain setting, the louder the sounds produced by light drumming. 1. While holding the [KIT] button, press the [SONG] but- ton to activate Menu Mode. 2. Press number button [5] to select the Trigger Settings parameter group. 3. Press number button [5] to select the Gain parameter. 4. Strike a pad to select it. 5. Enter a new gain level using number buttons [1] to [10/ 0]. Setting 1 to 127 5-6. Minimum Level Steps: MENU ([KIT] + [SONG]) [5] [6] Setting Setting When the strength with which you strike a pad is no more than this level, the pad will not output a trigger signal in response and no sound will be produced. 1. While holding the [KIT] button, press the [SONG] but- ton to activate Menu Mode. 2. Press number button [5] to select the Trigger Settings parameter group. 3. Press number button [6] to select the Minimum Level parameter. 4. Strike a pad to select it. 5. Enter a new setting (%) using number buttons [1] to [10/0]. Setting 0 to 99 (%) Setting Using the following procedure, you can set the practice timer used in the drum module's Training Mode. The timer begins counting at the start of a training session, and when the set time is reached, it automatically ends the session. 1. While holding the [KIT] button, press the [SONG] but- ton to activate Menu Mode. 2. Press number button [6] to select the Training Settings parameter group. 3. Press number button [1] to select the Timer parameter. 4. Select your preferred practice time using the corre- sponding number button ([1] to [10/0]). The available settings are as follows. Number button [1] [2] [3] [4] [5] [6] [7] [8] [9] [10/0] Off 30 seconds 60 seconds 90 seconds 120 seconds 150 seconds 180 seconds 300 seconds 480 seconds 600 seconds Setting NOTE The practice time set using this parameter applies to the following types of training only. • Groove Check • Rhythm Gate • Measure Break • Tempo Up/Down • Change Up • Pad Gate Other types of training are not affected. DTX400K/DTX430K/DTX450K Owner's Manual 49
-
 1
1 -
2
-
3
-
4
-
5
-
6
-
7
-
8
-
9
-
10
-
11
-
12
-
13
-
14
-
15
-
16
-
17
-
18
-
19
-
20
-
21
-
22
-
23
-
24
-
25
-
26
-
27
-
28
-
29
-
30
-
31
-
32
-
33
-
34
-
35
-
36
-
37
-
38
-
39
-
40
-
41
-
42
-
43
-
 44
44 -
 45
45 -
 46
46 -
 47
47 -
 48
48 -
 49
49 -
 50
50 -
 51
51 -
 52
52 -
 53
53 -
 54
54 -
55
-
56
-
57
-
58
-
59
-
60
-
61
-
62
-
63
-
64
-
65
-
66
-
67
-
68
 |
 |
