Yamaha DTX450K Owner's Manual - Page 51
Groove Tracker Control Pads, 6. Groove Tracker Advance Step
 |
View all Yamaha DTX450K manuals
Add to My Manuals
Save this manual to your list of manuals |
Page 51 highlights
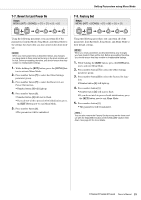
Setting Parameters using Menu Mode 6-5. Groove Tracker Control Pad(s) Steps: MENU ([KIT] + [SONG]) [6] [5] Setting 6-6. Groove Tracker Advance Step Steps: MENU ([KIT] + [SONG]) [6] [6] Setting Setting Setting Using the following procedure, you can select which pad(s) you would like to use to advance the practice drum pattern in Groove Tracker training (page 36). 1. While holding the [KIT] button, press the [SONG] but- ton to activate Menu Mode. 2. Press number button [6] to select the Training Settings parameter group. 3. Press number button [5] to select the Groove Tracker Control Pad(s) parameter. 4. Select a new setting using the corresponding number button ([1] to [5]). The available settings are as follows. Number button [1] [2] [3] [4] [5] [6] Setting Auto Cymbal + hi-hat 1 Cymbal + hi-hat 2 Kick Snare + hi-hat All Description The drum module will automatically select the best setting for the practice drum pattern. The cymbal and hi-hat pads will advance the pattern and will also produce their own sounds. The cymbal and hi-hat pads will advance the pattern. The kick pad or pedal will advance the pattern. The snare and hi-hat pads will advance the pattern. All pads and pedals will advance the pattern. NOTE • With a setting of [3] to [6], the corresponding pad(s) will not pro- duce a drum sound of their own. • When this parameter is set to [6], the [DRUM MUTE] button cannot be used to mute the practice drum pattern. Using the following procedure, you can set how much the practice drum pattern in Groove Tracker training (page 36) should advance for each strike of the set pad(s). 1. While holding the [KIT] button, press the [SONG] but- ton to activate Menu Mode. 2. Press number button [6] to select the Training Settings parameter group. 3. Press number button [6] to select the Groove Tracker Advance Step parameter. 4. Select a new advancement step using the corresponding number button ([1] to [4]). The available settings are as follows. Number button [1] [2] [3] [4] [5] Setting Auto 3 Description The drum module will automatically identify the best advancement step for the practice drum pattern. The practice drum pattern will advance in quarter-note steps. The practice drum pattern will advance in eighth-note steps. The practice drum pattern will advance in sixteenth-note steps. The practice drum pattern will advance in eighth-note triplet steps. NOTE • The advancement step set using this parameter only applies to Groove Tracker training. Other types of training are not affected. • If, when set to [1], you press and hold number button [1], the drum module will flash a number button between [2] and [5] to indicate the result of automatic identification. DTX400K/DTX430K/DTX450K Owner's Manual 51
-
 1
1 -
2
-
3
-
4
-
5
-
6
-
7
-
8
-
9
-
10
-
11
-
12
-
13
-
14
-
15
-
16
-
17
-
18
-
19
-
20
-
21
-
22
-
23
-
24
-
25
-
26
-
27
-
28
-
29
-
30
-
31
-
32
-
33
-
34
-
35
-
36
-
37
-
38
-
39
-
40
-
41
-
42
-
43
-
44
-
45
-
 46
46 -
 47
47 -
 48
48 -
 49
49 -
 50
50 -
 51
51 -
 52
52 -
 53
53 -
 54
54 -
 55
55 -
 56
56 -
57
-
58
-
59
-
60
-
61
-
62
-
63
-
64
-
65
-
66
-
67
-
68
 |
 |
