Yamaha PSR-540 Owner's Manual
Yamaha PSR-540 Manual
 |
View all Yamaha PSR-540 manuals
Add to My Manuals
Save this manual to your list of manuals |
Yamaha PSR-540 manual content summary:
- Yamaha PSR-540 | Owner's Manual - Page 1
- Yamaha PSR-540 | Owner's Manual - Page 2
MESSAGE SECTION This product utilizes batteries or an external power supply (adapter). DO NOT connect this product to any power supply or adapter other than one described in the manual, on the name plate, or specifically recommended by Yamaha. This product should be used only with the components - Yamaha PSR-540 | Owner's Manual - Page 3
to a floppy disk frequently, in order to help prevent the loss of important data due to a malfunction or user operating error. Yamaha cannot be held responsible for damage caused by improper use or modifications to the instrument, or data that is lost or destroyed. Always turn the power off when - Yamaha PSR-540 | Owner's Manual - Page 4
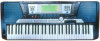
Congratulations! You are the proud owner of a fine electronic keyboard. The Yamaha PSR-540 PortaTone combines the most advanced tone generation technology with state-of-theart digital electronics and features to give you stunning sound quality with maximum musical - Yamaha PSR-540 | Owner's Manual - Page 5
Panel Controls Panel Display Indications Function Tree Appendix Troubleshooting Index page 12 Before going on to any other part of the manual, we strongly suggest you read this section first. It shows you how to get started playing and using your new PSR-540. page 8 Once you've set up the PSR-540 - Yamaha PSR-540 | Owner's Manual - Page 6
the manual 5 Important Features 8 Panel logos 9 Panel Controls and Terminals 10 Top Panel Controls 11 Rear Panel Controls 11 Setting Up 12 Power supply connections 12 Connecting a footswitch 13 Audio equipment connections 13 Connecting external MIDI devices 14 Music stand 14 Demo - Yamaha PSR-540 | Owner's Manual - Page 7
102 Naming User Styles 104 Clearing User Style Data 104 MIDI Functions 106 What's MIDI 106 What You Can Do With MIDI 108 MIDI Data Compatibility 109 Connecting to a Personal Computer 110 MIDI Template 112 MIDI Transmit Setting 114 MIDI Receive Setting 115 Local Control 116 Clock - Yamaha PSR-540 | Owner's Manual - Page 8
professional sounding backing parts for your performance. (→ Page 32) • Special Multi Pads let you instantly and easily play short rhythmic and melodic sequences for adding impact and variety to your performance. (→ Page 43) Playing the PSR-540 • The PSR-540 keyboard has 61 keys with full touch - Yamaha PSR-540 | Owner's Manual - Page 9
a specific part. (→ Page 49) * Harmony/Echo lets you enhance your right-hand melodies with a variety of harmony and echo effects. (→ Page 50) Disk Drive • The PSR-540 also features a built-in disk drive that lets you save all your important original data (such as User songs, User styles, User Multi - Yamaha PSR-540 | Owner's Manual - Page 10
Piano CHORD VOICE LR12 mdiMm67aug15s11u39s4 BACK NEXT EASY TRACK(1~16) START/STOP KEYBOARD NAVIGATOR PART DIAL 0~9 STYLE E2 F2 51 H 52 L 53 G2 54 H 55 A2 56 L 57 B2 C3 58 M 59 M 60 L H C 61 1 D3 H 62 R 63 1 E3 64 F3 R 65 G3 66 S 67 A3 68 C 69 2 B3 C4 70 - Yamaha PSR-540 | Owner's Manual - Page 11
Controls and Terminals Top Panel Controls q STANDBY/ON switch 15 w MASTER VOLUME control 15 e DEMO , 68 !7 STYLE button 17, 25 Disk Drive 58 $4 PITCH BEND wheel 30 Rear Panel Controls $5 PHONES/OUTPUT jack 13 $6 FOOT SWITCH jack 13 $7 TO HOST connector 107 $8 HOST SELECT switch 110 $9 MIDI - Yamaha PSR-540 | Owner's Manual - Page 12
. Follow the instructions below according to the power source you intend to use. s Using An Optional AC Power Adaptor 1 Make sure that the STANDBY/ON switch of the PSR-540 is set to STANDBY. 2 Connect the AC adaptor (PA-6 or other adaptor specifically recommended by Yamaha) to the power supply jack - Yamaha PSR-540 | Owner's Manual - Page 13
Important Notes on Battery Use • Since the PSR-540 consume a considerable amount of power, Yamaha recommends the use of an AC power adaptor rather than batteries. The batteries should be considered an auxiliary power source for data backup. • The floppy disk drive, in particular, uses a large amount - Yamaha PSR-540 | Owner's Manual - Page 14
Setting Up Connecting external MIDI devices For more information on using MIDI, refer to page 107. Music stand The PSR-540 is supplied with a music stand that can be attached to the instrument by inserting it into the slot at the rear of the control panel. 14 12 - Yamaha PSR-540 | Owner's Manual - Page 15
2 Press the [DEMO] button to start demo playback. 1 MyHeartGoOn CAUTION • Even when the switch is in the "STANDBY" position, electricity is still flowing to the instrument at the minimum level. When you are not using the PSR-540 for a long time, make sure you unplug the AC power adaptor from the - Yamaha PSR-540 | Owner's Manual - Page 16
Piano CHORD dim mM 67aug15s11u39s4 BACK NEXT START/STOP KEYBOARD TRANSPOSE REGISTRATION TEMPO REC REC REC REC REC REC REC EASY TRACK(1~16) NAVIGATOR PART DIAL 0~9 /YES MEASURE BEAT REC REC REC REC REC REC VOICE LR12 STYLE each function of the PSR-540. It also displays the - Yamaha PSR-540 | Owner's Manual - Page 17
PSR-540. • DEMO button page 15 • RECORD button pages 25, 78, 92, 96 • FUNCTION button pages 77, 118 • SONG button pages 25, 68 • STYLE 70 • DISK LOAD button page 62 • DISK SAVE button page 60 • DISK UTILITY button EXIT] button. Since the PSR-540 has so many different displays, you may - Yamaha PSR-540 | Owner's Manual - Page 18
" messages that guide you through the various operations. Let's take a look at some examples: q Voice Press the [VOICE R1] button. 001 Grand Piano CHORD mdiMm67aug15s11u39s4 BACK NEXT EASY TRACK(1~16) START/STOP KEYBOARD NAVIGATOR PART DIAL VOICE LR12 0~9 STYLE /YES SONG FUNCTION - Yamaha PSR-540 | Owner's Manual - Page 19
TRACK(1~16) START/STOP KEYBOARD NAVIGATOR PART DIAL VOICE LR12 0~9 STYLE /YES SONG FUNCTION This message means: "Press the [+/YES] button to execute the Format operation." Menu Selection For certain operations on the PSR-540 (such as selecting voices, demo songs and styles), you'll need to - Yamaha PSR-540 | Owner's Manual - Page 20
Basic Operation Changing (Editing) Values This section shows you how to set numeric values on the PSR-540, such as voice number, song/style number and various parameters. Input the values by using the number buttons [1]-[0] or the [+/YES]/[-/NO] buttons. Number buttons [1]-[0] described below. - Yamaha PSR-540 | Owner's Manual - Page 21
. • Disk files (User songs, etc pages 61, 65, 66, 90 • User Styles page 104 • User Pad banks page 94 • Registration Memory banks page 56 The example display below appears when naming a song on a floppy disk (page 65). Nam=-xxxxxxxx Cursor To enter an original name, use the keyboard. Letters - Yamaha PSR-540 | Owner's Manual - Page 22
/TAP FINGERING DISK LOAD DISK SAVE DISK UTILTY Menu/message display Function See page 01 MyHeartGoOn Demo song selection 15 001 Grand Piano Voice R1 selection 26 001 Grand Piano Voice R2 selection 27 001 Grand Piano Voice L selection 28 001 8Beat 1 Accompaniment Style selection 32 - Yamaha PSR-540 | Owner's Manual - Page 23
Pitch bend range setting 17 122 F5 Midi Template MIDI template vselection 112 Load OK Loading the selected MIDI template setting 112 Transmit Ch MIDI transmit channel setting 114 Receive Ch MIDI receive channel setting 115 Local Local control on/off setting 116 Clock External /Internal - Yamaha PSR-540 | Owner's Manual - Page 24
User Songs 90 Clear Clearing user song data 91 Style Record User Style recording 96 Edit Quantize Quantize 102 Name Namimg User Styles 104 Clear Clearing user style data 104 MultiPad Record User setting 11 Part octave setting of Voice L 12 Part octave setting of Voice R1 13 Part octave - Yamaha PSR-540 | Owner's Manual - Page 25
, the PSR-540 has several fundamentally different conditions (or methods of operation). Each of these condition is called a mode. This section explains the main modes of the instrument. Style Mode page 32 Select this mode by pressing the [STYLE] button. (This is the default mode when the power is - Yamaha PSR-540 | Owner's Manual - Page 26
The PSR-540 has a huge selection of various musical instrument voices which you can play. Try out the different voices referring to the voice list at the end of this manual (page 123). Select and play the voices of different musical instruments • Selecting a Voice page 26 • Keyboard Percussion - Yamaha PSR-540 | Owner's Manual - Page 27
Two Voices (R1, R2) Simultaneously 1 Press the [PART ON/OFF VOICE R2] button. 2 Play the voices. played with the right hand. Selecting a voice for VOICE R2 1 Press the [VOICE R2] button. 002 Bright Piano 2 Select a voice. Use the data dial, the [+/YES] button, the [-/NO] button or the number - Yamaha PSR-540 | Owner's Manual - Page 28
R2) Hands 1 Press the [PART ON/OFF VOICE L] button. is played with the left hand. • The point on the keyboard that separates voice L and voice R1 is called the "split point" ( voice for VOICE L 1 Press the [VOICE L] button. 002 Bright Piano 2 Select a voice. Use the data dial, the [+/YES] - Yamaha PSR-540 | Owner's Manual - Page 29
R2 In addition, the keyboard of the PSR-540 has other important functions floppy disk, User Styles, User Pad banks and Registration Memory banks (page 21). Each key has a note name; for example, the lowest (farthest left) key on the keyboard corresponds to C1, and the highest (farthest right) key - Yamaha PSR-540 | Owner's Manual - Page 30
new TRANSPOSE value will take effect from the next key played. • Minus values can be entered by using the number buttons while holding the [-/NO] button. Transpose = 4 Pitch Bend Wheel Use the PSR-540 is ON, all notes played on the keyboard have a longer sustain. Press the [SUSTAIN] button to - Yamaha PSR-540 | Owner's Manual - Page 31
of the manual (page 128). The drum and percussion instrument sounds for the standard kit (Std.Kit1) are indicated by symbols printed below the keys. • Each key has a note name; for example, the lowest (farthest left) key on the keyboard corresponds to C1, and the highest (farthest right) key to - Yamaha PSR-540 | Owner's Manual - Page 32
an entire band or orchestra. The PSR-540 features a total of 106 styles or accompaniment patterns (style numbers 1 - 106) in a STYLE] button. 2 Select a style. 001 8Beat 1 CHORD mdiMm67aug15s11u39s4 BACK NEXT EASY TRACK(1~16) START/STOP KEYBOARD NAVIGATOR PART DIAL VOICE LR12 0~9 STYLE - Yamaha PSR-540 | Owner's Manual - Page 33
button, the [-/NO] button or the number buttons [1]-[0]. Refer to the Style List (page 130). 3 Turn AUTO ACCOMPANIMENT on. Press the [ACMP ON/OFF] so that its indicator lights. The specified left-hand section of the keyboard becomes the "Auto Accompaniment" section, and chords played in this section - Yamaha PSR-540 | Owner's Manual - Page 34
, accompaniment shifts to the main section. The length of the intro (in measures) differs depending on the selected style. q MAIN Section This is used for playing the main part of the song. It plays an accompaniment pattern of several measures (2 - 4 measures), and repeats indefinitely until another - Yamaha PSR-540 | Owner's Manual - Page 35
continuing with the main section. • If you press the [SYNC START] button while the accompaniment is playing, the accompaniment will stop and the PSR-540 will enter Synchronized Start standby status. • You can begin the accompaniment by using the ending instead of the intro section. This switches to - Yamaha PSR-540 | Owner's Manual - Page 36
Auto Accompaniment Tempo/Tap Each style of the PSR-540 has been programmed with a default or standard tempo; you desire by "tapping" out the tempo with the [TEMPO/TAP] button. 1 Press the [STYLE] button. 2 Select a style (page 32). Use the data dial, the [+/YES] button, the [-/NO] button or the - Yamaha PSR-540 | Owner's Manual - Page 37
PSR-540 has eight accompaniment tracks - RHYTHM SUB, RHYTHM MAIN, BASS, CHORD 1, CHORD 2, PAD, PHRASE 1 and PHRASE 2 - that you can control to modify the "orchestration" and therefore the overall sound of the accompaniment. When a style required by each style. You'll find guitar, piano and other - Yamaha PSR-540 | Owner's Manual - Page 38
on the Auto accompaniment section of the keyboard (i.e. all keys to the left of and including the split-point key - normally F#2) while the PSR-540 supplies appropriately orchestrated rhythm, bass and chord accompaniment in the selected style. The Fingered 1 mode recognizes the following chords - Yamaha PSR-540 | Owner's Manual - Page 39
C7(#9) C7b5 C7aug C7sus4 C1+2+5 C7(13) C7(#9) C7b5 C7aug C7sus4 C • Notes in parentheses can be omitted. • If you play any three adjacent keys (including black keys), the chord sound will be cancelled and only the rhythm instruments will continue playing (CHORD CANCEL function). • Playing a single - Yamaha PSR-540 | Owner's Manual - Page 40
The Full Keyboard mode FingerMode=Full When the Full Keyboard Mode is selected, the PSR-540 will automatically keyboard is called the "split point". The initial setting (factory setting) of the split point is "F#2"; however, this can be set to any key you wish. Refer to page 118 for instructions - Yamaha PSR-540 | Owner's Manual - Page 41
stop completely when all keys in the auto-accompaniment section of the keyboard are released. Accompaniment playback will start again as soon as a chord is played. The BEAT indicators in the display will flash while the accompaniment is stopped. 1 Press the [STYLE - Yamaha PSR-540 | Owner's Manual - Page 42
a powerful and convenient User style (number 107-109) is selected, the One Touch Setting cannot be used. Auto Accompaniment 4 section Stop the accompaniment. One Touch Setting parameter list The PSR-540 /ECHO on/off, type, volume, part page 50 • DSP on/off, type, return level and FAST/SLOW page 49 - Yamaha PSR-540 | Owner's Manual - Page 43
PSR-540 Multi Pads can be used to play a number of short pre-recorded rhythmic and melodic sequences that can be used to add impact and variety to your keyboard of the phrase, press the [STOP] button. Chord Match 1 Press the [STYLE] button. 2 Turn AUTO ACCOMPANIMENT on (page 33). 3 Play a chord with - Yamaha PSR-540 | Owner's Manual - Page 44
Multi Pad." Use the data dial, the [+/YES] button or the [-/NO] button. VOICE LR12 STYLE SONG FUNCTION F1 Multi Pad 3 Press the [NEXT] button to display the MULTI PAD BANK screen off status of a user Multi Pad Bank (see above) is changed, the new status is recorded with the Multi Pad data. 44 42 - Yamaha PSR-540 | Owner's Manual - Page 45
The Multi Pads q Multi Pad Bank List Bank name Fanfare Crystal Gothic_V TechSyn1 TechSyn2 TechSyn3 TechSyn4 PianoSeq OrcheHit Traffic Chirp HorrorSE Noises WaterSE AnalogKit TechKit RockKit TomFlam LatinPerc1 LatinPerc2 Brassy1 Brassy2 Swingy SynBrass GuitarPlay1 GuitarPlay2 GuitarPlay3 - Yamaha PSR-540 | Owner's Manual - Page 46
Reverb and Chorus types, the PSR-540 has special DSP effects, that include additional effects usually used for a specific part, such as DSP(FAST) Reverb Selecting a reverb type 1 Press the [FUNCTION] button. VOICE LR12 STYLE SONG FUNCTION 2 Select "Digital Effect". Use the data dial, the [+/YES - Yamaha PSR-540 | Owner's Manual - Page 47
[+/YES] button or the [-/NO] button. Refer to the Reverb Type List (page 132). 7 Play the keyboard. Try out some of the other reverb types as well. Digital Effects • When you select a different style, the appropriate reverb type will be selected accordingly. Adjust the depth of the reverb. The two - Yamaha PSR-540 | Owner's Manual - Page 48
the [+/YES] button or the [-/NO] button. Refer to the Chorus Type List (page 132). 7 Play the keyboard. Try out some of the other chorus types as well. • When you select a different style, the appropriate chorus type will be selected accordingly. Adjust the depth of the chorus. The two parameters - Yamaha PSR-540 | Owner's Manual - Page 49
will be applied when you play the R1, R2 and L voices from the keyboard. In addition, when the [FAST/SLOW] button is pressed, the FAST icon or the [-/NO] button. Refer to the DSP Type List (page 132). 7 Play the keyboard. Try out some of the other DSP types as well. • When the selected DSP type - Yamaha PSR-540 | Owner's Manual - Page 50
specific part. With the insertion effects, only the DSP depth can be set. The illustration below with the various audio components (instruments, effect devices and a mixer) represents the inner workings of the DSP effects of the PSR-540 button. VOICE LR12 STYLE SONG FUNCTION F3 DigitalEffect 3 Press - Yamaha PSR-540 | Owner's Manual - Page 51
the selected R1 panel voice. Applying the Harmony/Echo effect 1 Press the [STYLE] button. 2 Turn AUTO ACCOMPANIMENT on (page 33). 3 Play a chord type is selected An echo effect is applied to the note played on the keyboard at the currently set tempo. Steps #1 - #3 above are unnecessary for this - Yamaha PSR-540 | Owner's Manual - Page 52
Digital Effects Adjusting the Harmony/Echo volume The volume of the Harmony/Echo sound in relation to the keyboard sound can be adjusted as follows: 1 4- Use the same operation as in "Selecting a Harmony/Echo Type" (page 50). Effect =Harmony 5 Press the [NEXT] button to - Yamaha PSR-540 | Owner's Manual - Page 53
screen. 6 Press the [NEXT] button to display the Harmony Volume screen. 7 Press the [NEXT] button to display the Harmony Part setting screen. H.Part =Auto 8 Set the part. Use the data dial, the [+/YES] button or the [-/NO] button. q Auto .......... Harmony/Echo notes are automatically assigned to - Yamaha PSR-540 | Owner's Manual - Page 54
recorded data is retained in memory even when the STANDBY switch is turned off if batteries are installed or an AC adaptor is connected (page 135). It is nevertheless a good idea to save important data to floppy disk so that you can keep them indefinitely and build up your own data library (page 60 - Yamaha PSR-540 | Owner's Manual - Page 55
1 Set up the panel controls as required. 2 Press the replaced by the new settings. • The Registration Memory contents will be retained even after turning the power off. See example, you cannot recall the Voice R2/L voices in the Style Record mode and Pad Record mode even if you press the Registration - Yamaha PSR-540 | Owner's Manual - Page 56
Memory Selecting a Registration Bank 1 Press the [FUNCTION] button. VOICE LR12 STYLE SONG FUNCTION 2 Select "Regist Memory". Use the data dial, the =Regist01 5 Enter the desired name for the bank. Use the keyboard to enter the name (page 21). Up to eight letters or characters can be used. 56 54 - Yamaha PSR-540 | Owner's Manual - Page 57
Memory data (page 54). You can save any number of User styles, pads and registration data to floppy disks, create your own song libraries or find many other ways to make playing and using the PSR-540 more efficient. q The PSR-540 is capable of playing back songs contained on the included sample - Yamaha PSR-540 | Owner's Manual - Page 58
in until it clicks into place and the eject button pops out. • When the PSR-540 is turned on, the LED below the floppy disk slot will be lit indicating that the Disk Drive is ready to use. q To eject a floppy disk: • Before ejecting the disk, be sure to confirm that the FDD is stopped (check if the - Yamaha PSR-540 | Owner's Manual - Page 59
drive. 001 CLUB_XG CHORD mdiMm67aug15s11u39s4 BACK NEXT EASY TRACK(1~16) START/STOP KEYBOARD NAVIGATOR PART DIAL VOICE LR12 0~9 STYLE /YES SONG FUNCTION • If a disk has already been inserted into the drive, press the [SONG] button to call up the Song display. 2 Select the desired song - Yamaha PSR-540 | Owner's Manual - Page 60
disk or turn off the power to the PSR-540. • If a disk that cannot be read by the PSR-540 is inserted into the disk drive, it will be treated the same as an unformatted floppy disk. Take care not to erase important data by accidentally formatting a disk. Save You can save PSR-540 User styles, User - Yamaha PSR-540 | Owner's Manual - Page 61
is being saved, never eject the floppy disk or turn off power to the PSR-540. • If there isn't enough space on the disk, an alert message appears and you will not be able to save any data. You can delete unneeded files on the disk (page 67), or replace the disk with a new one and repeat the Save - Yamaha PSR-540 | Owner's Manual - Page 62
Operations Load After saving User style (107-109), User pad (banks 37-40) and Registration Memory (bank 01-32) data to a floppy disk, you can reload them into the PSR-540. 1 Insert the floppy disk into the disk drive. 2 Press the [LOAD] button. 3 Select the file to be loaded. Use the data dial - Yamaha PSR-540 | Owner's Manual - Page 63
or turn the power off. • An alert message may appear on the display, if a problem occurs that prevents the data from being loaded. (For example, the capacity of the PSR-540 [RAM] may be exceeded, something may be wrong with the floppy disk, or the data from the disk may be corrupted, etc.) 63 61 - Yamaha PSR-540 | Owner's Manual - Page 64
it. Copying song data from one floppy disk to another Prepare a backup disk by formatting it. One file can be copied at a time. As shown in the illustration below, first copy the desired file on the disk to internal memory, then copy it to the destination disk. PSR-540 Internal Memory copy copy - Yamaha PSR-540 | Owner's Manual - Page 65
Enter the destination song name directly from the keyboard (page 21). 10 Press the [NEXT] data to be copied in parts. Insert the Source disk. Insert Source FD If disk The Copy operation is completed... Completed CAUTION While data is being copied, never eject the floppy disk or turn the power - Yamaha PSR-540 | Owner's Manual - Page 66
to display the Name screen. Nam=_Song -01 Cursor 9 Enter the destination file name directly from the keyboard (page 21). 10 Press the [NEXT] button to display the Copy operation screen. Copy OK? 11 CAUTION • While data is being copied, never eject the floppy disk or turn the power off. 64 - Yamaha PSR-540 | Owner's Manual - Page 67
You can delete individual files (User songs, User styles, User pads or Registration Memory) from the floppy disk. 1 Insert the floppy disk into the disk drive. 2 Press the [ deleted, never eject the floppy disk or turn the power off. Executing 49% The Delete Operation is completed... Completed 67 - Yamaha PSR-540 | Owner's Manual - Page 68
outside the 61-key range may not play back as expected. Song Playback 1 Insert the disk that contains song data into the disk drive. PSR-540 will automatically switch into Song mode. 001 CLUB_XG CHORD dim mM 67aug15s11u39s4 BACK NEXT EASY TRACK(1~16) START/STOP KEYBOARD NAVIGATOR PART DIAL - Yamaha PSR-540 | Owner's Manual - Page 69
playback through all the songs on the floppy disk repeatedly. q Random Continue playback through all the songs at random. 7 Press the [START/STOP] button to start the song. 002 TECHNO CHORD dim mM 67aug15s11u39s4 BACK NEXT START/STOP KEYBOARD TRANSPOSE REGISTRATION TEMPO REC REC REC - Yamaha PSR-540 | Owner's Manual - Page 70
Disk Song Playback Song Track Muting 1 Press the [START/STOP] button to button. Song Volume CHORD mdiMm67aug15s11u39s4 BACK NEXT EASY TRACK(1~16) START/STOP KEYBOARD NAVIGATOR PART DIAL =120 VOICE LR12 0~9 STYLE /YES SONG FUNCTION • The volume of the keyboardplayed voice(s) is not - Yamaha PSR-540 | Owner's Manual - Page 71
Disk Song Playback Playing from a Specified Measure 1 Press the [SONG] button. 2 Press the [NEXT] button to display the Song Menu screen. 3 Select "Measure". Use the data - Yamaha PSR-540 | Owner's Manual - Page 72
Disk Song Playback Repeat Play 1 Press the [SONG] button. 2 Press the [NEXT] button to display the Song Menu screen. 3 Select "AbRepeat". Use the data dial, the [+/ - Yamaha PSR-540 | Owner's Manual - Page 73
Disk Song Playback Song Transpose 1 Press the [SONG] button. 2 Press the [NEXT] button to the keyboard-played voice(s) • Changes made to the transpose setting (on page 30) affect the entire sound of the PSR-540, including the song transpose setting. • Enabling the record mode to record a User - Yamaha PSR-540 | Owner's Manual - Page 74
voices, the PSR-540 features many different instrumental "parts," included with the auto accompaniment, and song playback. q Style mode Keyboard Auto Accompaniment Part VOICE R1 VOICE R2 VOICE L RHYTHM SUB RHYTHM MAIN BASS CHORD1 CHORD2 PAD PHRASE1 PHRASE2 q Song mode Keyboard Song Part VOICE R1 - Yamaha PSR-540 | Owner's Manual - Page 75
settings affects all sections of the selected style. • Save any part settings you want to keep to the PSR-540 Registration Memory (page 54). The Auto accompaniment part setting are temporary and will be lost if the power is turned off, a different style is selected while the Voice Set function (page - Yamaha PSR-540 | Owner's Manual - Page 76
Mixer 1 Press the [MIXER] button. The [MIXER] lamp lights. 2 Select the part for which you want to adjust the volume. Parts can be selected from the following buttons (depending on the selected mode: Style or Song): q Voice PART ON/OFF [VOICE R1], [VOICE R2], [VOICE L] buttons q Accompaniment track - Yamaha PSR-540 | Owner's Manual - Page 77
Part Settings Parameter Edit 1 Press the [FUNCTION] button. VOICE LR12 STYLE SONG FUNCTION 2 Select "Parameter Edit". Use button, the [-/NO] button or the number buttons [1]-[0]. • You can switch among the parts just as with the Mixer function above. • Switch among the parameter displays by using - Yamaha PSR-540 | Owner's Manual - Page 78
. These include not only the voices for the keyboard performance (R1, R2, L), but also the auto accompaniment parts. • User Songs are recorded on floppy disks. They cannot be recorded unless a floppy disk is inserted into the disk drive. The PSR-540 provides two different ways to record: Quick - Yamaha PSR-540 | Owner's Manual - Page 79
is finished, the PSR-540 returns to record standby, allowing you to record. • If the disk memory becomes full while recording, an alert message will appear on the display and recording will stop. • Be careful to avoid turning off the power or unplugging the AC adaptor from the outlet during - Yamaha PSR-540 | Owner's Manual - Page 80
floppy disk into the disk drive. 2 Press the [RECORD] button to engage the Record mode. 3 Select "Song". Use the data dial, the [+/YES] button or the [-/NO] button. RecMenu=Song 4 Press the [NEXT] button. 001 New on. q Mel + Acmp This records your keyboard performance (Voices R1/R2) along with the - Yamaha PSR-540 | Owner's Manual - Page 81
Acmp] in step #8 above, recording starts as soon as you play a key. • If you've selected [Acmp] in step #8 above, the auto accompaniment a chord is played in the auto accompaniment section of the keyboard (the left side of the split point). • Recording can floppy disk or turn the power off. 81 79 - Yamaha PSR-540 | Owner's Manual - Page 82
(page 80). 4 Press the [NEXT] button to display the Song selection screen. 001 New Song 5 Press the [NEXT] button again to display the RecMode screen. 6 Select " NEXT EASY TRACK(1~16) START/STOP KEYBOARD NAVIGATOR PART DIAL =Rhm VOICE LR12 0~9 STYLE /YES SONG FUNCTION [BACK] button - Yamaha PSR-540 | Owner's Manual - Page 83
Rehearsal screen. Voices and styles can be set from this . • Recording starts as soon as you play a key on the keyboard. • If you enabled the auto accompaniment track for to disk, press the [+/YES] button. CAUTION • While the file is being saved, never eject the floppy disk or turn the power off - Yamaha PSR-540 | Owner's Manual - Page 84
Start Measure This section shows you how to re-record a specific section of a already-recorded song. In the eight-measure example Recording stop (Punch Out) 6 7 8 Previously played data 1 Insert the floppy disk into the disk drive. 2 Press the [RECORD] button to engage the Record mode. 3 - Yamaha PSR-540 | Owner's Manual - Page 85
Use the data dial, the [+/YES] button, the [-/NO] button or the number buttons [1]-[0]. Rec Start = 2 16 Press the [NEXT] button to display the PART screen. 17 Record using the same operation as described in "Multi Track Recording" on page 82, starting with step #7. • The punch-out measure number - Yamaha PSR-540 | Owner's Manual - Page 86
Song Recording Quantize Quantize lets you "clean up" or "tighten" the timing of a previously recorded track. For example, the following musical passage has been written with exact quarter-note and eighth-note values. Even though you think you may have recorded the passage accurately, your actual - Yamaha PSR-540 | Owner's Manual - Page 87
. To abort the Quantize operation, press the [-/NO] button. CAUTION • While the Quantize operation is being executed, never eject the floppy disk or turn the power off. Executing 84% The Quantize operation is completed... Completed 16 Press the [RECORD] button to exit from the Record mode. 87 - Yamaha PSR-540 | Owner's Manual - Page 88
Song Recording Editing Setup Data This function lets you make changes to various voice-related parameters (setup data) for each track of a recorded song. The following parameters can be edited: q Voice Assigns a voice number to the specified track. q Volume Sets the volume of the specified track - Yamaha PSR-540 | Owner's Manual - Page 89
entered by pressing the appropriate number button while holding the [-/NO] button. CAUTION • While the file is being saved, never eject the floppy disk or turn the power off. Executing 84% The Save operation is completed... Completed 14 Press the [RECORD] button to exit from the Record mode. 89 87 - Yamaha PSR-540 | Owner's Manual - Page 90
Song Recording Naming User Songs 1 4- Use the same operation as in "Re-recording" (page 84). 5 display the NAME screen. Nam=_UserSong1 cursor 11 Enter the desired name for the file (song). Use the keyboard to enter the name (page 21). Up to 12 letters or characters can be used. (The three-letter - Yamaha PSR-540 | Owner's Manual - Page 91
Song Recording Clearing User Song Data 1 4- Use the same operation as in "Re-recording" ( press the [-/NO] button. CAUTION • While the track is being cleared, never eject the floppy disk or turn the power off. Executing 84% The Clear operation is completed... Completed 14 Press the [RECORD] button - Yamaha PSR-540 | Owner's Manual - Page 92
to the PSR-540 Multi Pads. • User Pad data is recorded by playing voice R1 from the keyboard. Voice R2, voice L and the auto accompaniment cannot be used. • Material recorded data is retained in memory even when the STANDBY switch is turned off if batteries are installed or an AC adaptor is - Yamaha PSR-540 | Owner's Manual - Page 93
tempo, indicating that the record ready (Synchro Start) mode is engaged. BEAT 11 Start recording. • Recording starts as soon as you play a key on the keyboard. • Recording can also be started by pressing the [START/STOP] button. M.Pad Recording If you are recording a Chord match phrase, use only - Yamaha PSR-540 | Owner's Manual - Page 94
=Off [BACK] button [NEXT] button ChMatch Pad2=Off [BACK] button [NEXT] button 11 Press the [RECORD] button to exit from the Record mode. Naming User Pads 1 7- Use the same operation as in "Chord Match" above. 8 Select "Name". Use the data dial, the [+/YES] button or the [-/NO] button. Ed - Yamaha PSR-540 | Owner's Manual - Page 95
10 Enter the desired name for the bank. Use the keyboard to enter the name (page 21). Up to eight letters or characters can be used. P.Name=UserPad2 11 Press the [RECORD] button to exit from the Record mode. Multi Pad Recording Clearing User Pad Data 1 7- Use the same operation as in "Chord - Yamaha PSR-540 | Owner's Manual - Page 96
if batteries are installed or an AC adaptor is connected (page 135). It is nevertheless a good idea to save important data to floppy disk so that you can keep them indefinitely and build up your own data library (page 60). • User Style data is recorded by playing voice R1 from the keyboard. Voice R2 - Yamaha PSR-540 | Owner's Manual - Page 97
s About Recording User Styles In recording a User song, the PSR-540 records your keyboard performance as MIDI data. Recording of User styles, however, is done in a different way. Here are some of the aspects in which style recording differs from song recording: Loop Recording Auto accompaniment - Yamaha PSR-540 | Owner's Manual - Page 98
. 1 Press the [RECORD] button to engage the Record mode. 2 Select "Style". Use the data dial, the [+/YES] button or the [-/NO] button. RecMenu=Style 3 Press the [NEXT] button. 001 8Beat 1 4 Select a style to begin with. Use the data dial, the [+/YES] button, the [-/NO] button or the number buttons - Yamaha PSR-540 | Owner's Manual - Page 99
step #10. • Press the [SYNC START] button to enable synchronized standby (page 25), then play a key on the keyboard. Playback starts as described in the first method above. Style Recording Style Recording • Only one track can be recorded at a time. • For recording the RHYTHM tracks, the instrument - Yamaha PSR-540 | Owner's Manual - Page 100
Recording Exiting from the Style Record mode To leave the style recording mode, follow the instructions in the chart below. Press the [RECORD] button. Store OK? Press the [+/YES] button. Press the [-/NO] button to exit from the Style Record mode without storing the performance data to Internal - Yamaha PSR-540 | Owner's Manual - Page 101
the following ways: • Press the [START/STOP] button. • Press the [SYNC START] button to enable synchronized standby (page 25), then play a key on the keyboard. Style Recording The recording repeats indefinitely (until stopped) in a loop. Notes that you record will play back from the next repetition - Yamaha PSR-540 | Owner's Manual - Page 102
align all the notes in a track so that the timing is absolutely accurate to the specified note value. 1 5- Use the same operation as in "Style Recording - Rhythm Track" (page 98). 6 Select "Edit". Use the data dial, the [+/YES] button or the [-/NO] button. RecMode=Edit 7 Press the [NEXT] button - Yamaha PSR-540 | Owner's Manual - Page 103
Style Recording 13 Press the [NEXT] button. Q.Size = 1/4 14 Select the Quantize size (resolution). Use the data dial, the [-/NO] button or the [+/YES] button. Set - Yamaha PSR-540 | Owner's Manual - Page 104
the desired name for the style. Use the keyboard to enter the name (page 21). Up to 12 letters or characters can be used. 11 Press the [RECORD] button to exit from the Record mode. For information on leaving the recording mode, see page 100. Clearing User Style Data 1 7- Use the same operation - Yamaha PSR-540 | Owner's Manual - Page 105
the Clear screen. Clear OK? 14 Press the [+/YES] button to execute the Clear operation. To abort the Clear operation, press the [-/NO] button. Style Recording The Clear operation is completed... Completed 15 Press the [RECORD] button to exit from the Record mode. For information on leaving the - Yamaha PSR-540 | Owner's Manual - Page 106
's say you play a "C" quarter note using the grand piano sound on the PSR-540 keyboard. Unlike an acoustic instrument that puts out a resonated note, the electronic instrument puts out information from the keyboard such as "with what voice," "with which key," "about how strong," "when was it pressed - Yamaha PSR-540 | Owner's Manual - Page 107
..... Transmits the PSR-540's keyboard information as MIDI data to another MIDI device. q TO HOST ..... Transmits and receives MIDI data to and from a personal computer. • When using the TO HOST terminal to connect to a personal computer using Windows, a Yamaha MIDI driver must be installed in the - Yamaha PSR-540 | Owner's Manual - Page 108
settings (page 115). Personal computer, QY700, etc. q Play music from another keyboard (no tone generator) using the PSR-540 XG tone generator. PSR-540 MIDI receive MIDI IN MIDI OUT MIDI keyboard with no tone generator • When using a personal computer, special software (sequencer software - Yamaha PSR-540 | Owner's Manual - Page 109
by Yamaha specifically to provide more voices and variations, as well as greater expressive control over voices and effects, and to ensure compatibility of data well into the future. • The PSR-540 is compatible with XG. q DOC This voice allocation format is compaible with many of Yamaha's MIDI - Yamaha PSR-540 | Owner's Manual - Page 110
the computer has a MIDI interface installed, connect the MIDI OUT terminal of the personal computer to the MIDI IN terminal of the PSR-540. Set the HOST SELECT switch to "MIDI." Computer (sequencer software) MIDI OUT MIDI IN MIDI IN MIDI OUT PSR-540 q When using a MIDI interface with a Macintosh - Yamaha PSR-540 | Owner's Manual - Page 111
(system peripheral cable, 8 bit). Set the PSR-540 HOST SELECT switch in the "Mac" position. PSR-540 mini DIN 8-pin mini DIN 8-pin Set the MIDI interface clock in the sequencer software you are using to 1 MHz. For details, carefully read the owner's manual for the software you are using. For - Yamaha PSR-540 | Owner's Manual - Page 112
MIDI Functions MIDI Template The PSR-540 is capable of transmitting and receiving MIDI data over sixteen independent channels. For proper MIDI operation, it is necessary to determine which data is set to which channel. The MIDI Template function allows you to instantly configure all appropriate - Yamaha PSR-540 | Owner's Manual - Page 113
outputting the style data. Used to play the PSR-540 auto accompaniment data with an external tone generator and to record the PSR-540 auto accompaniment PSR-540 to an external sequencer. When using the PSR-540 as a master keyboard; in other words, using it strictly as a controller for outputting MIDI - Yamaha PSR-540 | Owner's Manual - Page 114
• Ch. 9 = RhS • Ch. 10 = RhM • Ch. 11 = Bas • Ch. 12 = Ch1 • Ch. 13 = Ch2 • Ch. 14 = Pad • Ch. 15 = Ph1 • Ch. 16 = Ph2 • To avoid MIDI loops which can cause operational errors, check the PSR-540 Local Control setting (page 116), and the MIDI THRU settings of any external - Yamaha PSR-540 | Owner's Manual - Page 115
are set to "XG/GM", the PSR-540 functions as a 16-channel multi-timbral tone generator. Received MIDI data is handled in the same way as data generated by the PSR-540's own keyboard. In other words, a remote keyboard could be used to control the PSR-740/640 AUTO ACCOMPANIMENT functions, etc. The - Yamaha PSR-540 | Owner's Manual - Page 116
to the "XG/GM" mode via the MIDI IN connector. This means that while an external MIDI sequencer, for example, plays the PSR-540 internal voices, an external tone generator can be played from the PSR-540 keyboard. 1 Press the [FUNCTION] button. 2 Select "Midi". Use the data dial, the [+/YES] button - Yamaha PSR-540 | Owner's Manual - Page 117
appear on the TEMPO display, and tempo cannot be changed with the panel button. Initial Data Send Transmits all current panel settings to a second PSR-540 or a MIDI data storage device. If you want to have the song play back with the panel settings used for recording, execute the Initial Data Send - Yamaha PSR-540 | Owner's Manual - Page 118
Other Functions (Utility) This section of the manual covers some important functions of the PSR-540 that have not been explained in previous sections. These are all combined in the Utility menu of the "Function" section. • Metronome page 118 • Part Octave page 118 • Master Tuning page 119 • - Yamaha PSR-540 | Owner's Manual - Page 119
L. Octave R1 = 1 • Select the part (R1, R2, L) by pressing one of the PART ON/OFF buttons (VOICE R1, VOICE R2, VOICE L). • Set the value with the data dial, the [+/YES] button or the [-/NO] button. Master Tuning The Master Tuning function sets the overall pitch of the PSR-540. The range is from 414 - Yamaha PSR-540 | Owner's Manual - Page 120
keyboard of the PSR-540 is equipped with a touch response feature that lets you dynamically and expressively control hard or how soft you play the keys. (This setting is good for instrument depth, chorus depth, DSP depth) • Harmony Type, Volume, Part setting • DSP on/off, type, return level and FAST/ - Yamaha PSR-540 | Owner's Manual - Page 121
). When you press the foot switch, the soft effect is applied to the keyboard notes. When you press the foot switch, a register with one number higher the panel. This parameter lets you configure the foot switch response of the PSR-540 to match that of the particular foot switch you are using. If - Yamaha PSR-540 | Owner's Manual - Page 122
Other Functions (Utility) Pitch Bend Range This determines the maximum pitch bend range for the PITCH BEND wheel. The range is from "0" to "12". Each increment corresponds to one semitone. Bend Range = 4 • Set the Pitch Bend Range with the data dial, the [+/YES] button, the [-/NO] button or the - Yamaha PSR-540 | Owner's Manual - Page 123
and programmed voices exclusive to the PSR-540 and other PortaTone instruments. The XG voices conform to Yamaha's XG format; they also conform to the GM (General MIDI) standard. This allows you to 44 45 46 47 48 49 50 51 52 53 54 55 56 57 58 59 60 61 62 63 64 65 66 67 68 69 70 71 72 73 74 75 76 77 - Yamaha PSR-540 | Owner's Manual - Page 124
61 BigBandBrass 0 112 61 BrassSection 0 116 61 Mellow Brass 0 117 61 Small Brass 0 118 61 Pop Brass 0 119 61 Mellow Horns 0 113 59 Ballroom Brs 0 114 61 Full Horns 0 115 61 High Brass 0 120 61 196 197 198 199 200 Bank Select MIDI MSB LSB Program Change Voice Name - Yamaha PSR-540 | Owner's Manual - Page 125
Bank Select MIDI MSB LSB Piano 2 El.Piano2KSP Chorus EP 2 DX EP Hard DX Legend DX Phase EP DX+AnalogEP DX Koto EP VXfade El.P1 Harpsichord Harpsi.KSP Harpsichord2 Harpsichord3 Clavi. Clavi.KSP Clavi.Wah Pulse Clavi. PierceClavi. Celesta Glockenspiel Music Box Orgel Vibraphone Bank Select MIDI - Yamaha PSR-540 | Owner's Manual - Page 126
452 0 37 60 453 0 0 61 454 0 35 61 455 0 40 61 456 0 41 61 457 0 42 61 458 0 0 62 459 0 Bank Select MIDI Voice Program 527 0 64 87 528 0 65 87 529 0 0 88 530 0 64 88 531 0 0 89 532 0 16 89 533 0 90 538 0 64 90 539 0 65 90 540 0 66 90 541 0 67 90 542 0 0 Whirl New Age - Yamaha PSR-540 | Owner's Manual - Page 127
Echo Pan Echo Bells Big Pan Synth Piano Creation Star Dust Reso&Panning Sci- StereoGamlan Rama Cymbal Asian Bells Agogo Steel Drums Bank Select MIDI Voice Program Number MSB LSB Change Number 644 0 97 CuttingNoise CuttingNoiz2 String Slap Fl.Key Click Shower Thunder Wind Stream Bubble - Yamaha PSR-540 | Owner's Manual - Page 128
note. • The note numbers and note names printed on the keyboard are one octave higher than the MIDI note numbers and note names shown in the list. For E2 53 F2 54 F#2 55 G2 56 G#2 57 A2 58 A#2 59 B2 60 C3 61 C#3 62 D3 63 D#3 64 E3 65 F3 66 F#3 67 G3 68 G#3 69 A3 - Yamaha PSR-540 | Owner's Manual - Page 129
53 F2 54 F#2 55 G2 56 G#2 57 A2 58 A#2 59 B2 60 C3 61 C#3 62 D3 63 D#3 64 E3 65 F3 66 F#3 67 G3 68 G#3 69 H 126 0 0 SFX Kit 1 Cutting Noise Cutting Noise 2 String Slap Flute Key Click Shower Thunder Wind Stream Bubble Feed Dog Horse Bird Tweet 2 Ghost Maou 126 - Yamaha PSR-540 | Owner's Manual - Page 130
4 Soft Fusion Hip Hop Pop 16Beat Funk Funky Pop 16Beat 5 8BEAT BALLAD Piano Ballad U.S. Ballad Slow Rock Modern 6/8 Guitar Ballad Organ Ballad Epic Ballad 16BEAT Ballad Jazz Ballad Jazz Trio Boogie Bebop Big Band 2 Dixieland 130 Style Number 57 58 59 60 61 62 63 64 65 66 67 68 69 70 71 72 73 - Yamaha PSR-540 | Owner's Manual - Page 131
type/depth can be set by panel operation. When you select a different style, the appropriate chorus type will be selected accordingly. q DSP (System/Insertion be made by operating the PSR-540 panel manually, some of them may be accessible through MIDI. Refer to the MIDI data format for details. When - Yamaha PSR-540 | Owner's Manual - Page 132
the sound heard through a telephone receiver. A mono EQ with adjustable LOW, MID, and HIGH equalizing. A stereo EQ with adjustable LOW and HIGH. Ideal for drum Parts. Cyclically modulates the center frequency of a wah filter. No effect. Bypass without applying an effect. 132 130 - Yamaha PSR-540 | Owner's Manual - Page 133
A parallel voice is produced a fifth above the note played on the keyboard. One note is added above the note played on the keyboard for a country-style harmony feel. Two notes are added below the note played on the keyboard for three-part harmony. Three or four notes are added to the note played on - Yamaha PSR-540 | Owner's Manual - Page 134
an AC power adaptor. • The keys are played. You are probably exceeding the maximum polyphony of the PSR540. The PSR-540 can play up to 32 notes at the same time - including voice R2, voice L, auto accompaniment, song, and multi pad notes. Notes exceeding this limit will not sound. Make sure that Disk - Yamaha PSR-540 | Owner's Manual - Page 135
listed below, all PSR-540 panel settings are reset to their initial settings whenever the power is turned on. The data listed below are backed up - i.e. retained in memory - as long as an AC adaptor is connected or a set of batteries is installed. • User Style data page 96 • User Pad data page 92 - Yamaha PSR-540 | Owner's Manual - Page 136
Copy function is not possible. No Disk There is no floppy disk inserted into the disk drive. Insert a disk. Disk Removed Disk Full Wrong Disk Same Name An error occured because the disk was removed during a disk operation. Never remove a disk during a disk operation since this could damage both - Yamaha PSR-540 | Owner's Manual - Page 137
User styles before recording a new User style. This message appears when you attempt to edit, or quantize the track (other than RHYTHM) which contains preset data in the Style Record mode. This function cannot be used during Song/Style/Pad recording. Cannot Set MIDI The MIDI key on the keyboard. - Yamaha PSR-540 | Owner's Manual - Page 138
Many MIDI messages listed in the MIDI 55 56 57 58 59 60 61 62 63 Hexadecimal 00 01 02 191/BnH/1011 0000-1011 1111 displays the Control Change Message for each channel (1-16). 192- CnH PITCH BEND CHANGE EnH SYSTEM EXCLUSIVE MESSAGE UNIVERSAL NON-REALTIME F0H 7EH - Yamaha PSR-540 | Owner's Manual - Page 139
SOUND OFF BnH,78H,00H RESET ALL CONTROLLERS BnH,79H,00H ALL NOTES OFF BnH,7BH BEND CHANGE EnH SYSTEM EXCLUSIVE MESSAGE UNIVERSAL REALTIME the currently selected DRUM VOICE will be replaced with the new DRUM VOICE. (3-1-4) CHANNEL AFTER TOUCH (Receive only) - Yamaha PSR-540 | Owner's Manual - Page 140
Rhythm, Song Playback, or Song Rec will stop. (3-6) SYSTEM EXCLUSIVE MESSAGE (3-6-1) YAMAHA MIDI FORMAT (3-6-1-1) SECTION CONTROL binary hexadecimal 11110000 F0 Exclusive status 01000011 43 YAMAHA ID 01111110 7E Style 00000000 00 0sssssss SS Switch No. 00H : INTRO A 01H - 07H - Yamaha PSR-540 | Owner's Manual - Page 141
139 (3-6-1-2) TEMPO CONTROL binary hexadecimal 11110000 F0 01000011 43 01111110 7E 00000000 01 0ttttttt TT 0ttttttt TT 0ttttttt TT 0ttttttt TT 11110111 F7 Exclusive status YAMAHA ID Style Tempo4 Tempo3 Tempo2 Tempo1 End of Exclusive The internal clock will be set to the - Yamaha PSR-540 | Owner's Manual - Page 142
YAMAHA ID 01110011 73 Clavinova ID 00000001 01 Clavinova common ID 00010001 11 Sub ID 0000nnnn 0N N = MIDI Channel 01000101 45 0vvvvvvv VV 11110111 F7 Volume and Expression Realtime Control ,Chorus,Variation) MULTI PART 08 00 00 08 0F 00 Multi Part 1 : Multi Part 16 DRUM 30 0D - Yamaha PSR-540 | Owner's Manual - Page 143
Vari. Param. 10 LSB Variation Return Variation Pan Send Vari. To Reverb Send Vari. To Chorus Variation Connection Variation Part MW Vari. Ctrl Depth PB Vari. Ctrl Depth CAT Vari. Ctrl Depth Not Used Not Used Refer to the Ef Type Depend on Variation Type Depend on Variation Type MIDI Data Format 143 - Yamaha PSR-540 | Owner's Manual - Page 144
MIDI Data Format < Table 1-5 > MIDI Parameter Change table (MULTI PART Channel Mono/Poly Mode Same Note Number Key On Assign Part Mode Note Shift Detune Volume Velocity ..7F 00..7F 00..7F 00..7F Bend Pitch Control Bend Filter Control Bend Amp. Control Bend LFO PMod Depth Bend LFO FMod Depth Bend - Yamaha PSR-540 | Owner's Manual - Page 145
MIDI Data Format < Table 1-6 > MIDI Chorus Send Level Variation Send Level Key Assign Rcv Note Off Rcv Note as LSB=0 XG OPTION EFFECT Expanded type for PSR-540 * If the received value does not contain an [54]ROTARY SP. [57]TREMOLO [60]AUTO PAN [61]PHASER [65]DISTORTION [66]OVER DRIVE [67]AMP SIM. - Yamaha PSR-540 | Owner's Manual - Page 146
MIDI Data Format < Table 1-8 > Effect Parameter List HALL1,HALL2, ROOM1,ROOM2,ROOM3, STAGE1,STAGE2, PLATE (reverb, variation, insertion block) No. Parameter Display Value See Table Control 1 Reverb Time 2 Diffusion 3 Initial Delay 4 HPF Cutoff 5 LPF Cutoff 6 7 8 9 10 Dry/Wet 0.3-30.0s 0-10 - Yamaha PSR-540 | Owner's Manual - Page 147
MIDI Data Format AMBIENCE (variation block) No. Parameter 1 Delay Time 2 Output Phase 3 4 5 6 EQ Low Frequency 40 52-76 34-60 0-127 28-54 52-76 10-120 1-127 0-127 See Table table#3 table#3 table#3 mild-sharp Control q Value 0-127 4-40 52-76 34-60 0-127 14-54 52-76 10-120 1-127 0-127 0-19 0-15 79 - Yamaha PSR-540 | Owner's Manual - Page 148
MIDI Data Format TOUCH WAH 1 (variation, insertion block), TOUCH WAH+DIST (variation Table table#8 table#9 table#10 See Table table#8 table#9 See Table Control q Control q Control q Control q Control Control Control 148 NO EFFECT (reverb, chorus, variation block), THRU (variation, insertion - Yamaha PSR-540 | Owner's Manual - Page 149
MIDI Data Format < Table 1-9 > Effect Data Value Assign Table Table#1 LFO Frequency 36 37 38 39 40 41 42 43 44 45 46 47 48 49 50 51 52 53 54 55 56 57 58 59 60 61 62 63 Value 3.5 3.6 3.7 3.8 3.9 4.0 4.1 4.2 4.3 4.4 4.5 4.6 4.7 4.8 4.9 5.0 5.5 6.0 6.5 7.0 7.5 8.0 8.5 9.0 9.5 10.0 11.0 12.0 13.0 - Yamaha PSR-540 | Owner's Manual - Page 150
Implementation Chart [Portable Keyboard] Model : PSR-540 MIDI Implementation Chart Date :3-MAR-1999 Version : 1.0 Velocity Note ON Note OFF o 9nH,v=1-127 x 9nH,v=0 o 9nH,v=1-127 x After Key's x x Touch Ch's x o Pitch Bend o Control Change 0,32 o 1,5,11 x 7,10 o 6,38 o 64,66-67 o 65 - Yamaha PSR-540 | Owner's Manual - Page 151
selection since they are directly sent to the tone generator of the PSR-540. However, the following MIDI messages affects the panel controls such as Panel Voice, Style, Multi Pad and Song settings: • MIDI MASTER TUNE, MASTER TUNE (XG System Parameter). • TRANSPOSE (XG System Parameter). • System - Yamaha PSR-540 | Owner's Manual - Page 152
Index A AC adaptor 12 Accompaniment 32 Accompaniment style 32 Accompaniment track 37 Accompaniment 38, 40 Fingering 17, 38 Floppy disk 58 Footswitch 13, 121 Format 60 Freeze 55 Full Keyboard 38, 40 Function 17, 106, 118 Function tree 22 G GM (General MIDI 9, 68, 109 H Harmony 16 - Yamaha PSR-540 | Owner's Manual - Page 153
Edit 74, 77 PART ON/OFF 27, 28, 29 Part Octave 119 Pitch 35 Root 115 S Sample Disk 59 Save 60 Scale Tuning Specification 155 Split Point 29, 40, 119 Standard MIDI 109 STANDBY switch 15 Start Measure 71 START/STOP 25, 32, 69, 81, 83, 93, 99 Style 32, 96 Style File 9, 57, 109 Style - Yamaha PSR-540 | Owner's Manual - Page 154
16, 120 Touch Sensitivity 120 Track 37, 70, 82 Transmit 114 Transpose 16, 30, 73 Tremolo 51, 133 Trill 51, 133 Troubleshooting 134 U Upper 112 User Pad 92 User Song 78 User Style 96 Utility 17, 60, 64, 67, 118 V Velocity 106 Voice 26 Voice Change 17, 74, 75 Voice L 28, 29 Voice List - Yamaha PSR-540 | Owner's Manual - Page 155
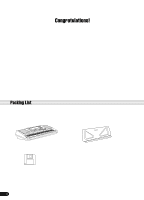
Supplied Accessories • Sample Disk • Music Stand • Owner's Manual Optional Accessories • Headphones • AC Power Adaptor • Foot Switch • Keyboard Stand : HPE-150 : PA-6 : FC4, FC5 : L-6, L-7 * Specifications and descriptions in this owner's manual are for information purposes only. Yamaha - Yamaha PSR-540 | Owner's Manual - Page 156
! This product, when installed as indicated in the instructions contained in this manual, meets FCC requirements. Modifications not expressly approved by Yamaha may void your authority, granted by the FCC, to use the product. 2. IMPORTANT: When connecting this product to accessories and/ or another - Yamaha PSR-540 | Owner's Manual - Page 157
warranty to: the retailer selling the product, an authorized service center, or to Yamaha with an explanation of the problem. Please be prepared to provide proof purchase date (sales receipt, credit card copy, etc.) when requesting service and/or parts under warranty. 3. Shipping and/or insurance - Yamaha PSR-540 | Owner's Manual - Page 158
156 - Yamaha PSR-540 | Owner's Manual - Page 159
-61-4000 ITALY Yamaha Musica Italia S.P.A., Home Keyboard Division Viale Italia 88, 20020 Lainate (Milano), Italy Tel: 02-935-771 SPAIN/PORTUGAL Yamaha-Hazen OCEANIA AUSTRALIA Yamaha Music Australia Pty. Ltd. 17-33 Market Street, South Melbourne, Vic. 3205, Australia Tel: 3-699-2388 NEW ZEALAND - Yamaha PSR-540 | Owner's Manual - Page 160
M.D.G., EMI Division, Yamaha Corporation © 1999 Yamaha Corporation ??????? ???POTY???.?-01A0 Printed in China
-
 1
1 -
 2
2 -
 3
3 -
 4
4 -
 5
5 -
 6
6 -
 7
7 -
8
-
9
-
10
-
11
-
12
-
13
-
14
-
15
-
16
-
17
-
18
-
19
-
20
-
21
-
22
-
23
-
24
-
25
-
26
-
27
-
28
-
29
-
30
-
31
-
32
-
33
-
34
-
35
-
36
-
37
-
38
-
39
-
40
-
41
-
42
-
43
-
44
-
45
-
46
-
47
-
48
-
49
-
50
-
51
-
52
-
53
-
54
-
55
-
56
-
57
-
58
-
59
-
60
-
61
-
62
-
63
-
64
-
65
-
66
-
67
-
68
-
69
-
70
-
71
-
72
-
73
-
74
-
75
-
76
-
77
-
78
-
79
-
80
-
81
-
82
-
83
-
84
-
85
-
86
-
87
-
88
-
89
-
90
-
91
-
92
-
93
-
94
-
95
-
96
-
97
-
98
-
99
-
100
-
101
-
102
-
103
-
104
-
105
-
106
-
107
-
108
-
109
-
110
-
111
-
112
-
113
-
114
-
115
-
116
-
117
-
118
-
119
-
120
-
121
-
122
-
123
-
124
-
125
-
126
-
127
-
128
-
129
-
130
-
131
-
132
-
133
-
134
-
135
-
136
-
137
-
138
-
139
-
140
-
141
-
142
-
143
-
144
-
145
-
146
-
147
-
148
-
149
-
150
-
151
-
152
-
153
-
154
-
155
-
156
-
157
-
158
-
159
-
160
 |
 |
