Yamaha PSR-540 Owner's Manual - Page 101
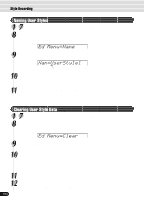
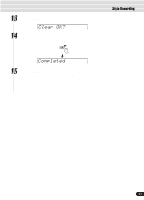
Select a voice for the track to be recorded., Press the [RECORD] button to exit from the Record mode.
 |
View all Yamaha PSR-540 manuals
Add to My Manuals
Save this manual to your list of manuals |
Page 101 highlights
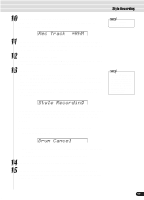
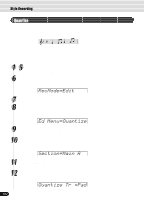
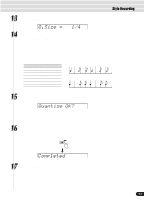
12 Select a voice for the track to be recorded. Select the desired voice by pressing the [VOICE R1] button (page 26). To return to the previous display, press the [EXIT] button. 13 Start recording. You can start recording with one of the following ways: • Press the [START/STOP] button. • Press the [SYNC START] button to enable synchronized standby (page 25), then play a key on the keyboard. Style Recording The recording repeats indefinitely (until stopped) in a loop. Notes that you record will play back from the next repetition, letting you record while hearing previously recorded material. Style Recording Observe the following rules when recording the MAIN and FILL sections: • Use only the CM7 scale tones when recording the BASS and PHRASE tracks (i.e. C, D, E, G, A and B). • Use only the chord tones when recording the CHORD and PAD tracks (i.e. C, E, G and B). CSC CSC C = chord tone C, S = scale tones Any appropriate chord or chord progression can be used for the INTRO and ENDING sections. 14 Press the [START/STOP] button to stop recording. 15 Press the [RECORD] button to exit from the Record mode. For information on leaving the recording mode, see page 100. 101 99
-
 1
1 -
2
-
3
-
4
-
5
-
6
-
7
-
8
-
9
-
10
-
11
-
12
-
13
-
14
-
15
-
16
-
17
-
18
-
19
-
20
-
21
-
22
-
23
-
24
-
25
-
26
-
27
-
28
-
29
-
30
-
31
-
32
-
33
-
34
-
35
-
36
-
37
-
38
-
39
-
40
-
41
-
42
-
43
-
44
-
45
-
46
-
47
-
48
-
49
-
50
-
51
-
52
-
53
-
54
-
55
-
56
-
57
-
58
-
59
-
60
-
61
-
62
-
63
-
64
-
65
-
66
-
67
-
68
-
69
-
70
-
71
-
72
-
73
-
74
-
75
-
76
-
77
-
78
-
79
-
80
-
81
-
82
-
83
-
84
-
85
-
86
-
87
-
88
-
89
-
90
-
91
-
92
-
93
-
94
-
95
-
 96
96 -
 97
97 -
 98
98 -
 99
99 -
 100
100 -
 101
101 -
 102
102 -
 103
103 -
 104
104 -
 105
105 -
 106
106 -
107
-
108
-
109
-
110
-
111
-
112
-
113
-
114
-
115
-
116
-
117
-
118
-
119
-
120
-
121
-
122
-
123
-
124
-
125
-
126
-
127
-
128
-
129
-
130
-
131
-
132
-
133
-
134
-
135
-
136
-
137
-
138
-
139
-
140
-
141
-
142
-
143
-
144
-
145
-
146
-
147
-
148
-
149
-
150
-
151
-
152
-
153
-
154
-
155
-
156
-
157
-
158
-
159
-
160
 |
 |
