Yamaha PSR-540 Owner's Manual - Page 33
Using Auto Accompaniment (all tracks
 |
View all Yamaha PSR-540 manuals
Add to My Manuals
Save this manual to your list of manuals |
Page 33 highlights
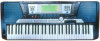
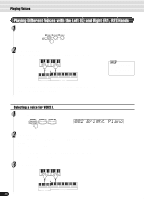
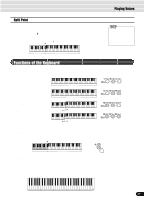
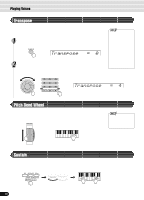
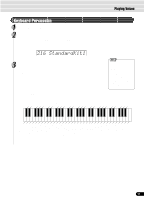
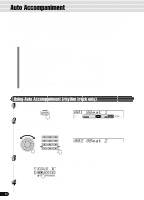
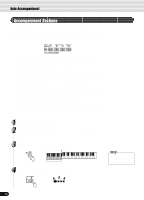
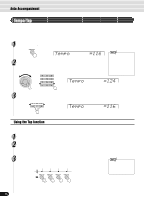
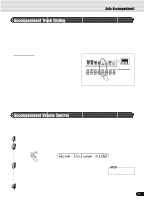
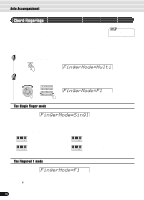
Auto Accompaniment Using Auto Accompaniment (all tracks) 1 Press the [STYLE] button. 2 Select a style. Use the data dial, the [+/YES] button, the [-/NO] button or the number buttons [1]-[0]. Refer to the Style List (page 130). 3 Turn AUTO ACCOMPANIMENT on. Press the [ACMP ON/OFF] so that its indicator lights. The specified left-hand section of the keyboard becomes the "Auto Accompaniment" section, and chords played in this section are automatically detected and used as a basis for fully automatic accompaniment with the selected style. Split Point • [ACMP] is the abbreviation of [ACCOMPANIMENT] . Auto Accompaniment section 4 Turn SYNCHRONIZED START on. Press the [SYNC START] button so that its indicator lights. The beat lamp also flashes in time with the tempo. This condition is called synchronized start standby. Refer to page 25 for details. • [SYNC START] is the abbreviation of [SYNCHRONIZED START]. BEAT 5 As soon as you play a chord with your left hand, the auto accompaniment starts. For this example, play a C major chord (as shown below). Split Point CHORD dim mM 67aug15s11u39s4 Auto Accompaniment section 6 Try playing other chords with your left hand. For information on how to enter chords, see "Chord Fingerings" on page 38. Split Point Auto Accompaniment 7 section Press the [START/STOP] button again to stop the accompani- ment. 33 31
-
 1
1 -
2
-
3
-
4
-
5
-
6
-
7
-
8
-
9
-
10
-
11
-
12
-
13
-
14
-
15
-
16
-
17
-
18
-
19
-
20
-
21
-
22
-
23
-
24
-
25
-
26
-
27
-
 28
28 -
 29
29 -
 30
30 -
 31
31 -
 32
32 -
 33
33 -
 34
34 -
 35
35 -
 36
36 -
 37
37 -
 38
38 -
39
-
40
-
41
-
42
-
43
-
44
-
45
-
46
-
47
-
48
-
49
-
50
-
51
-
52
-
53
-
54
-
55
-
56
-
57
-
58
-
59
-
60
-
61
-
62
-
63
-
64
-
65
-
66
-
67
-
68
-
69
-
70
-
71
-
72
-
73
-
74
-
75
-
76
-
77
-
78
-
79
-
80
-
81
-
82
-
83
-
84
-
85
-
86
-
87
-
88
-
89
-
90
-
91
-
92
-
93
-
94
-
95
-
96
-
97
-
98
-
99
-
100
-
101
-
102
-
103
-
104
-
105
-
106
-
107
-
108
-
109
-
110
-
111
-
112
-
113
-
114
-
115
-
116
-
117
-
118
-
119
-
120
-
121
-
122
-
123
-
124
-
125
-
126
-
127
-
128
-
129
-
130
-
131
-
132
-
133
-
134
-
135
-
136
-
137
-
138
-
139
-
140
-
141
-
142
-
143
-
144
-
145
-
146
-
147
-
148
-
149
-
150
-
151
-
152
-
153
-
154
-
155
-
156
-
157
-
158
-
159
-
160
 |
 |
